Allowlist SQS
When to use SQS to receive Delivery reports
- Handling Traffic Spikes: SQS is ideal when you experience sudden surges in traffic. For instance, if you launch a campaign targeting 500,000 or more users, SQS is the recommended solution.
- Managing Consistent High-Volume Traffic: For scenarios with sustained high traffic, such as processing 30 million + notifications per month, SQS proves to be an effective choice.
- Batch Processing of Delivery Reports: If your workflow benefits from processing delivery reports in batches rather than handling each report individually, SQS offers an efficient approach.
Creating an Allowlist SQS
You can add any number of SQS that you intend on using in Fyno's application by following the below steps:
- Tap on Workspace Settings on the bottom left corner of the navigation menu and click 'Allowlist URL' which opens up the Allowlist URL page.
- On the page that opens, find the "Add HTTP/SQS" button on the top right side of the page.
- Select 'SQS' option.
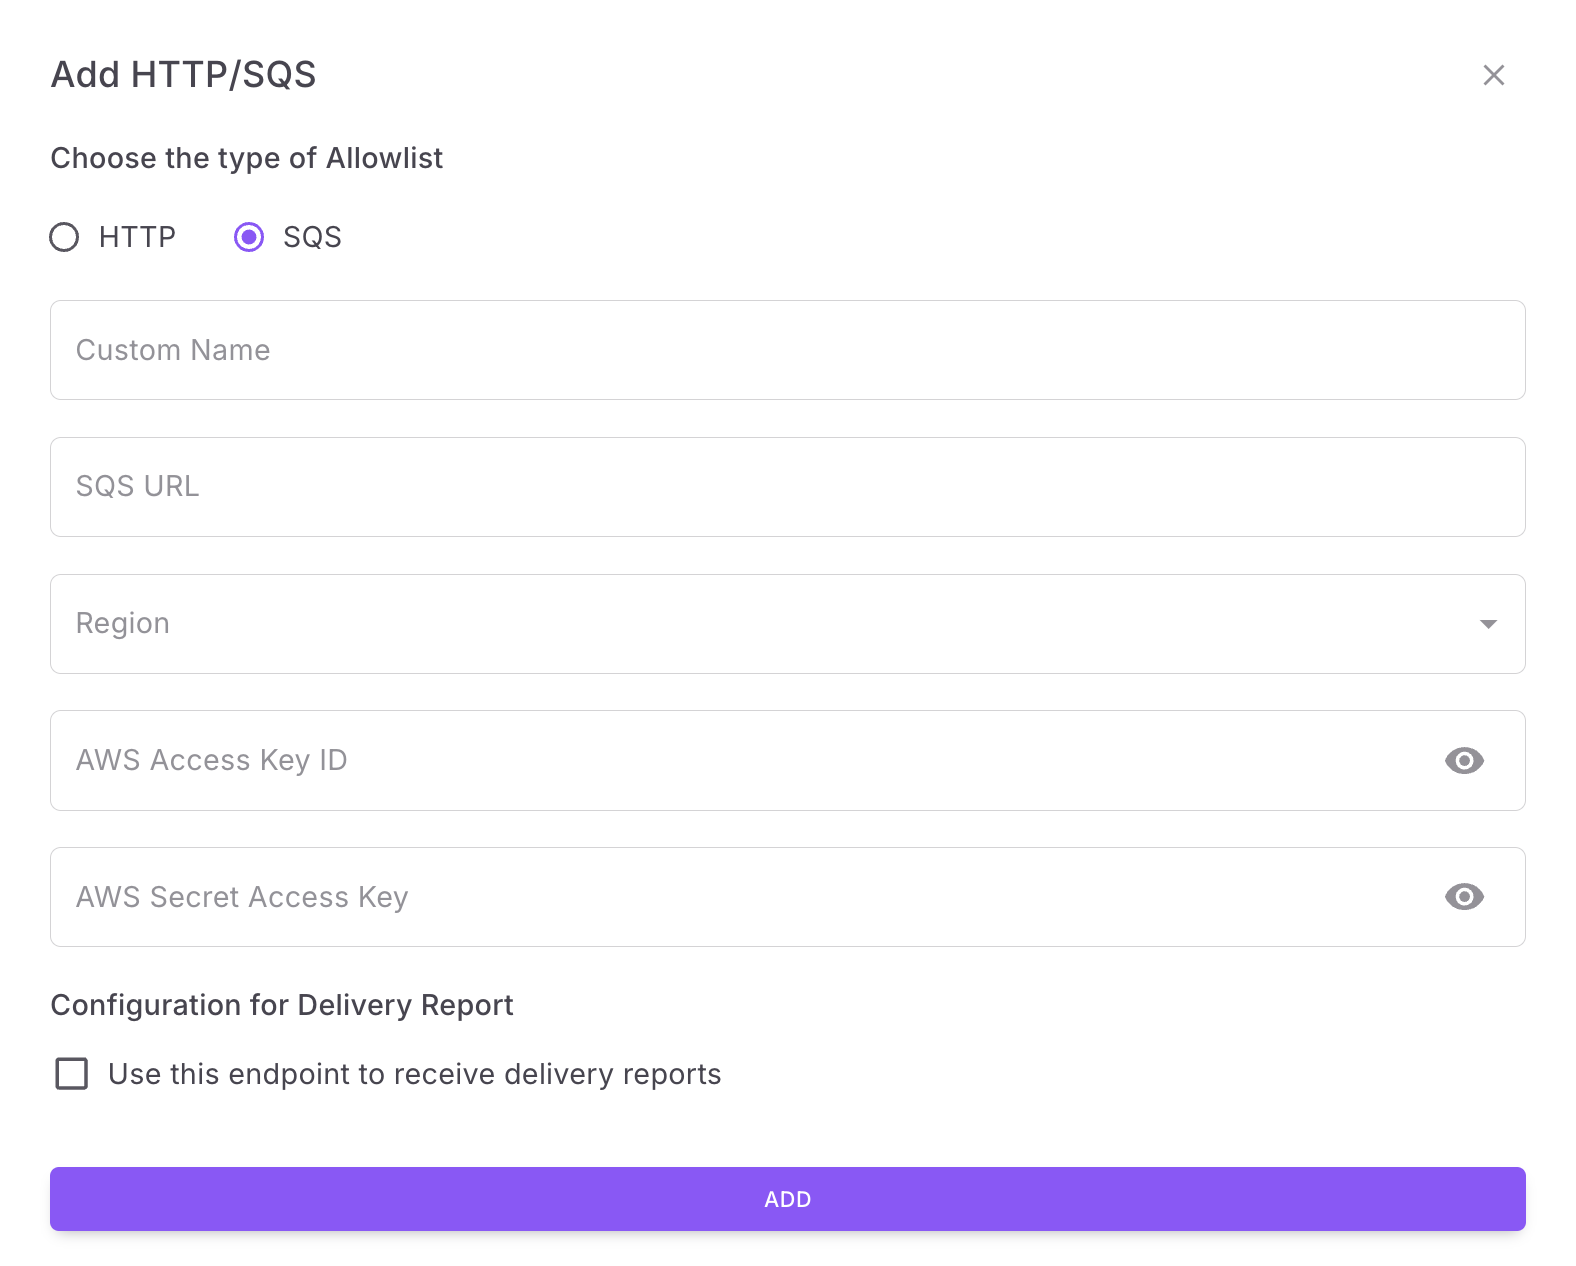
Adding a Allowlist SQS
- Custom Name - Provide a name that would help you identify the configured account in Fyno's portal.
- SQS URL - You will get this from Amazon SQS -> Queues. Click a queue to get SQS URL.
- Region - From your Amazon AWS account, find the region either in the browser URL or you may also select the Region as per the drop-down next to your username in the AWS console.
- AWS Access Key ID - To get the access key ID, log into your Amazon AWS account and from the top right corner, open the menu by clicking on your name and navigate to "Security Credentials". On the page that opens, find "Access Keys" and enter the details.
- AWS Secret Access Key - To get the access key ID, log into your Amazon AWS account and from the top right corner, open the menu by clicking on your name and navigate to "Security Credentials". On the page that opens, find "Access Keys" and enter the details.
- Access Policy - By default, both Read and Write access is provided. If you want to change it, go to Amazon SQS -> Queues. Go to a queue where you want to change the access policy. In the JSON payload, replace "Action": ["SQS: *"] to "Action": ["SQS: SendMessage"]. This will give only Write access.
Enabling SQS to receive delivery report
A allowlisted SQS can be enabled to receive delivery status of the notifications sent out and easily share the delivery details with you.
An Allowlist SQS can be converted anytime to receive Delivery Report. You can read how to do it here.
Updated 3 months ago