Creating a workflow with Incoming message
This functionality is ideal for creating automated WhatsApp conversations using predefined templates and notification event triggers. It's also useful for capturing and updating customer SMS responses in your system.
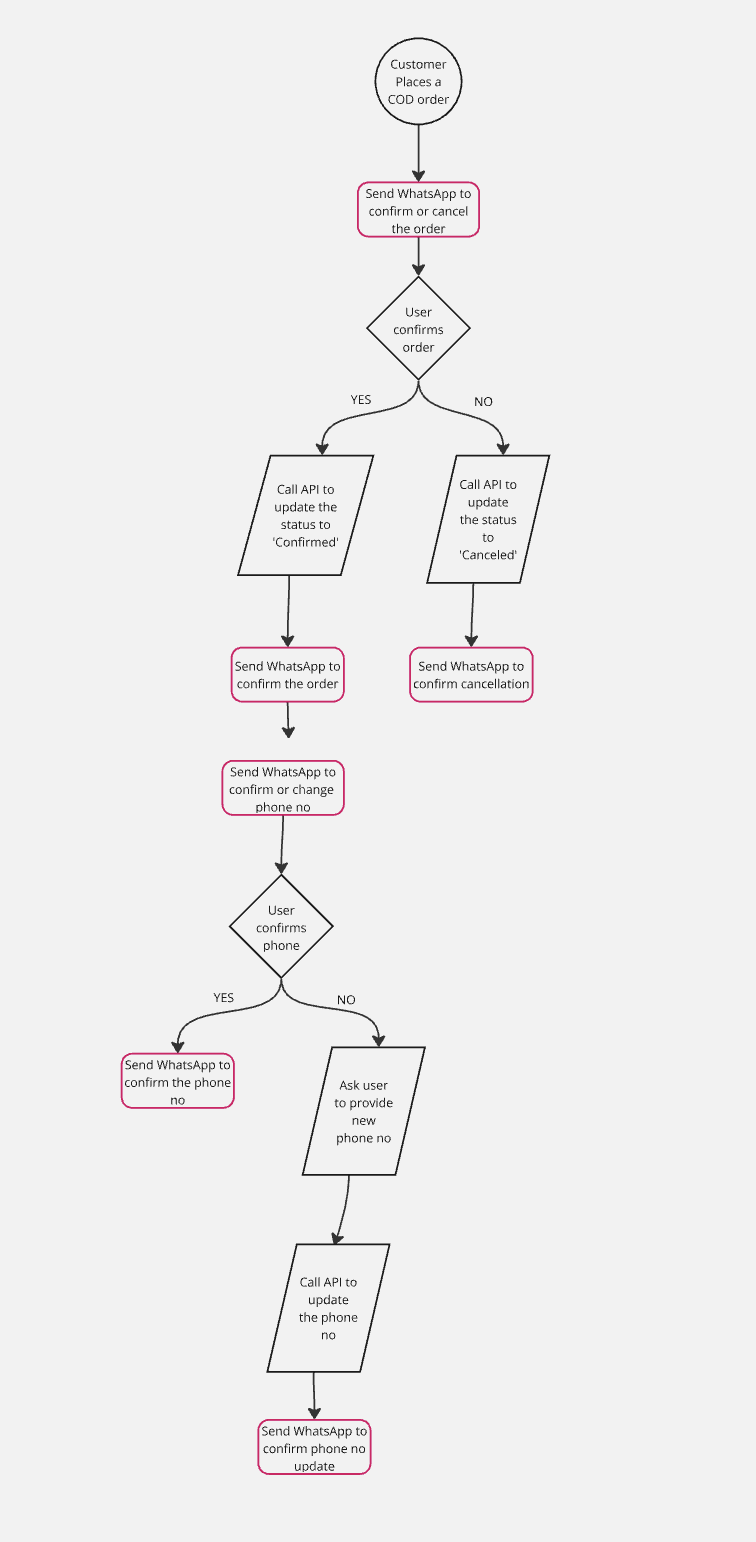
For example, you can configure the below example using our Workflow.
- Send a WhatsApp to customers who placed a COD order to either confirm or cancel their order.
- Based on customer's response, update the status in your system by calling your API.
- Send order status update confirmation to the customer.
- Ask customer if they want to update their phone no.
- If yes, let them enter a phone no and call an API to update it in your system. If user selects No, the flow will end.
To achieve this, you need to do the following steps
Step 1 - Create a WhatsApp template to initiate a conversation.
Step 2 - Design a Workflow to decide what WhatsApp message to send based on user response.
Step 1 - Create a WhatsApp template to initiate a conversation
-
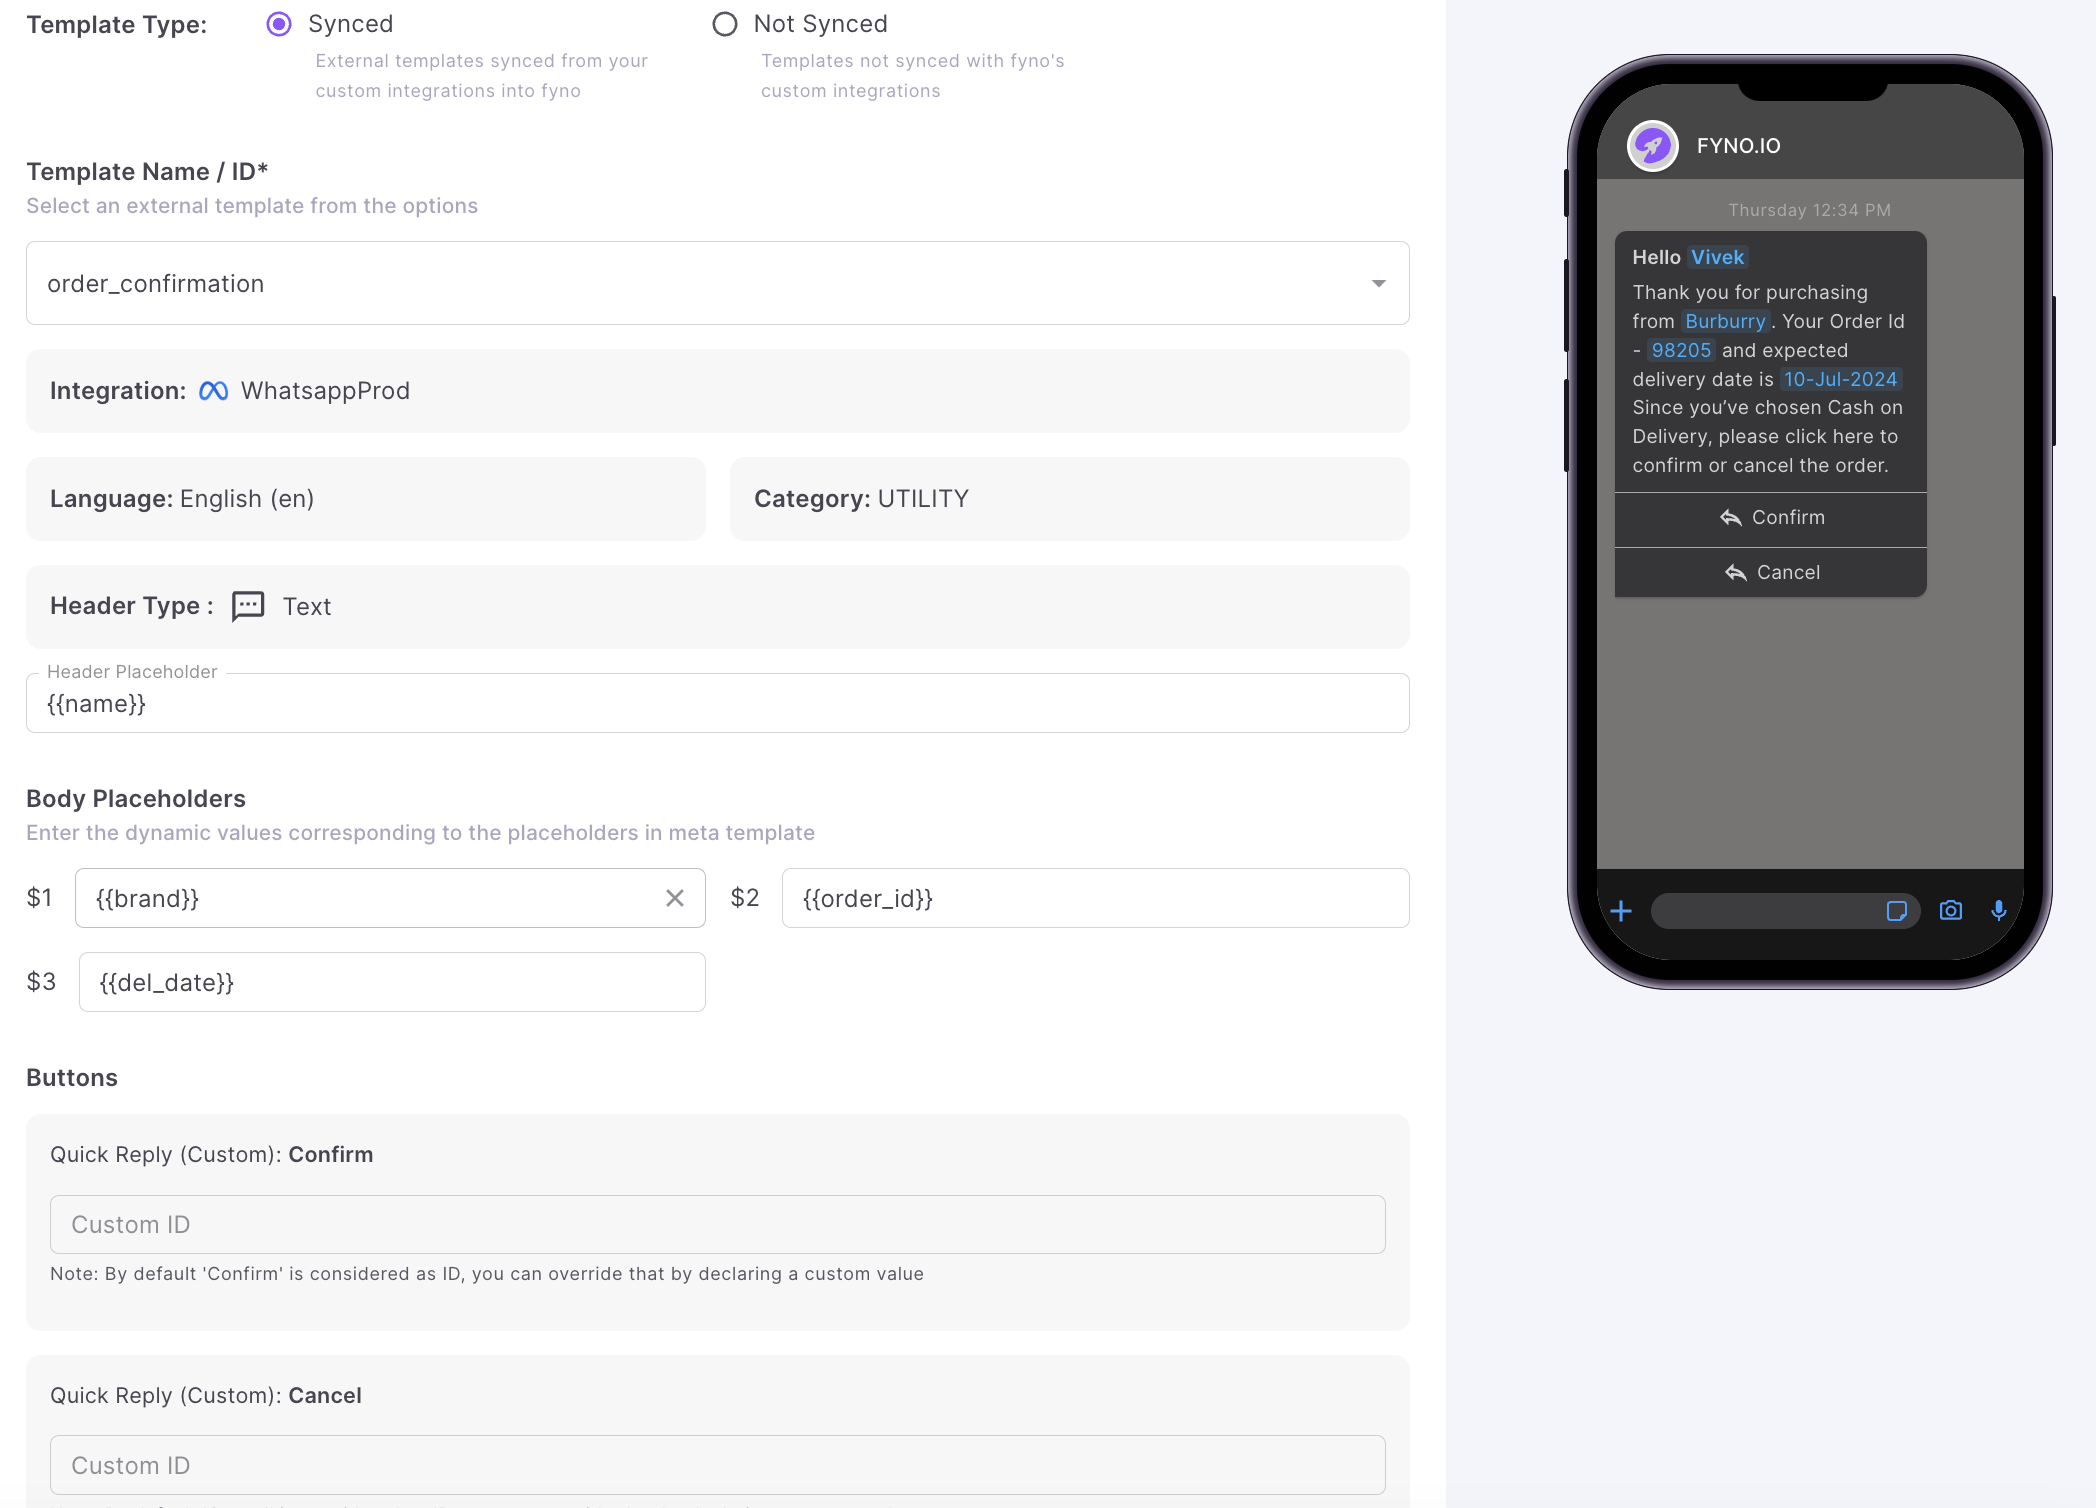
Create a Fyno Template with the content and Quick Reply options as shown.
-
In the template, you can see 2 Quick Reply options. When user clicks any Quick Reply option, it will trigger a workflow.
- Confirm
- Cancel
-
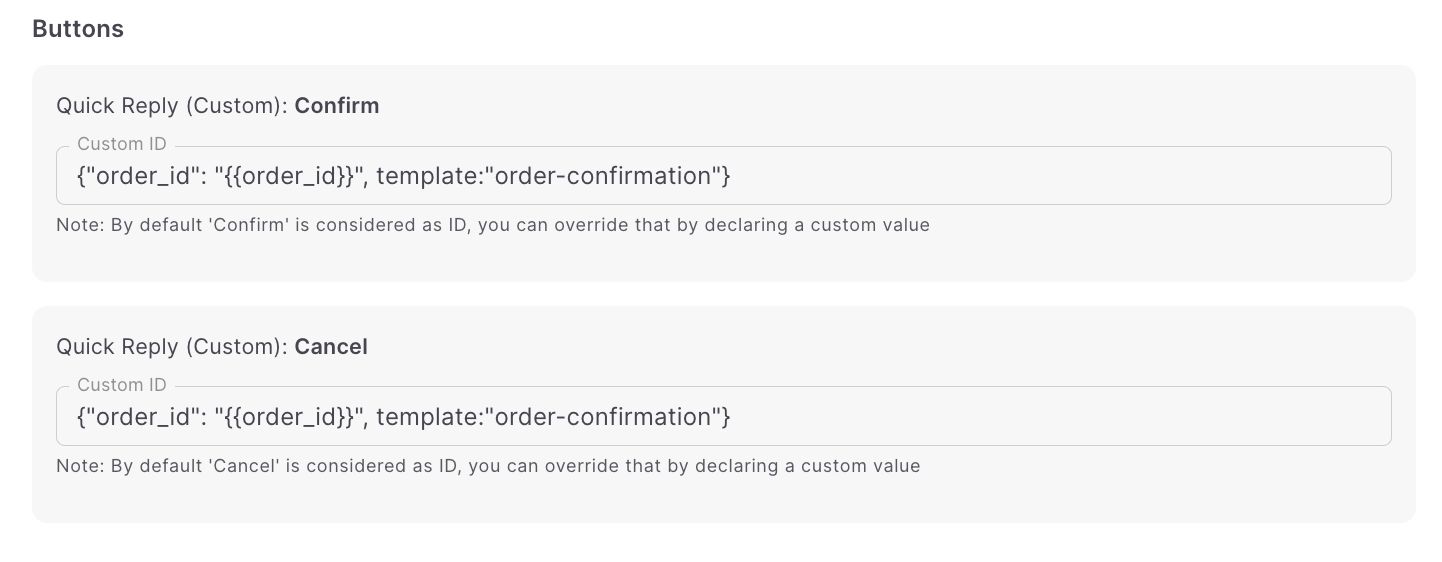
If you want to pass additional information when the user clicks Quick Reply button, you can do that by adding a JSON payload in the Custom Id section.
-
For example, you need to pass order_id and the template name to be used in the Workflow, You can do that by adding a JSON Payload as shown below. You can add any payload upto 126 characters
Step 2 - Design a Workflow to decide what WhatsApp message to send based on user response
-
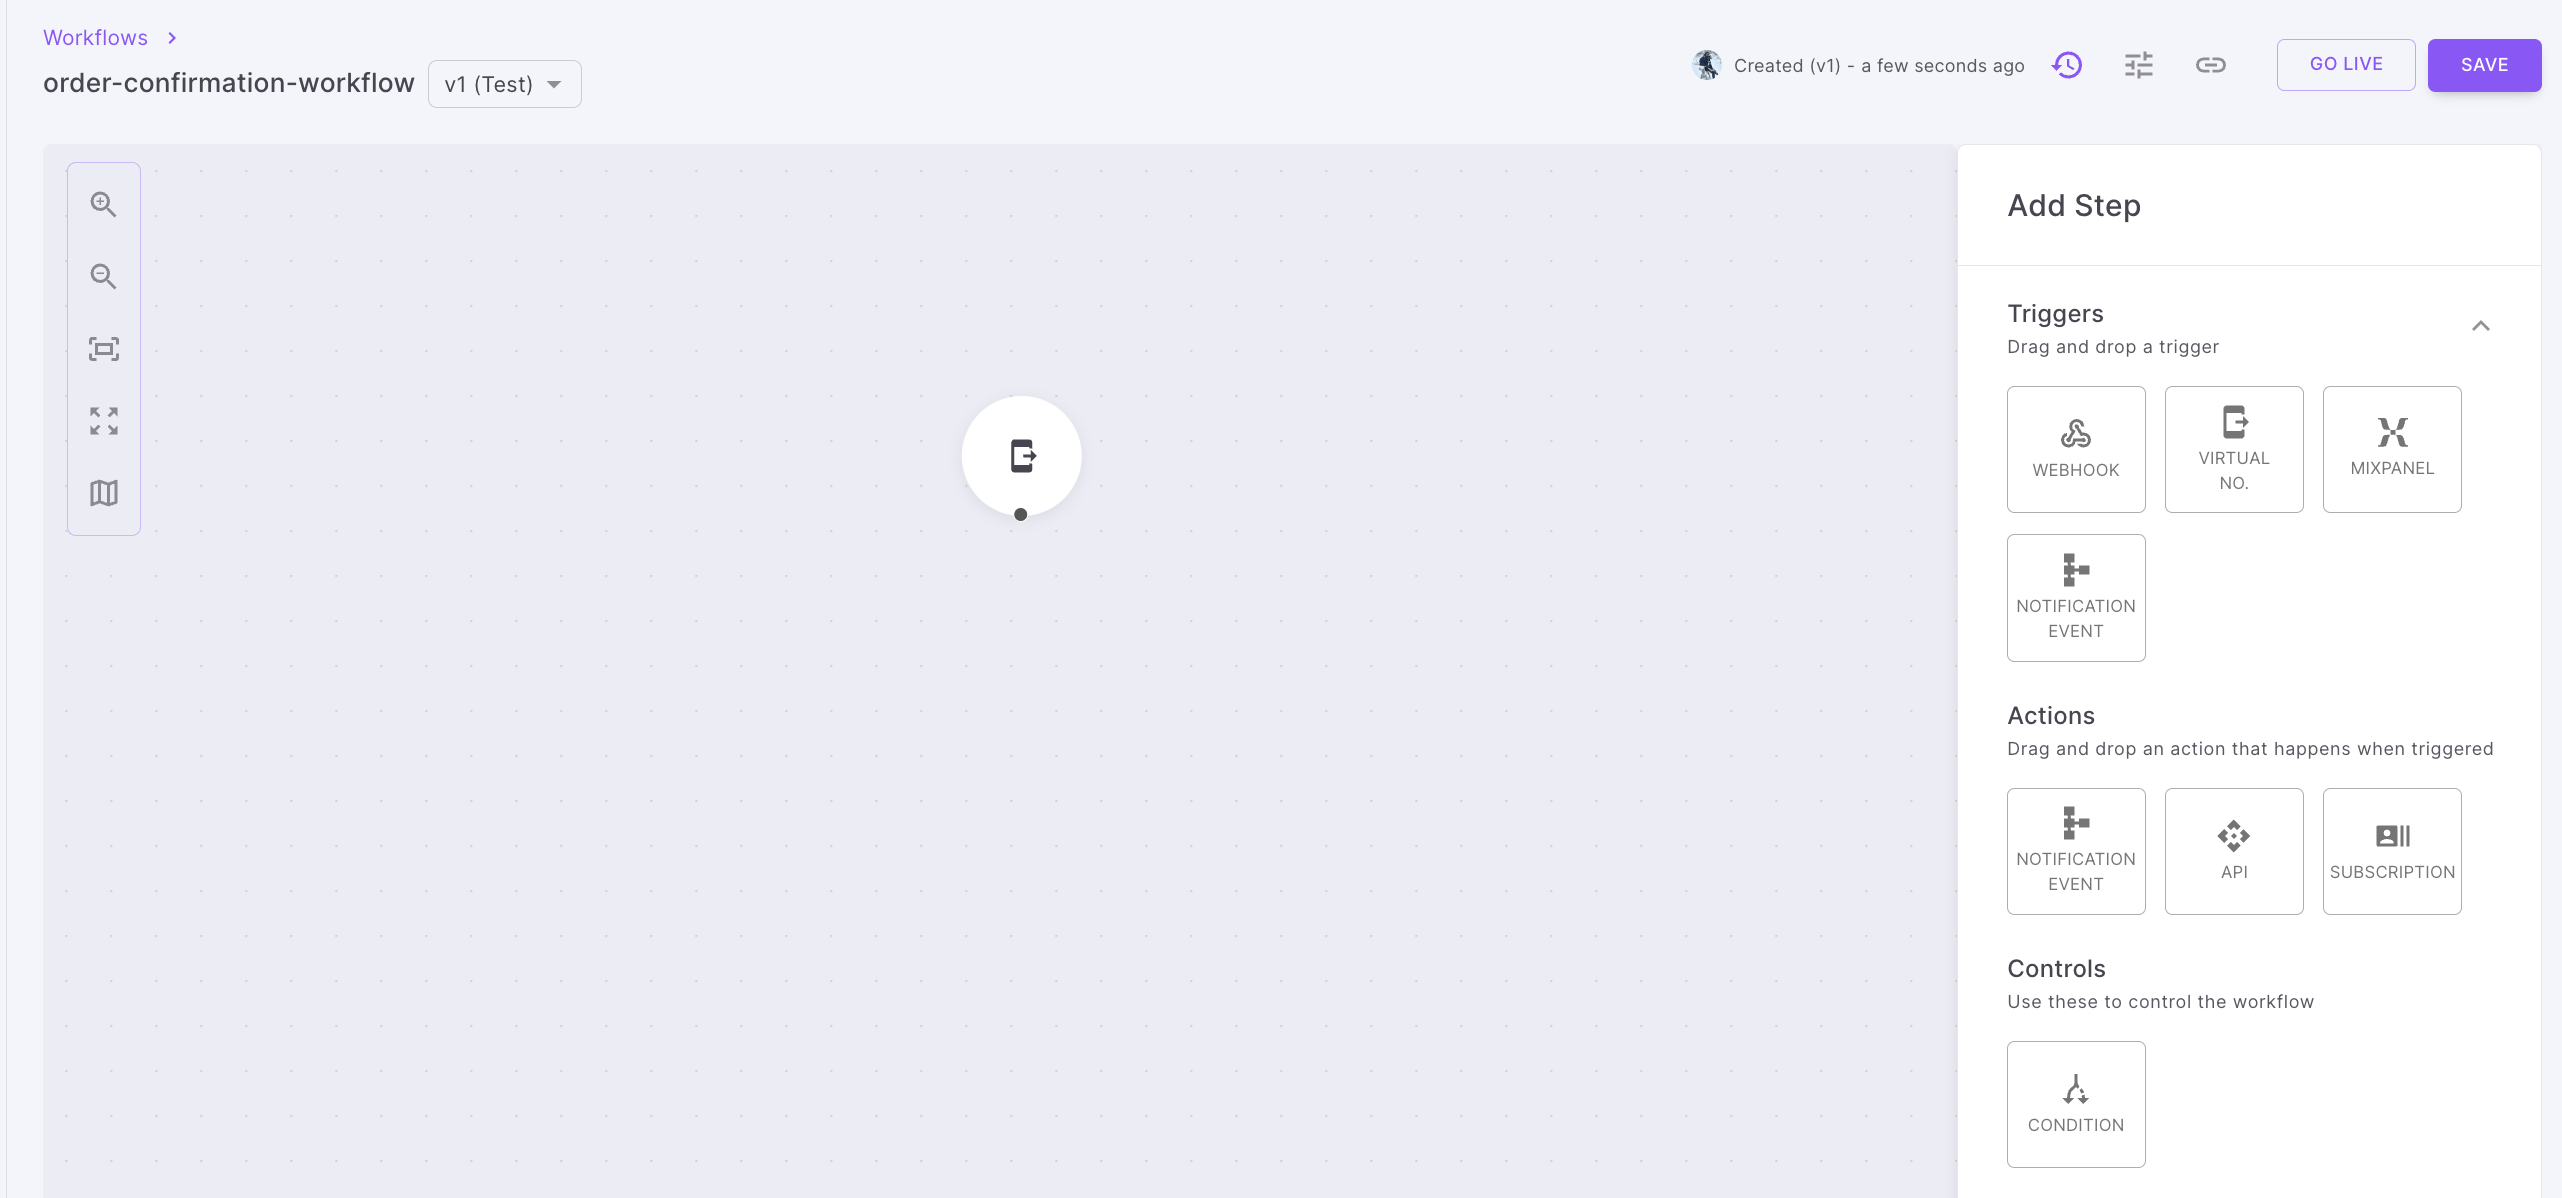
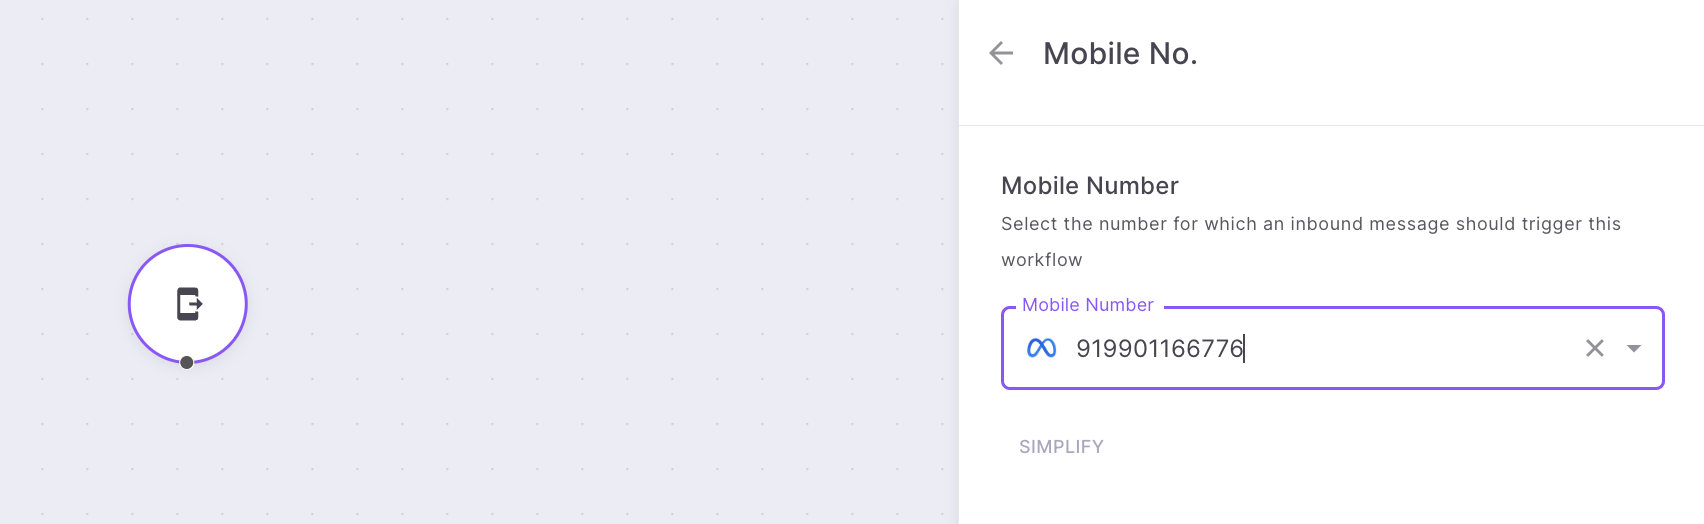
Create a workflow with 'Virtual Number' as trigger. You can do that by dragging & dropping Virtual No trigger into Workflow canvas.
-
Select your WhatsApp Business no to which user sends their response.
-
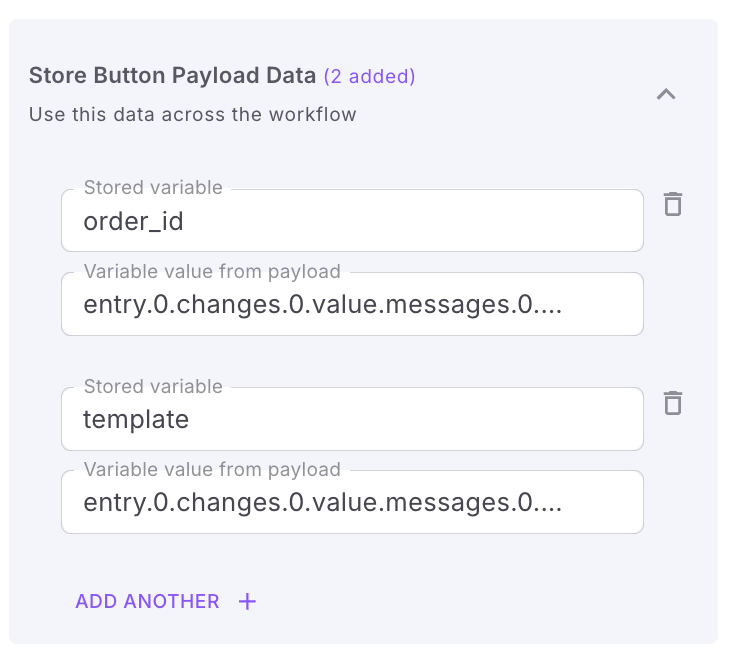
You can store the data you are passing in the button payload if you want to use that data further in the workflow. In this example, we are passing order_id and template name in the button payload. We can store those values as shown.
-
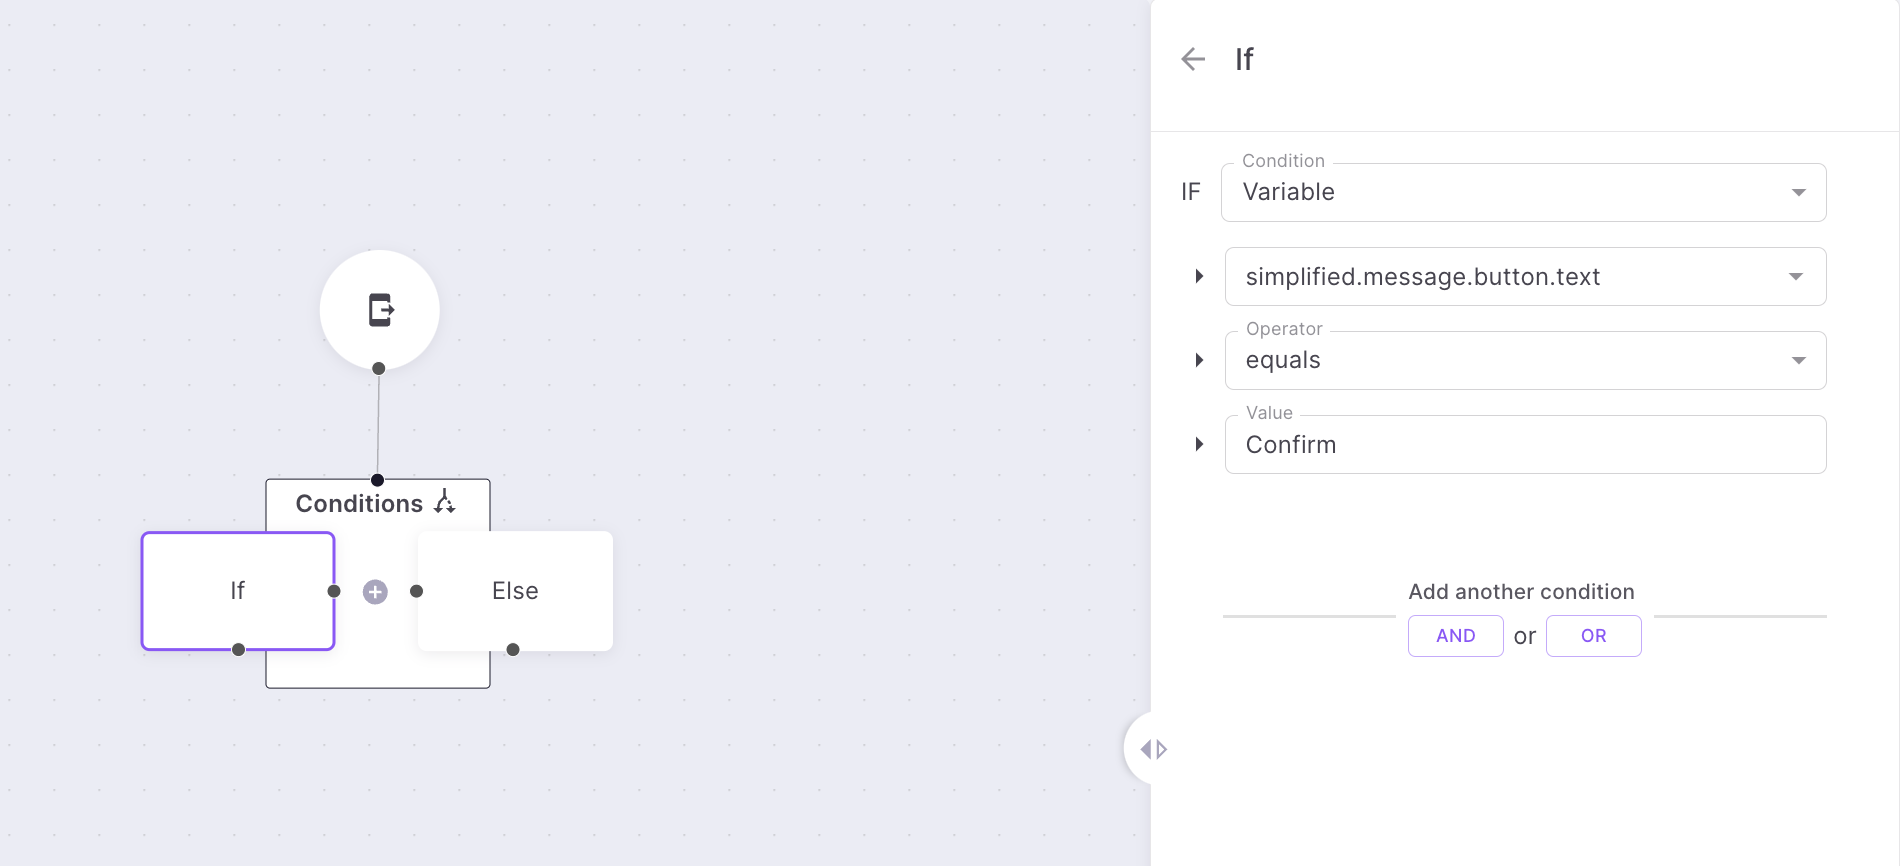
Add a condition to check what the user has sent to your WhatsApp Business number. In this use case, user could have sent either 'Confirm' or 'Cancel'. The variable 'simplified.message.button.text' will contain the Quick Reply text your customer has sent. In this case, we have assumed, user has sent 'Confirm'.
-
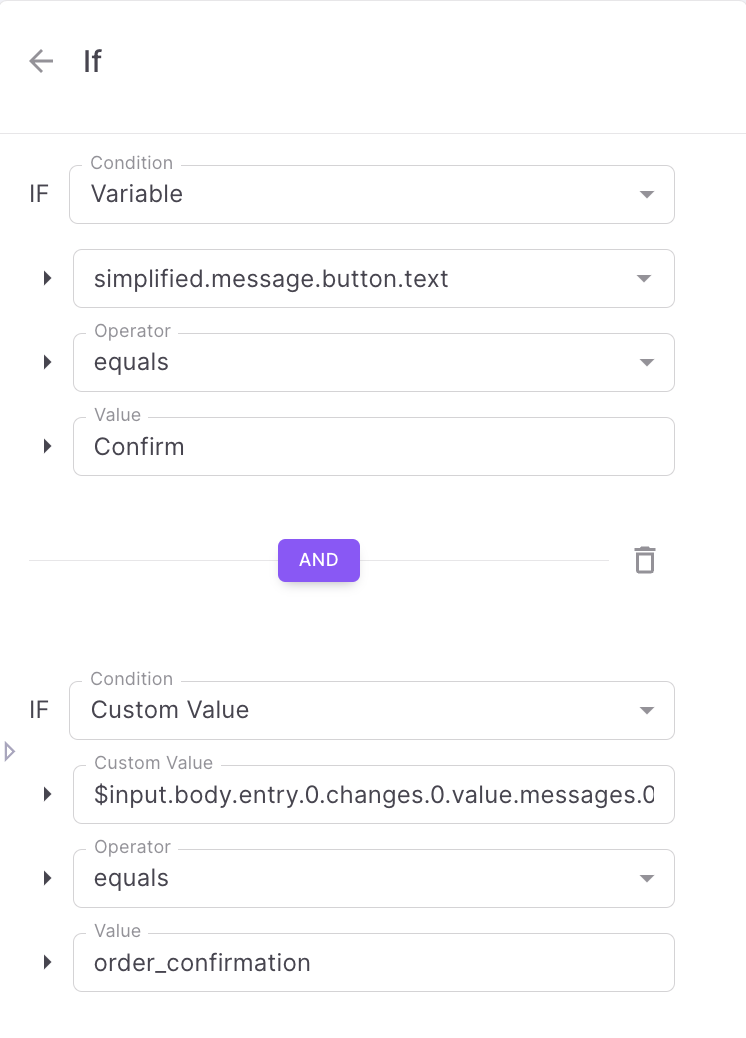
If you want to make sure, this response comes from the exact template message you sent to the user, you can add one more condition to check the template name as shown.
-
You need to add the condition as follows,
Custom Value '$input.body.entry.0.changes.0.value.messages.0.button.payload.template' equals order_confirmation. This is done to access the template variable we added in the WhatsApp template (Refer Point 4 in Step 1) -
Repeat steps 3,4 and 5 for 'Cancel' flow.
-
The next step is trigger 'Call an API' to send the user response to your system.
-
Drag and Drop 'API' action block into the workflow canvas.
-
You need to post a request to your webhook. Make sure you have allow-listed your URL. Read more about it here

-
When the user clicks either 'Confirm' or 'Cancel' , send the response to your system to update the order status.
-
Check if the order status update is successful.
-
To do so, add a condition to check if the HTTP response code is 200' . This can be done by adding the condition as shown below.
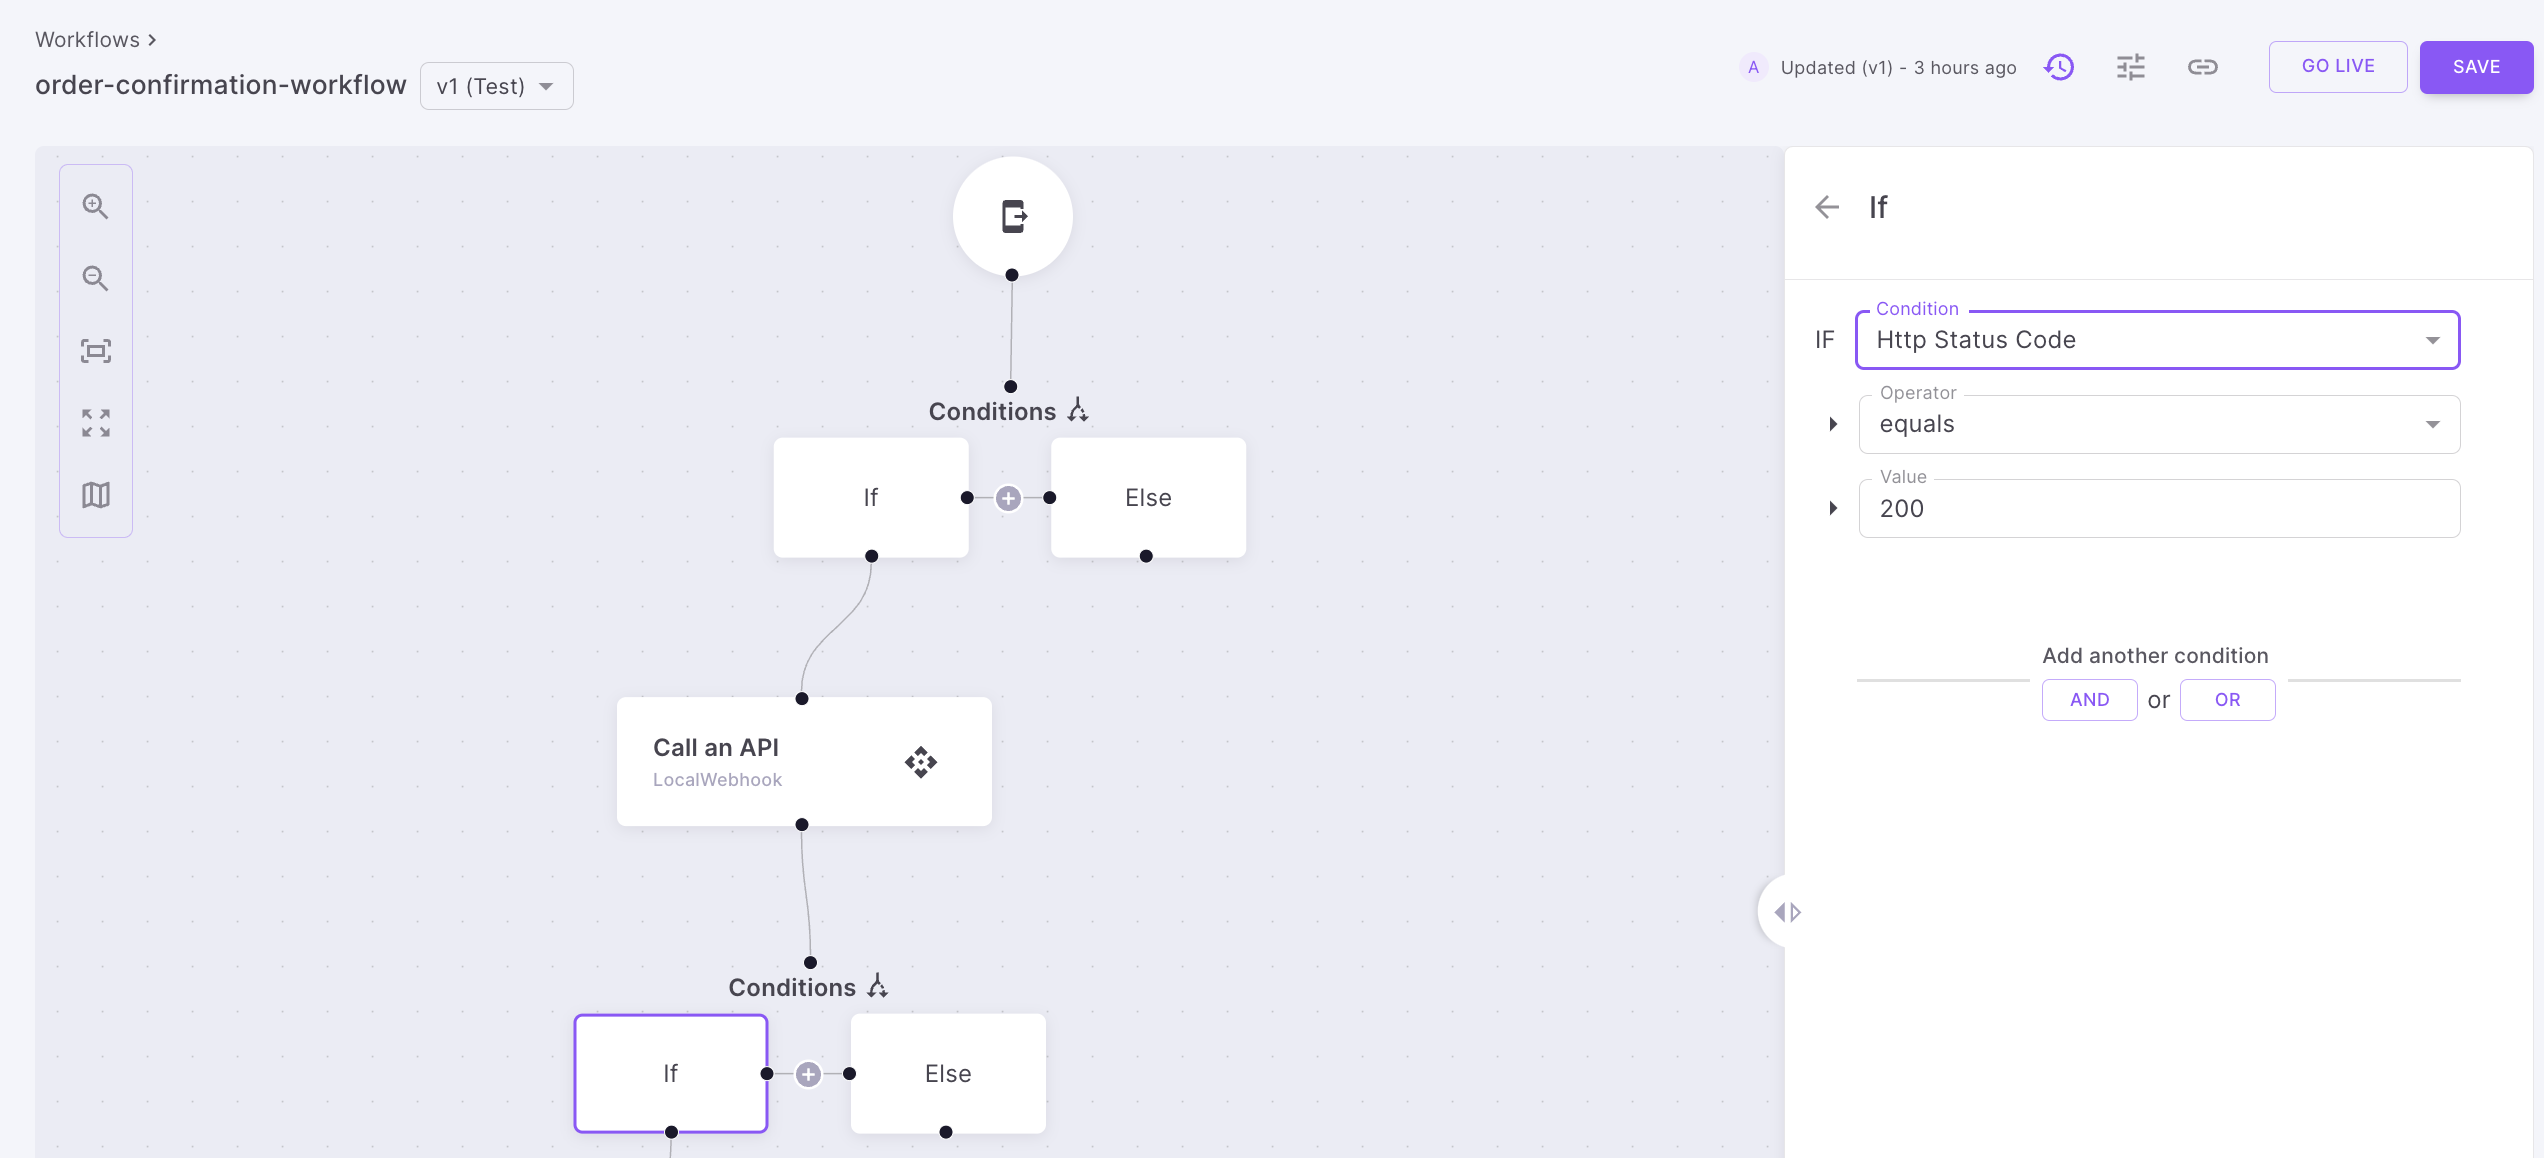
- If the HTTP status code is 200, send a notification to the user confirming the status of the order.
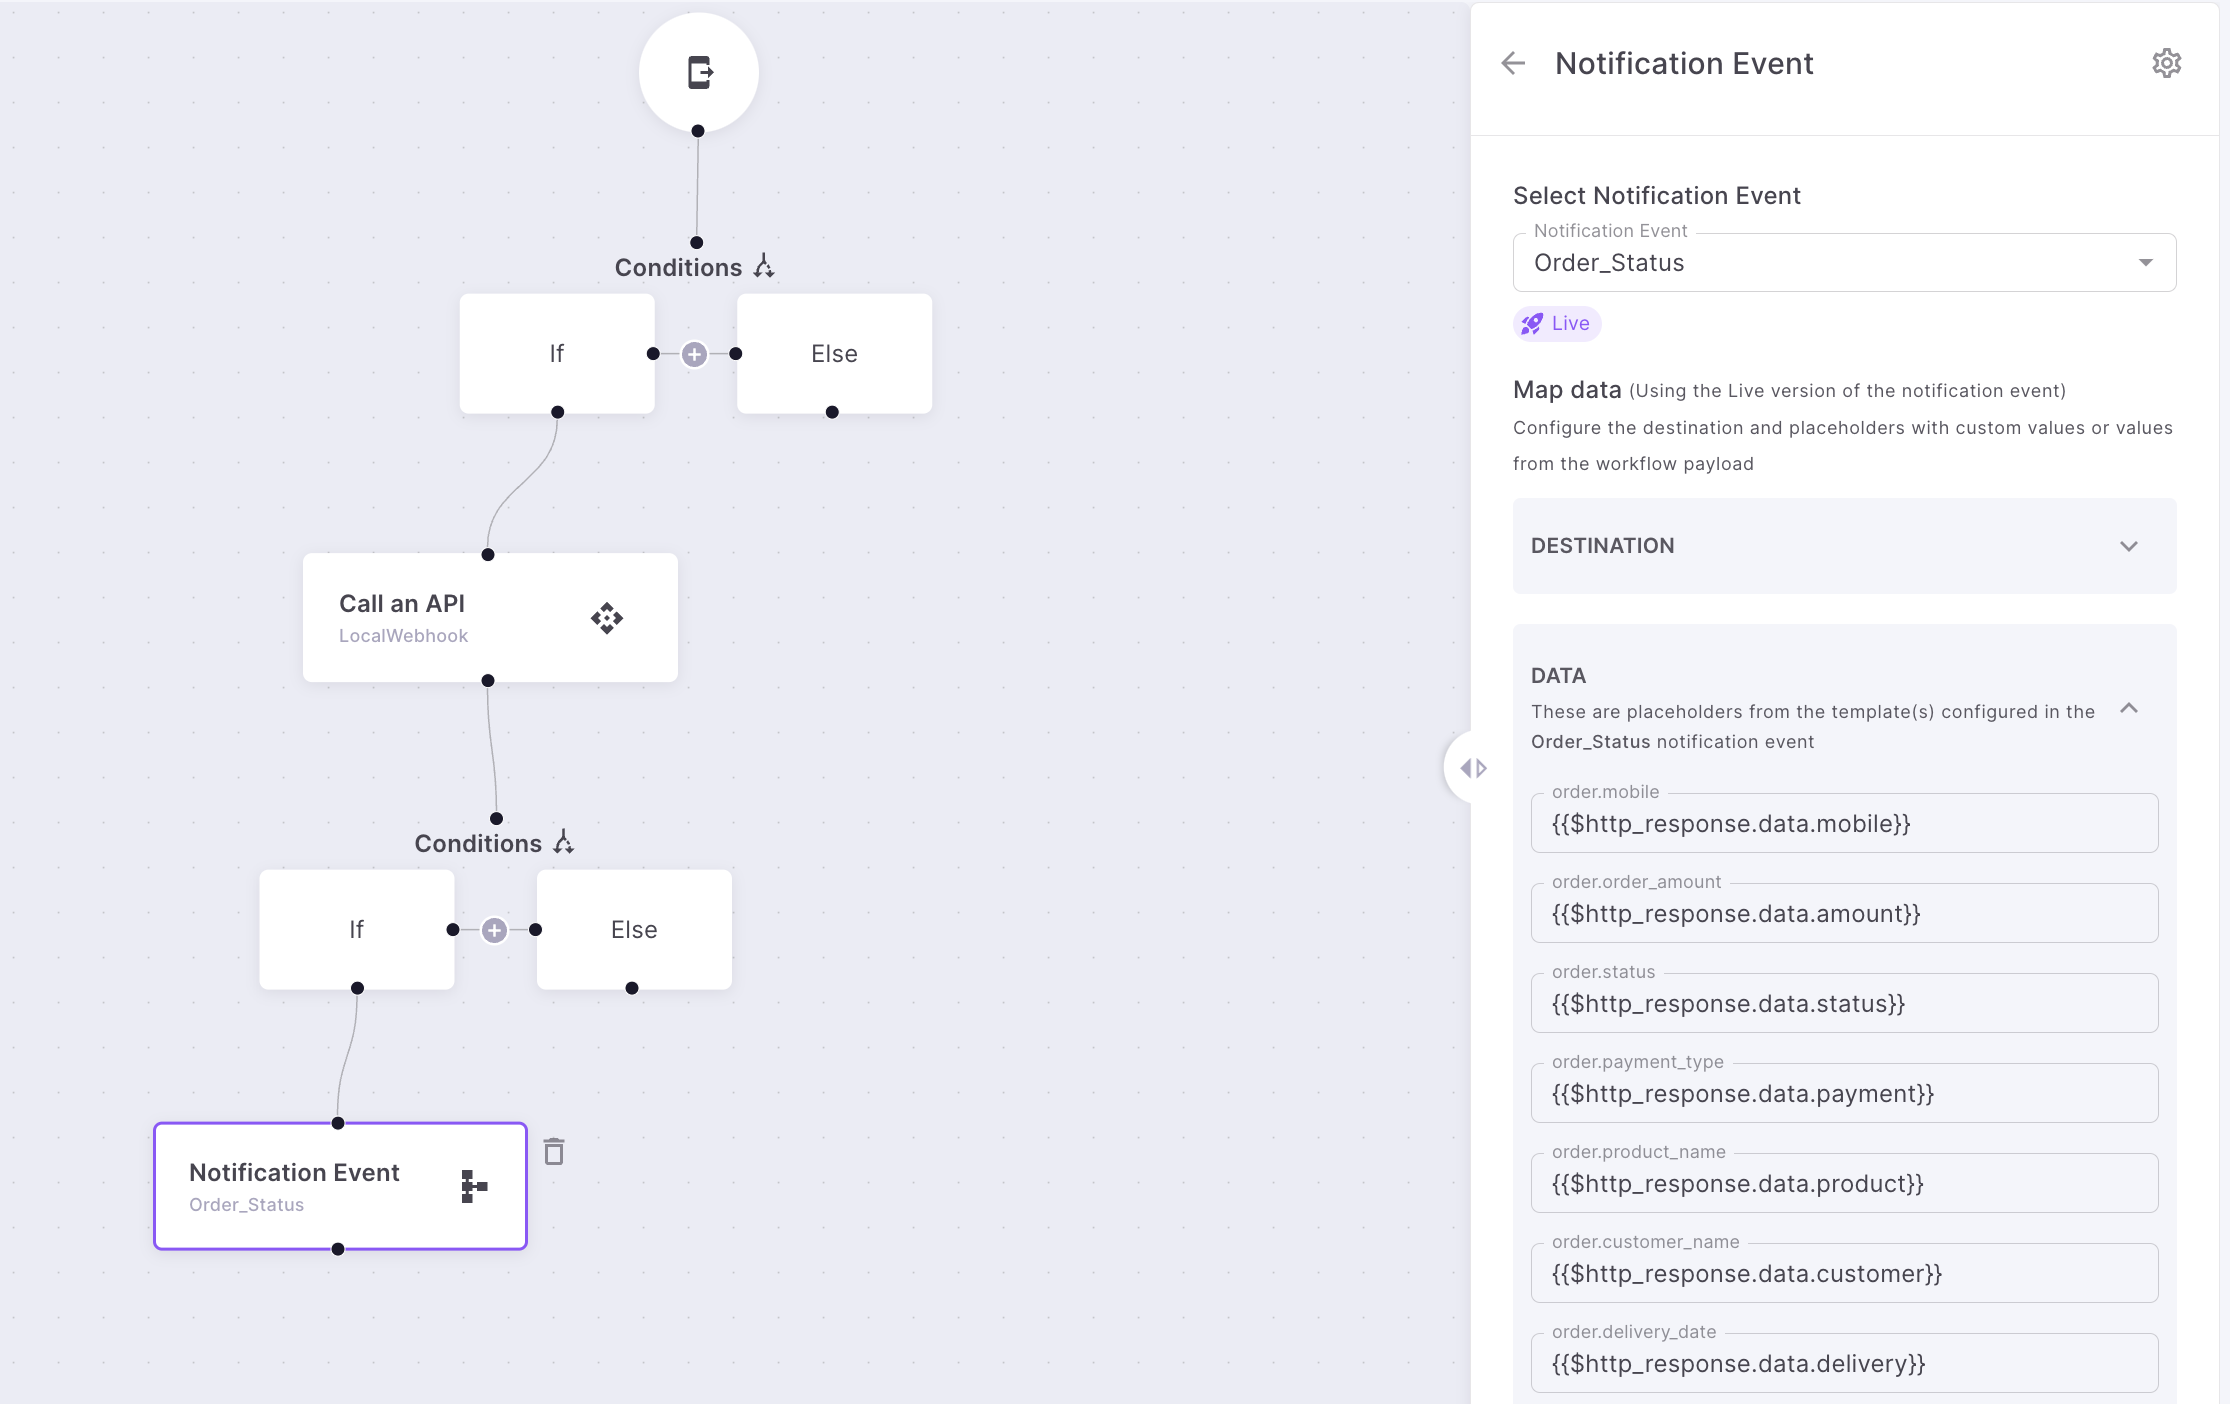
-
Map the mobile no in the destination section. You can choose 'simplified.source' from the dropdown.
-
You can map all the placeholders used in the template as shown in the data section as shown above. Make sure to add it in the format {{$http_response.data.}}
-
You can add a Reply widget to store the user response and use it further in the flow as shown below. In this example, we are saving the user response for whether they want to change the phone no or not.
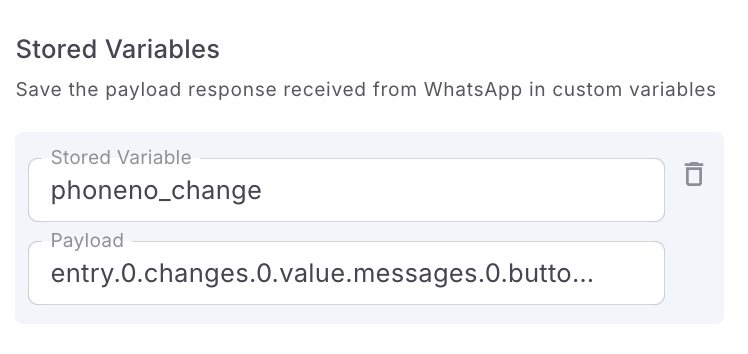
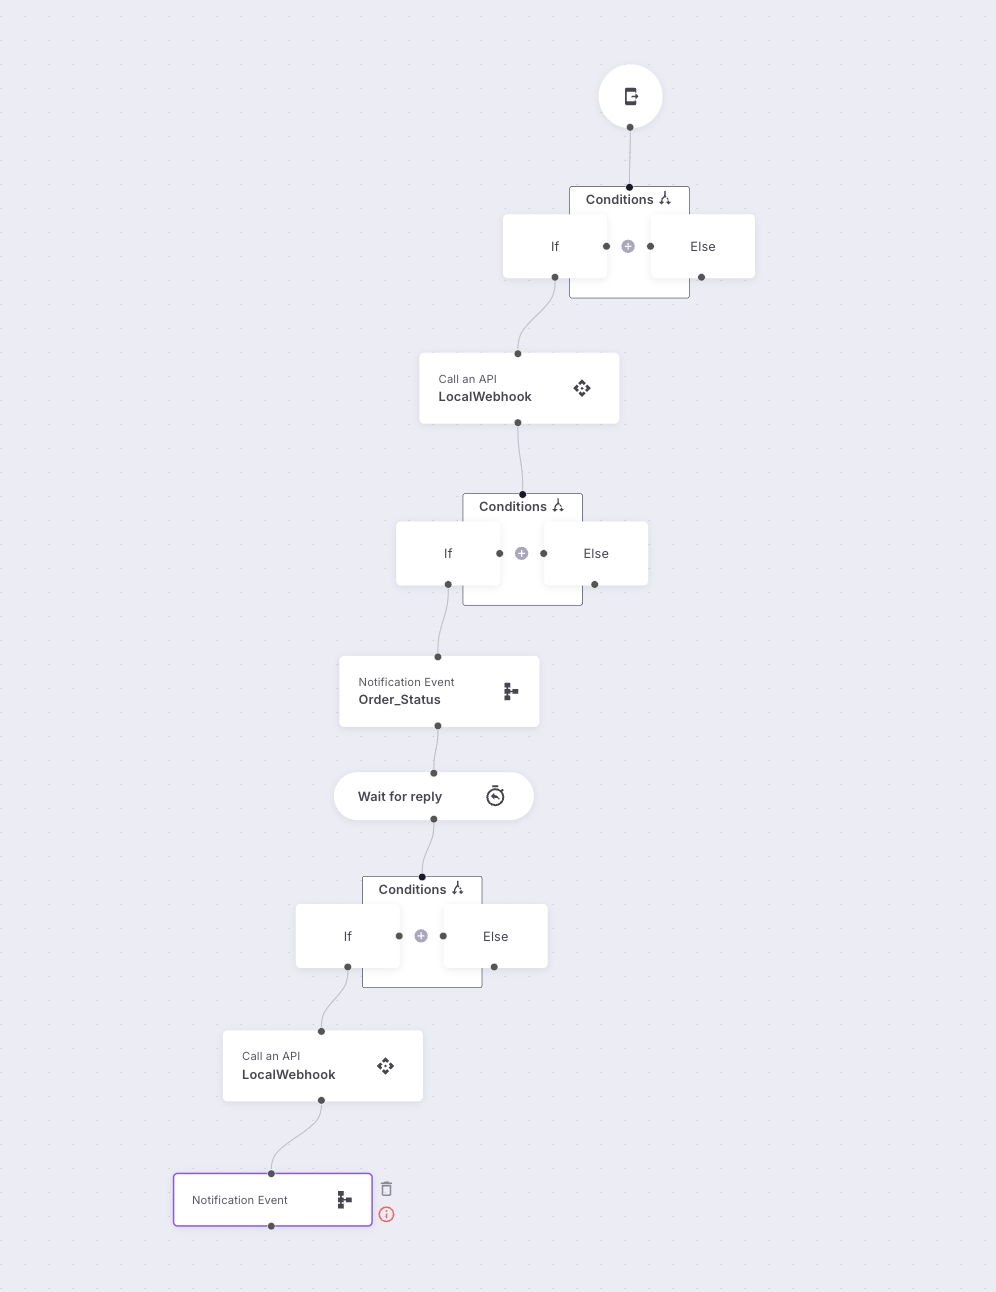
-
Using this, you can decide whether you need to call an API to update the phone no (if user clicked Yes) or end the flow.
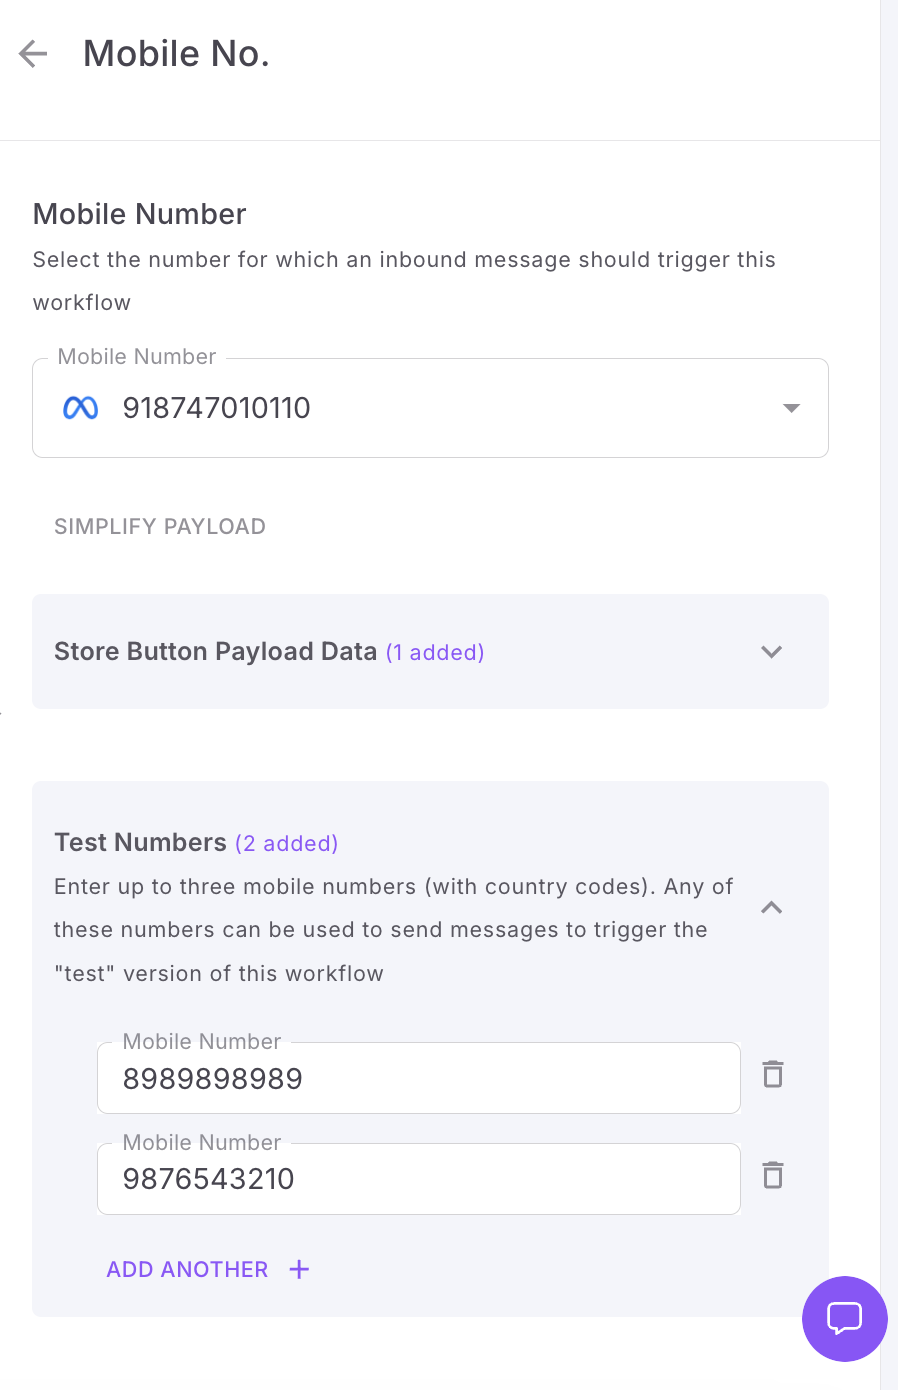
How to test a Incoming message workflow
While configuring the Incoming number, there is an option to add Test mobile numbers. You can add up to 3 numbers. So all the messages sent from these mobile numbers will trigger the latest Test version of the Workflow.
How to receive delivery reports
Fyno allows you to forward delivery reports to your own system or integrate them with third-party analytics tools like Mixpanel and Amplitude. This feature enables you to track and analyze the success of your notification deliveries seamlessly.
You can read more about it here
How to configure Idempotent Key
Workflows now supports idempotency, ensuring you can safely retry requests without the risk of performing the same operation twice. This feature proves invaluable in scenarios where an API call gets interrupted in transit, leaving you without a response.
You can read more about it here
How to configure overrides
Fyno allows you to override pre-configured values within an Integration, enabling you to use different values for specific notifications in a Workflow. This flexibility is useful when you need to customize the sender information or other details based on the requirements of each notification.
You can read more about it here
Updated 9 days ago