How to create a campaign in Fyno Connect
Campaigns allow you to trigger bulk notifications to a select group of users that you have created via Cohorts through a specific Notification Event that you have pre-created in Fyno Cloud.
To get started with Campaigns on Fyno Connect,
- Click on Campaigns from the left navigation bar. On the new page, click on Create + to create a new campaign. In the pop-up, fill in:
- Name: Provide a suitable name for the campaign
- Campaign Type: Select the type of campaign. This can be:
- Engagement
- Onboarding
- OTP
- Promotional
- Retention
- Transactional
- Select Cohort: Select a cohort you would like to use. In case you selected "Save and Create Campaign" while saving a cohort, this would be pre-filled.
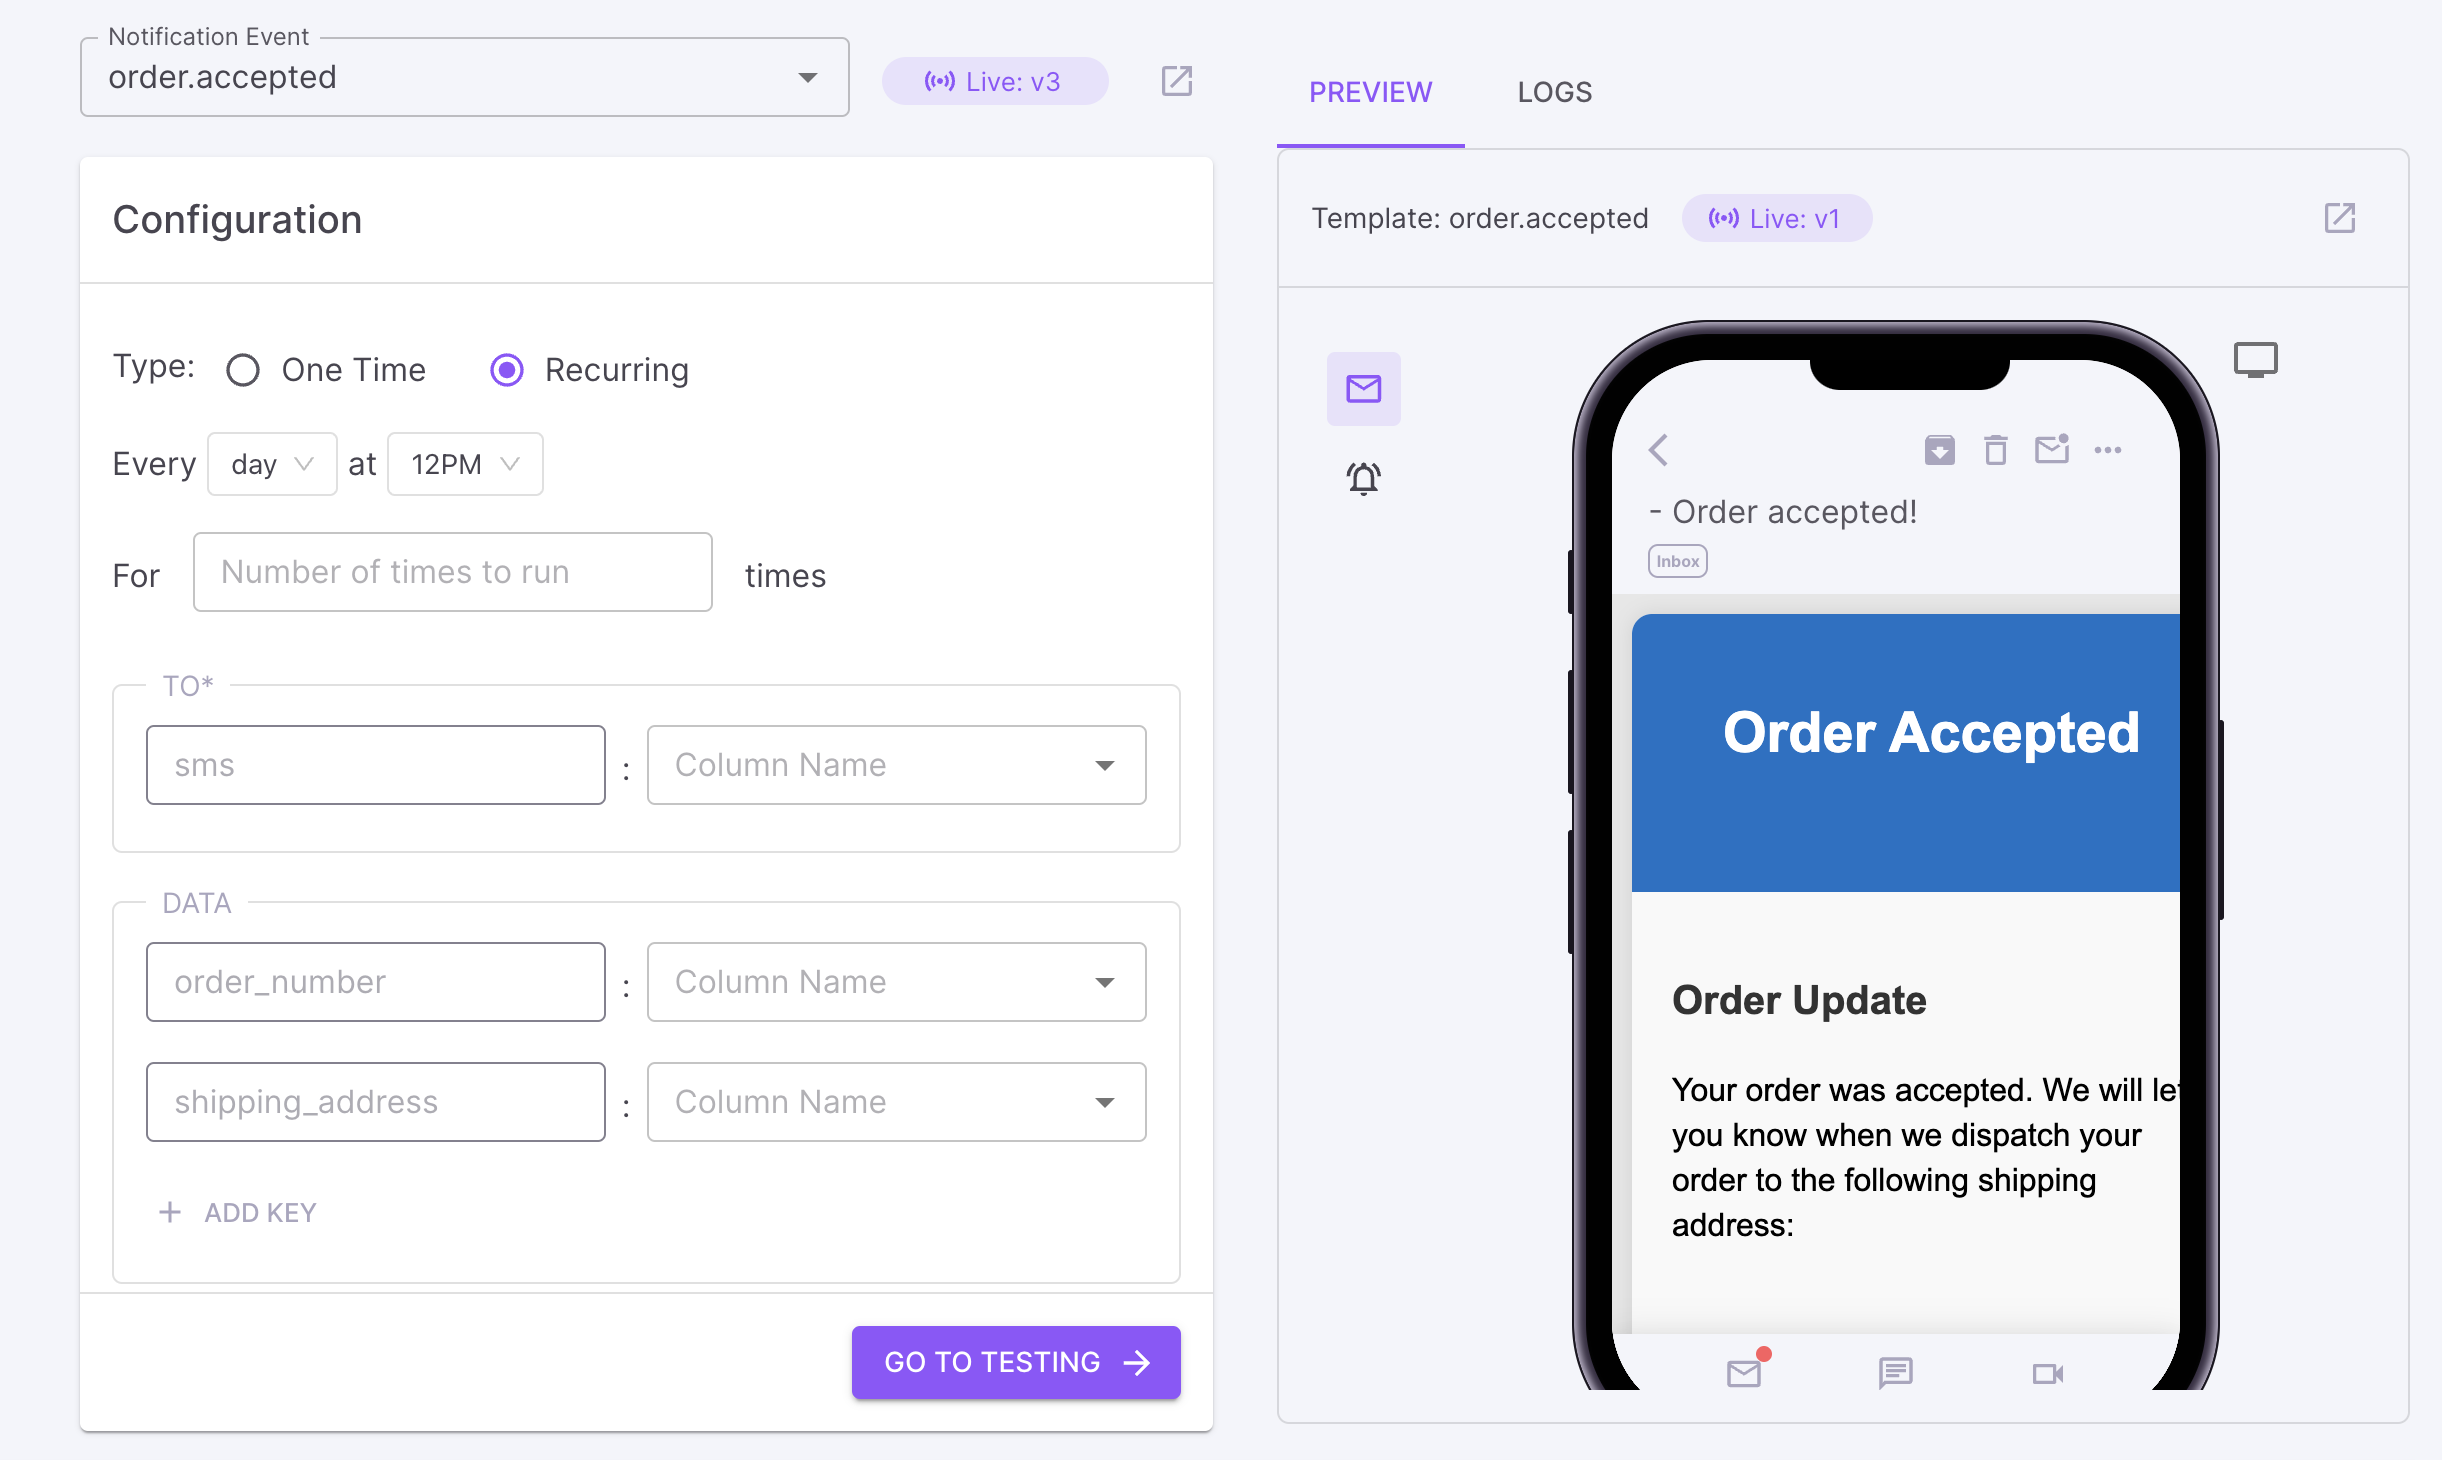
- Once this information is filled click on "Next". At this step, you will need to configure the Notification Event details by entering the following:
- Notification Event Name: Select the name of a pre-created notification event from Fyno Cloud.
- Select One time or Recurring Campaign
- To: Select the channel, based on the configured details in the Notification Event and select a corresponding header from the cohort created for the same. For example, if the selected channel is Email, then the corresponding header from the data that contains the email IDs to execute these emails will need to be selected.
- Data: Placeholders can be specified using this section, to correspond and pick up data from the headers of the cohort created. For example, if the email contains a placeholder called "Shoe Brand" then the corresponding column header containing that information needs to be selected.
- Once this information is filled in, click on "Next Step". Here, you will be able to test the campaign before executing it, just to ensure that the notification event is correctly configured and the data points are correctly reflecting.
- To test, enter a test number under the To field and click on "Trigger Campaign".
Only when the notification event is successfully called, will the campaign get created and triggered!
Campaign Types
You can do 2 types of campaigns
- One-time - Enables you to run campaigns
- Recurring - Enables you to setup a frequency at which you want your campaigns to run.
Recurring Campaigns
Frequency - Select the periodicity of the campaign. You can choose from four options: Month, Week, Day, Hour.
- Day - You can select every hour or a particular time like 1 PM or more than 1 time slot like 1 PM, 4 PM etc.
- Week - You can select Every day of the week or a particular day like Monday or few days like Monday, Friday. You also need to select the time slot when you want the campaign to be executed.
- Month - You can select a particular day of the month and particular days in a month and also the time slots.
When the campaign ends - Select after how many times you want the campaign to end.

Your logs are safe with us!
For every campaign triggered by you via Fyno Connect, the logs will be visible on Notification Event logs as well as Sent Logs. Head on over to the Logs section and find insights about your campaign
How to receive delivery reports
Fyno allows you to forward delivery reports to your own system or integrate them with third-party analytics tools like Mixpanel and Amplitude. This feature enables you to track and analyze the success of your notification deliveries seamlessly.
By sending delivery reports to your preferred systems or analytics platforms, you can gain valuable insights into the effectiveness of your notification strategies and make data-driven decisions to optimize your communication processes. Fyno's flexibility ensures a smooth integration with your chosen tools, empowering you to monitor and improve your notification performance.
-
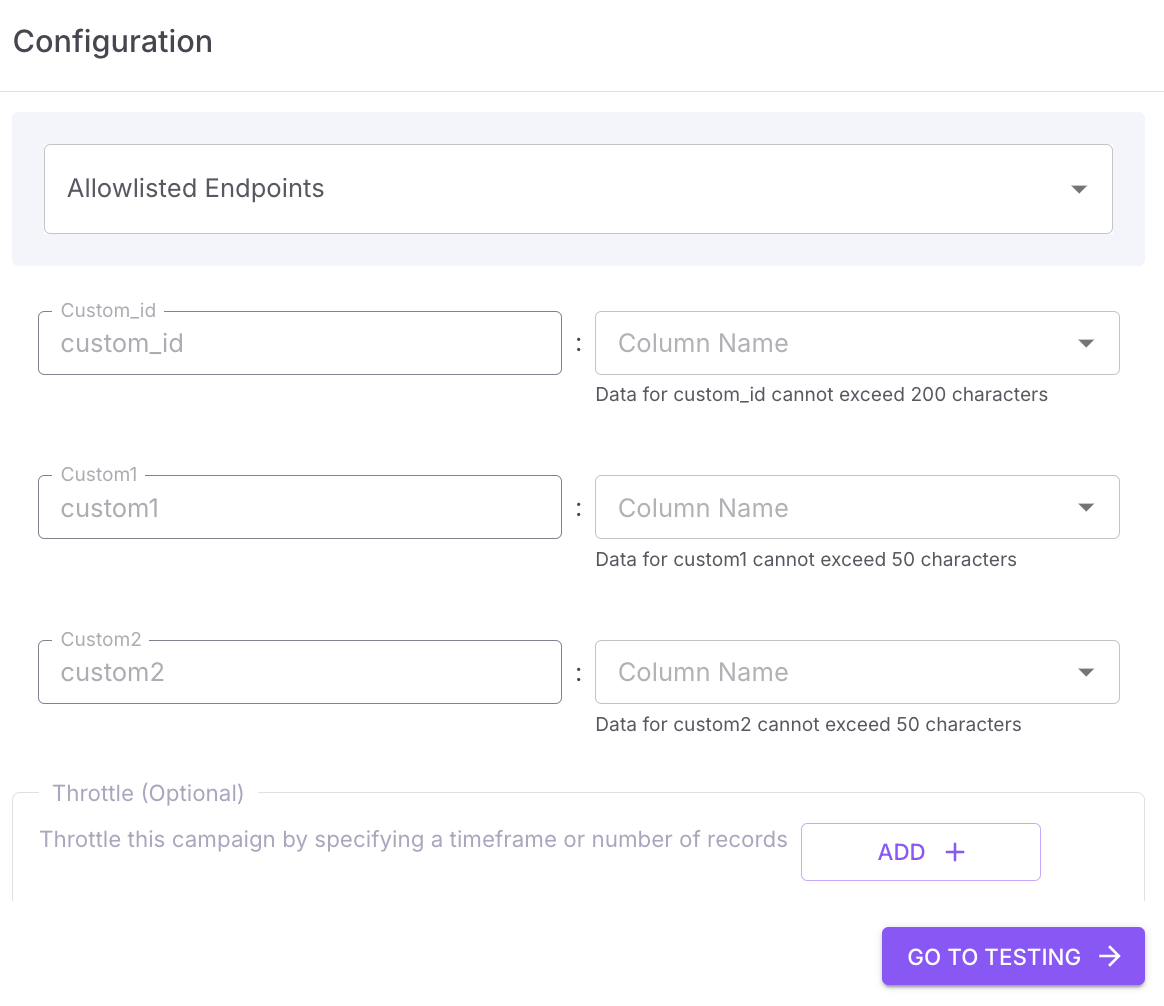
To configure callbacks to receive delivery reports, select the checkbox - 'Receive delivery report from Fyno to my allow-listed endpoint(s)'.
-
This option allows you to receive Delivery reports of each notification triggered in any URL you have allowlisted in Fyno.
-
Allowlisted Endpoints - Selecting Delivery Report Endpoint(s) from Verified Allowlist URLs (Maximum 3 can be selected). If you didn't allowlist any URL, you can refer this doc and add a new URL

-
Once the Delivery Endpoint URL(s) is selected, 3 additional placeholder details need to be configured.
| Placeholders | Default Value | Meaning |
|---|---|---|
| Custom Id | custom_id | ID you provided in the callback.custom_id field while triggering the notification. |
| Custom 1 | msg_id | Message ID generated for every notification sent from Fyno. |
| Custom 2 | status | status of the message such as Delivered, Opened, Read etc. |
More values can be added in the callback. For a list of additional available values, please see:
https://docs.fyno.io/docs/allowlist-url#callback-response
How to throttle a campaign
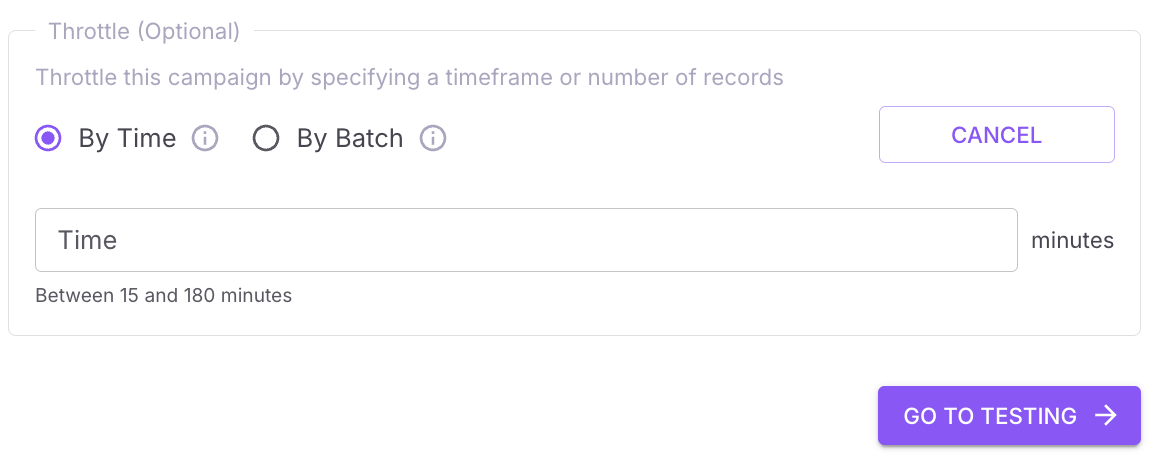
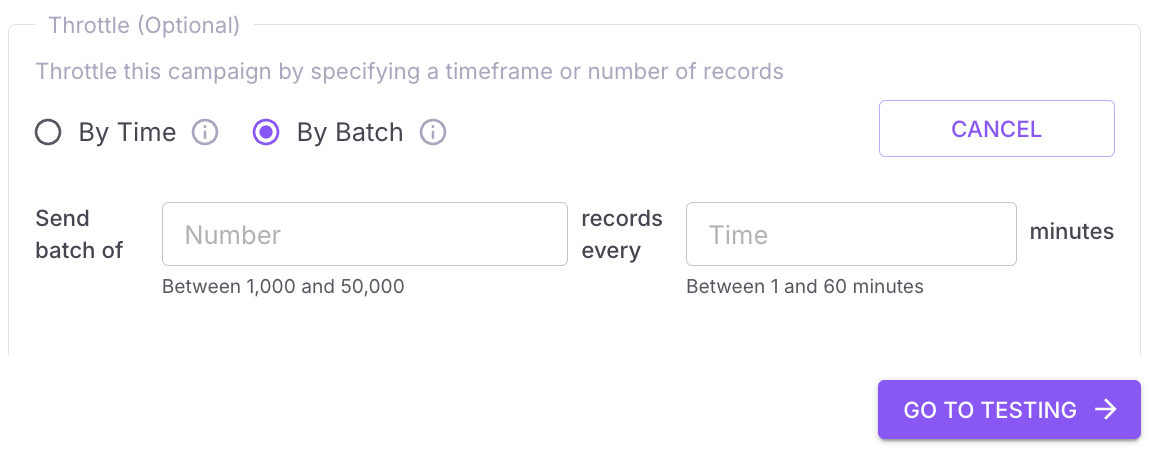
Throttle is optional but we recommend using it. Throttling allows you to control the rate at which notifications (Emails/SMS/WhatsApp/Push/WebPush) are sent to users.
By Time - You can specify a duration for which the campaign should run. You can have a minimum of 15 minutes and a maximum of 180 minutes. For example, if you want to execute the campaign for an hour, you can do that by entering 60 minutes.

By Batch - In this option, you can throttle the number of records the campaign should send for a specific duration. You can have a batch size between 1000 and 5000 and time limit between 1 and 60 minutes. For example you want to send a execute a batch of 1000 records in the csv file every minute, then you can enter 1000 records and 1 minute

Updated 2 months ago
