Security
Security is considered one of Fyno's biggest selling points since we deal with the transmission of a lot of sensitive information and Personal Identifiable Information.
Therefore while implementing the Security features, a lot of consideration was put in, keeping Compliance as well as client data discretion in mind.
Fyno has 2 types of Security features that can be enabled for your account:
- Masking
- Hashing
Only users with 'Owner' as role can enable or disable Hashing or Masking.
Before you enable any of these features, it is important to understand what each one does, to ensure your use case is being covered and you are achieving the security data protection.
Both security features, when enabled, applies only to "Live" version data.
Masking
Masking a piece of information means covering it. In the simplest of terms, masking is a 2-way feature that enables you to cover sensitive data points on the Fyno application when it's being displayed.
When and How it Works
Masking, when activated, will be implemented on the below 2 data points that we receive from you:
- Data Payload
- Destination
Fyno's Masking feature works as below:
- Fyno receives an API request from your end with one or both of the above-mentioned data points.
- On receiving the API Request, if Masking is toggled on, then the data will be stored in the database as plain text format
- On viewing these data points on the Fyno application, they will be displayed in a masked format - xxxxx.
Masking is a reversible feature for current and historical data (for which it was applied previously when the feature was enabled) and can be unmasked.
Enabling Masking
To enable the Masking feature for your account,
- Tap on Workspace Settings on the bottom left corner of the navigation menu and click 'Security' which opens up the Security page.
- Then find the Masking option and toggle it "on".
And you are all set!
Once done, all your Data Payload and Destination details will be masked across the application. You can see this in the following places:
- Sent logs
- Notification Event Logs
- Workflow Logs
You will be able to see the masked data as a string of "xxxxx" where the sensitive information is supposed to be.
Data Payload Storage
You can decide whether you want to store the data payload you send to Fyno or not using this setting.
When and How it Works
Data Payload storage, when activated, will be implemented on the below data point that we receive from you:
- Data Payload
- Payload sent to workflows.
Fyno's Data Payload Storage feature works as below:
- Fyno receives an API request from your end with the data payload.
- On receiving the API Request, if Data Payload Storage is toggled on, then we will store the data payload at our end.
If its disabled, you wont see any Placeholders data in the logs.
Enabling Data Payload Storage
To enable the Data Payload Storage feature for your account,
- Tap on Workspace Settings on the bottom left corner of the navigation menu and click 'Security' which opens up the Security page.
- Then find the Data Payload Storage option and toggle it "on".
And you are all set!
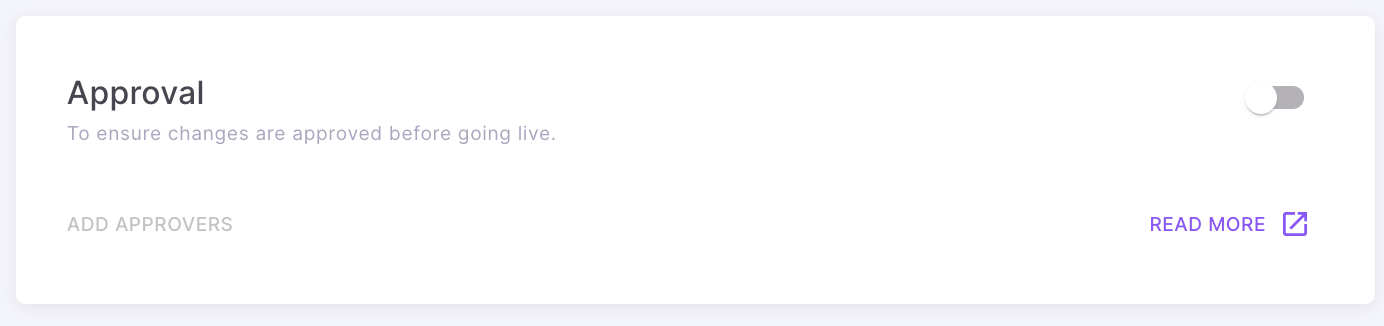
Approval
Only Owner can enable this setting
This feature will enable you to add a approval process when anyone promotes a feature from Test to Live. This additional step ensures to prevent incorrect or unintended communications from reaching users.
To enable Approval flow for Templates, Notification events and Workflows, follow the below steps.
-
Enable the toggle button.
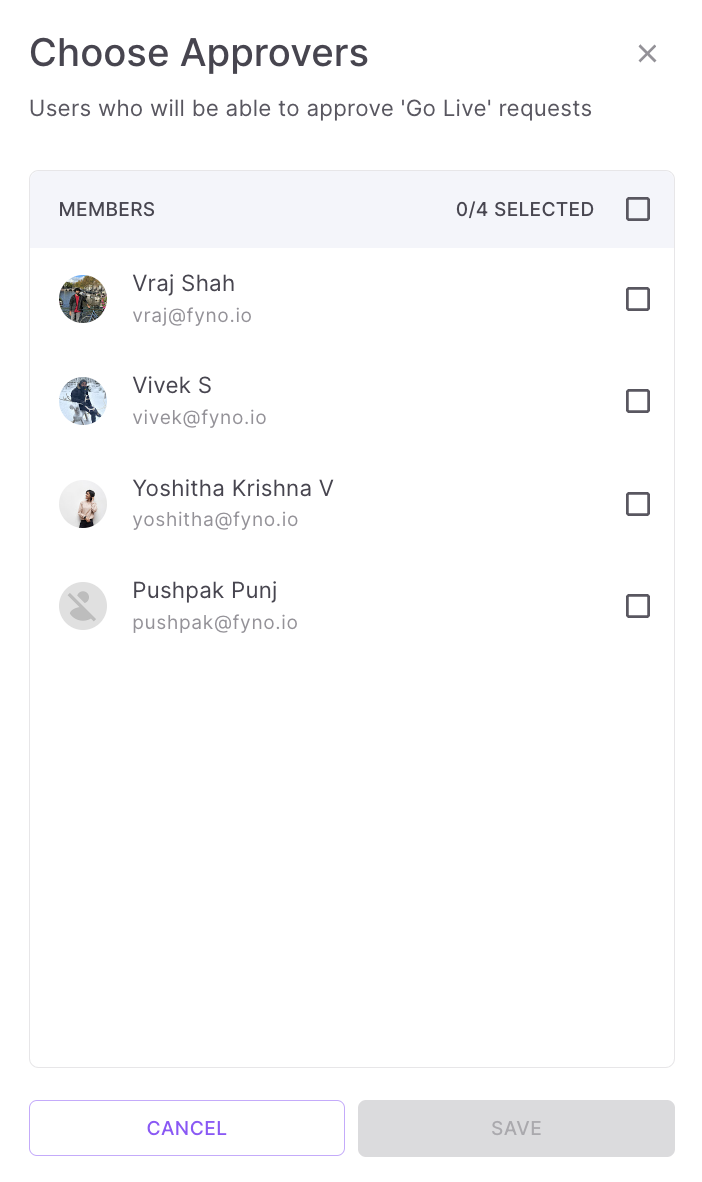
-
Select the users whom you want to choose as Approvers and click 'Save'.
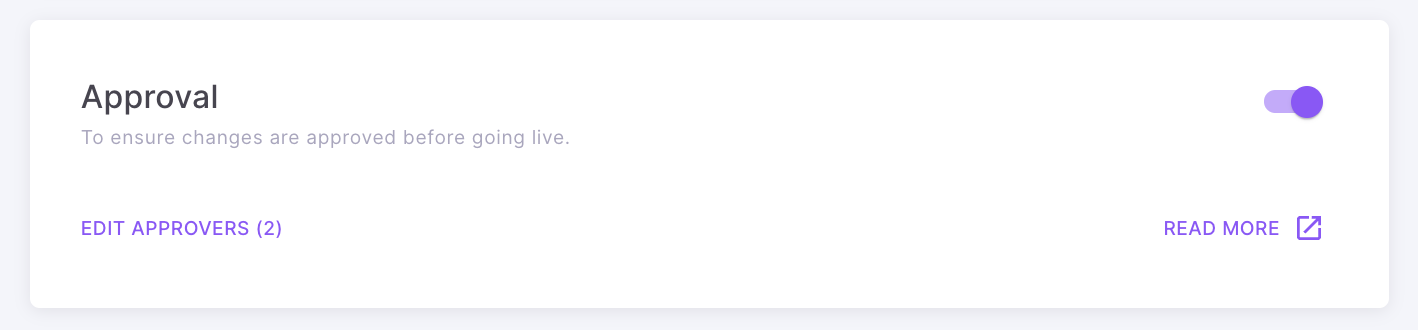
-
The Approval card will look like shown below. You can click 'Edit Approvers' to add or remove approvers.
Updated 5 months ago