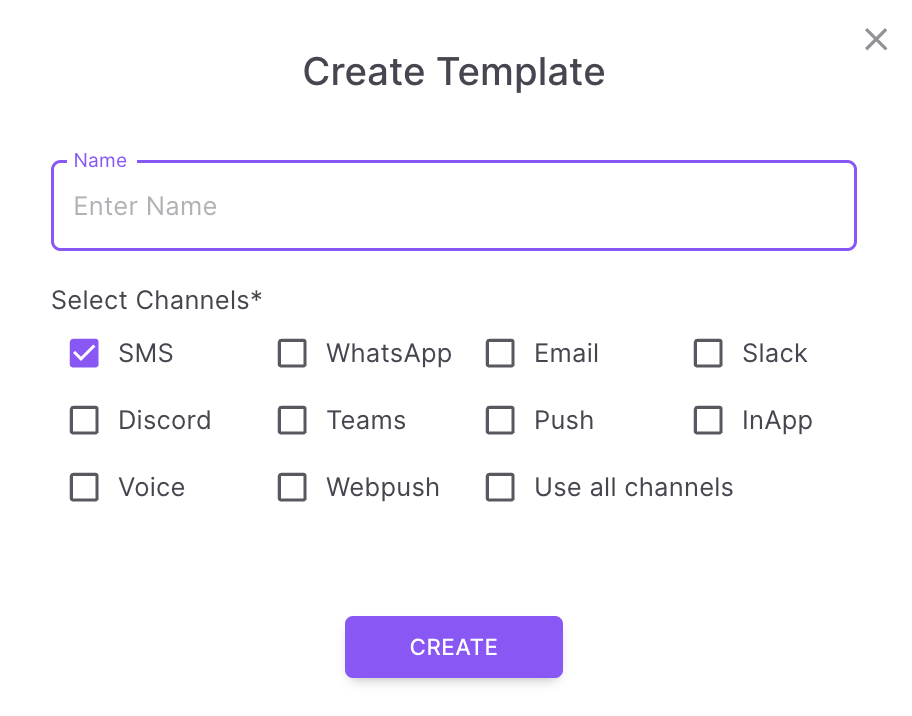
Creating a Template
Fyno offers support for 8 different notification channels. For each channel to work, a template is mandatory, without which you won't be able to send notifications.
In Fyno, templates serve as the foundation for your notification content. To streamline content management, Fyno allows you to create a single template that encompasses the content for all supported channels, including SMS, Email, WhatsApp, Push notifications, and more. A template can consist of two types of content:
Static Content: This portion of the template remains consistent for all recipients and contains the core message or design of your notification.
Dynamic Content: This part of the template includes placeholders that are dynamically populated with user-specific information. These placeholders can be mapped to data from your data payload, allowing you to personalize the notification content for each recipient. Examples of dynamic content include customer names, SIP amounts, due dates, and other relevant information.
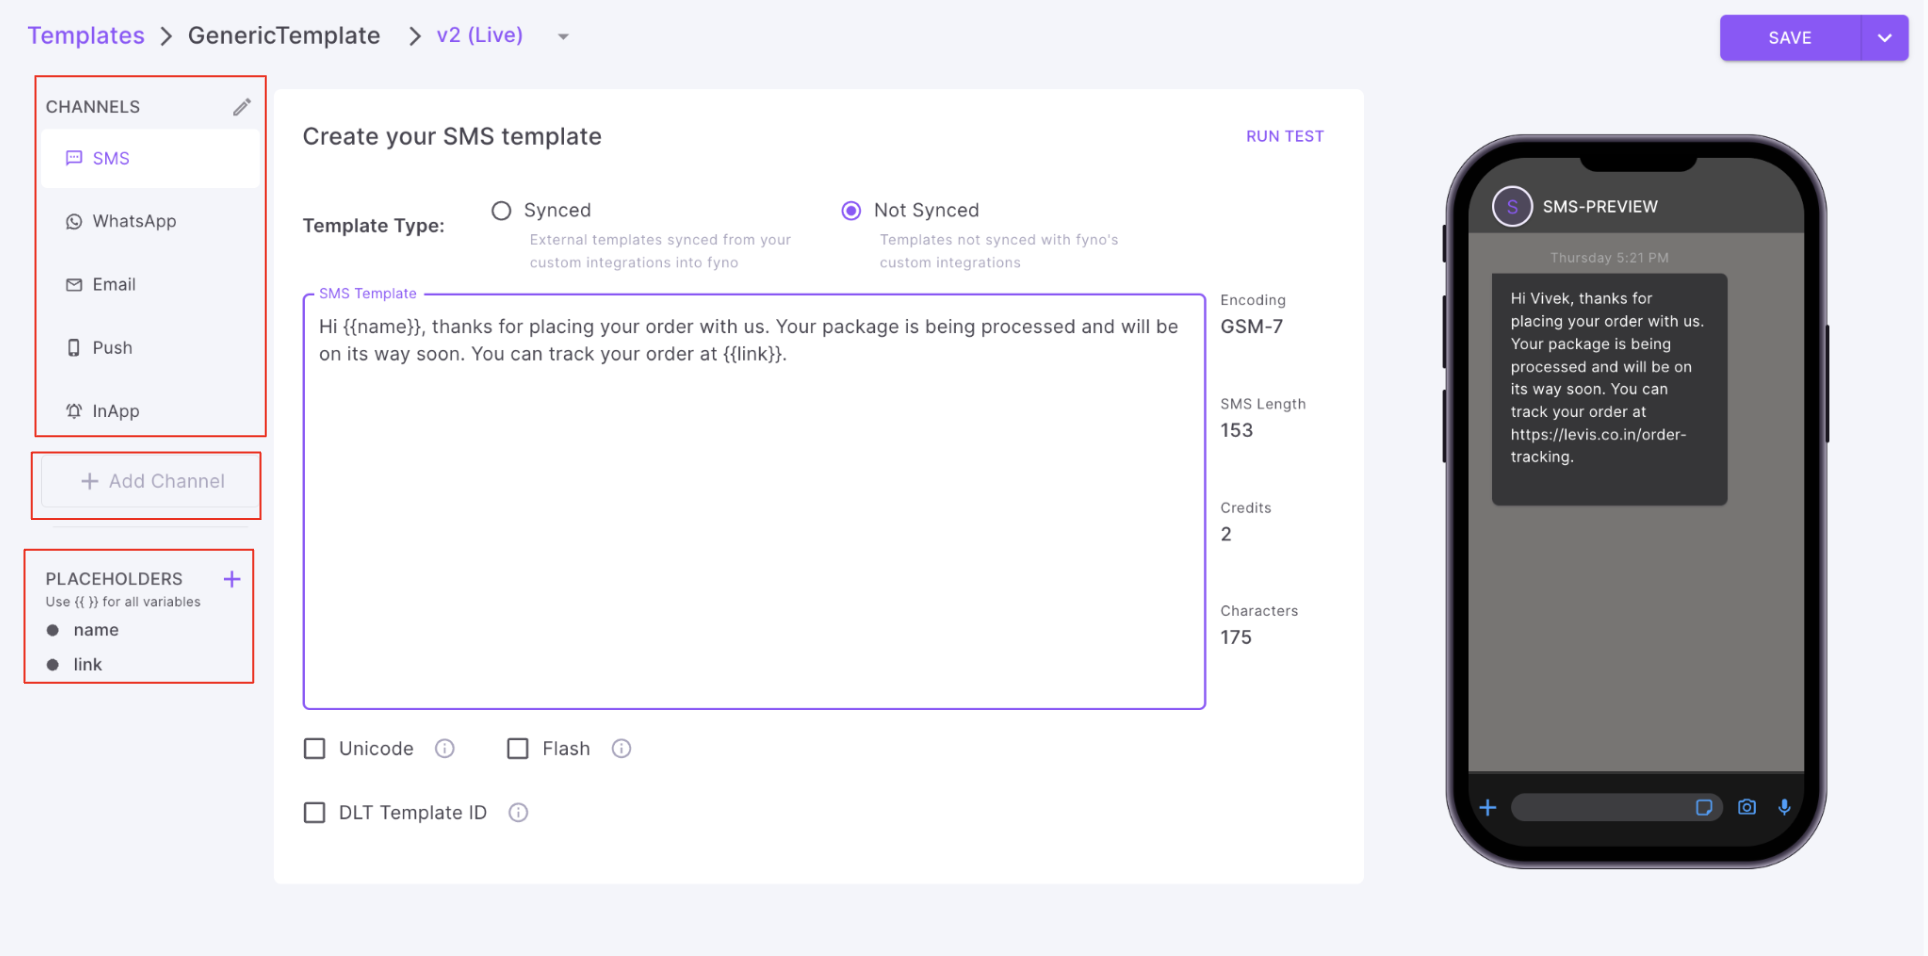
- Once a template is created, you can add content for each channel as shown below.
- Click 'Add Channel' to add a new channel
- Click '+' next to Placeholders to add dynamic content in the template.
To understand how templates work for each Channel, let's go a little bit in-depth for each one.
Test and Live Versions
Every template that you create will be saved as Test versions, allowing you to test different variations and content of templates, to suit your needs.
When a Test version is saved, this does not disturb the Live version that may be plugged in your application and may be active.
When you are confident and happy with the Template that you have created and tested in Test version, this can then be moved into the live version by following the below steps.
- Make the final changes to the template and test it to make sure you are getting the desirable results.
- On the top of the page, next to the name of the Template, you will see the Test Version mentioned.
- To keep this as a Test, click on Save and the draft will be saved.
- To make this version of the Test version live, expand the Save menu to find Save and Promote.
- This will make the current version live in the Template.
Once a Template is live, all the Notification Events into which this template is plugged in will also be automatically updated and modified.
Approval flow
If you have enabled 'Approval' in Security Settings, when you click 'Go Live', you will need to raise an approval request for the changes you have done.
-
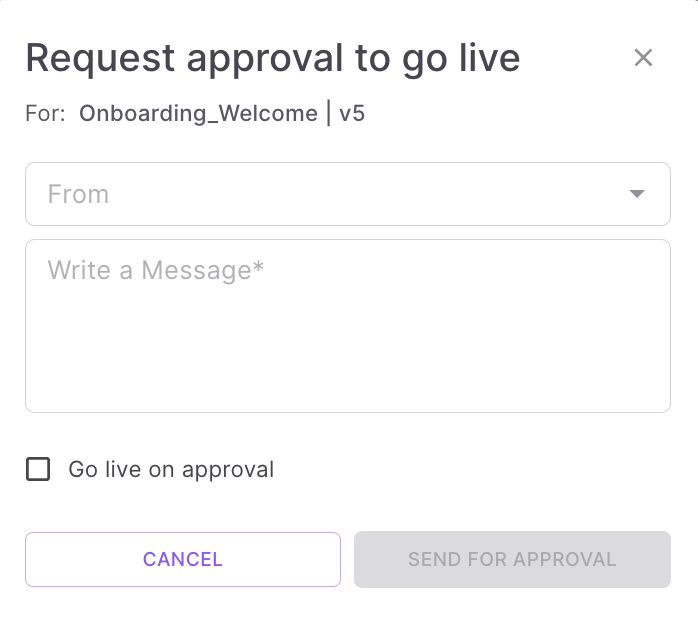
You will see the below popup once you click 'Go Live' . Select approvers from the 'From' dropdown. You can choose one or more approvers. You need to write a short message mentioning the reason for approval request. If you select 'Go Live on approval', the feature will go Live once the approver approves the request. Clicking 'Send for Approval' will send the request.
-
You will see the approval request in the Template page as shown . You can click 'Cancel' to cancel the request.

-
The approvers will receive an Email, an InApp notification for every approval request.
-
The approver will see the request in the Template page. The approver can approve or reject from the respective Template.

-
Also if the approver wants to see all the pending requests, then can see them in the 'Requests' page as shown below.
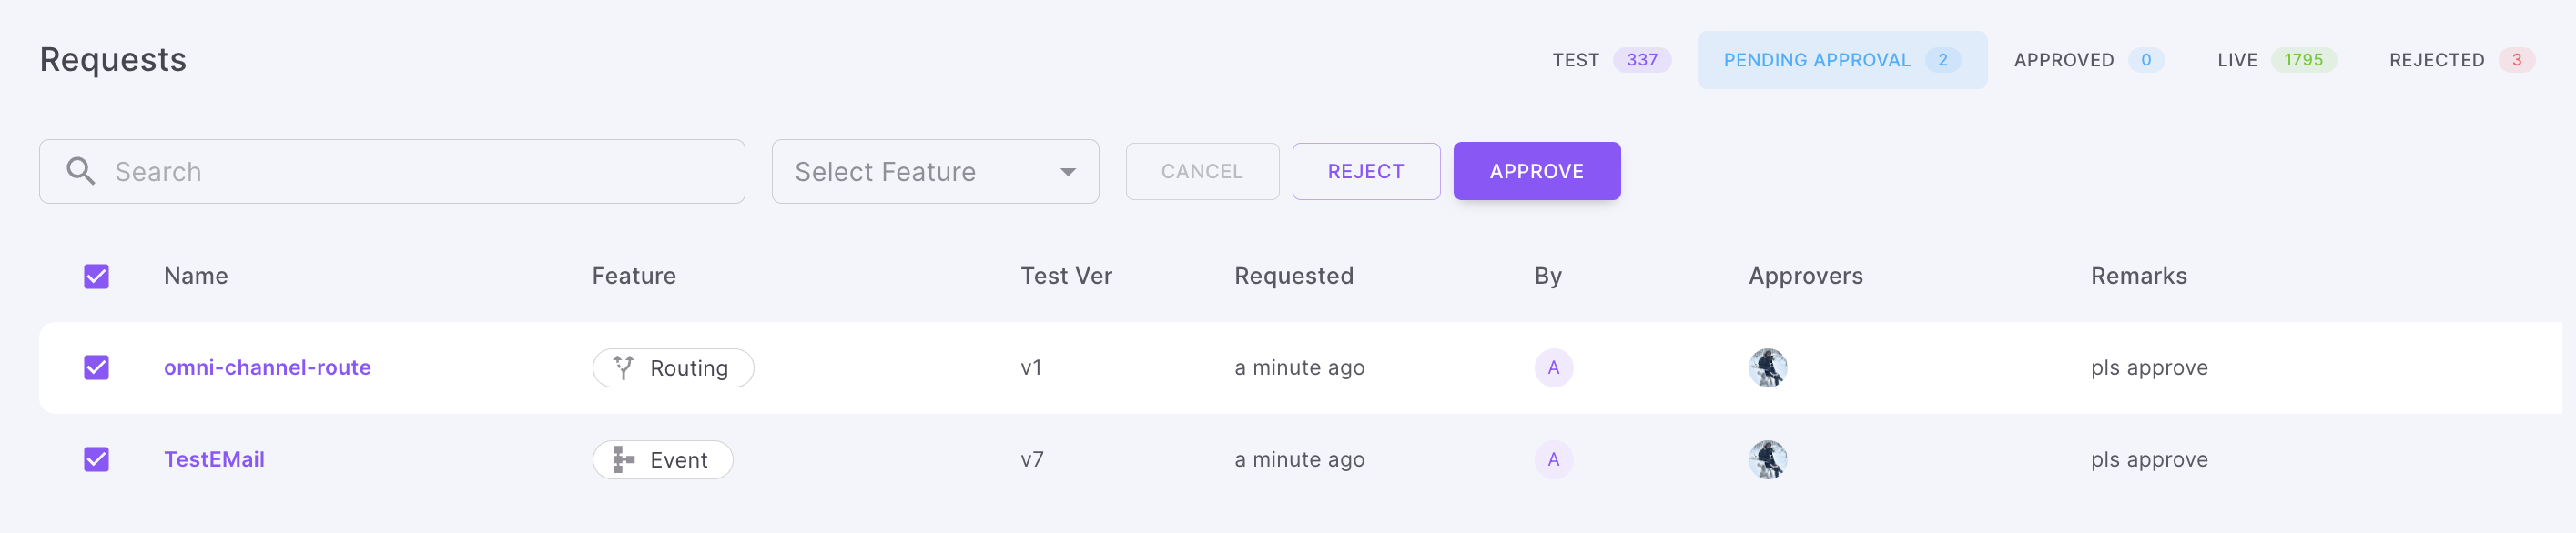
- The approver can choose one or more requests and either Approve or Reject. While rejecting they need to provide a rejection reason.
- If the request is Approved, the feature will go Live if the requestor selected 'Go Live on approval' while raising the request. Otherwise, they have to click 'Go Live' to take the feature Live.
Updated 7 months ago