Create an Omnichannel Route
Creating an Omnichannel Route is pretty simple, with Fyno's Omnichannel Route Builder.
To get started, follow the below steps:
- Login to your Fyno account and navigate to the Omnichannel Tab from the left Navigation pane.
- Click on "Create+" to a new Omnichannel Route.
- In the pop-up that appears, fill in an appropriate name for the route that you are about to create along with a description and click on "Submit".
- On the page that loads, you will see a flow builder and elements that act as your building component on the right-hand pane.
To understand each of the elements, let's quickly have a look at the sections within the right-hand pane.
Channels
Channels account for all the Channels and Providers you have added in the "Integrations" section. This will also contain the Routes you have created within a Channel within the "Routing" section of Fyno's App.
If there is no Integration configured, you will not be able to see any details when trying to select a Provider or Route.
Within each channel component, you would be able to:
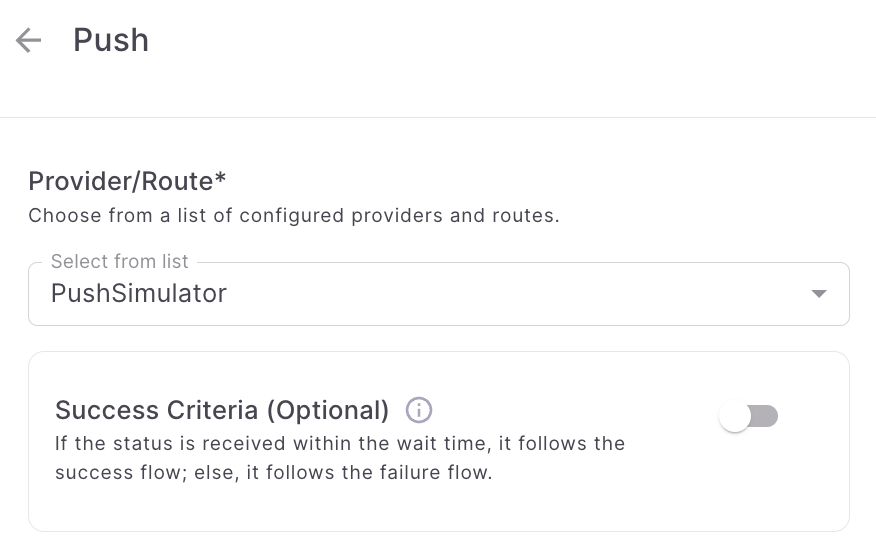
- Select a provider or a route (single channel route)
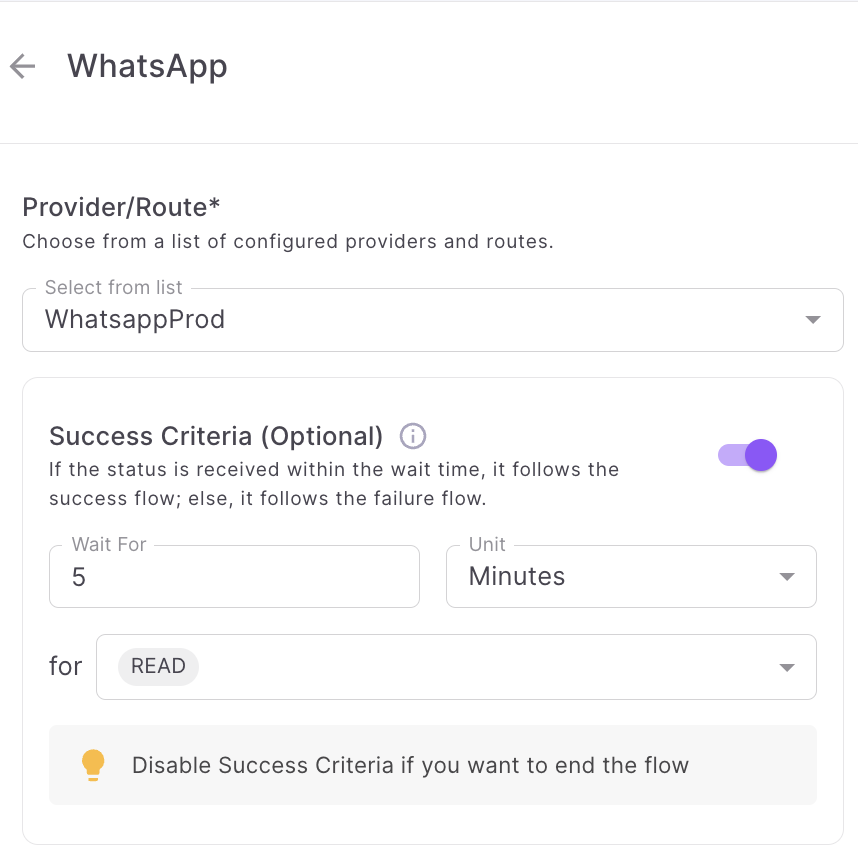
- Success Criteria - This is an optional field. You can define the status(es) that determine the Success flow and specify the wait time for these statuses.
- For example - To set the success criteria for a WhatsApp notification when it is delivered or read within 2 minutes after being sent, configure the settings as follows:
- Enable the Success Criteria section.
- Select the desired statuses, such as "delivered" or "read" etc.
- Set the wait time to 2 minutes.
This configuration ensures that the flow will wait for up to 2 minutes to receive either a "delivered" or "read" status for the WhatsApp notification before proceeding to the success flow. If none of the specified statuses are received within the 2-minute window, the flow will transition to the failure flow.
The wait time range is limited to a minimum of 5 seconds and a maximum of 10 minutes.
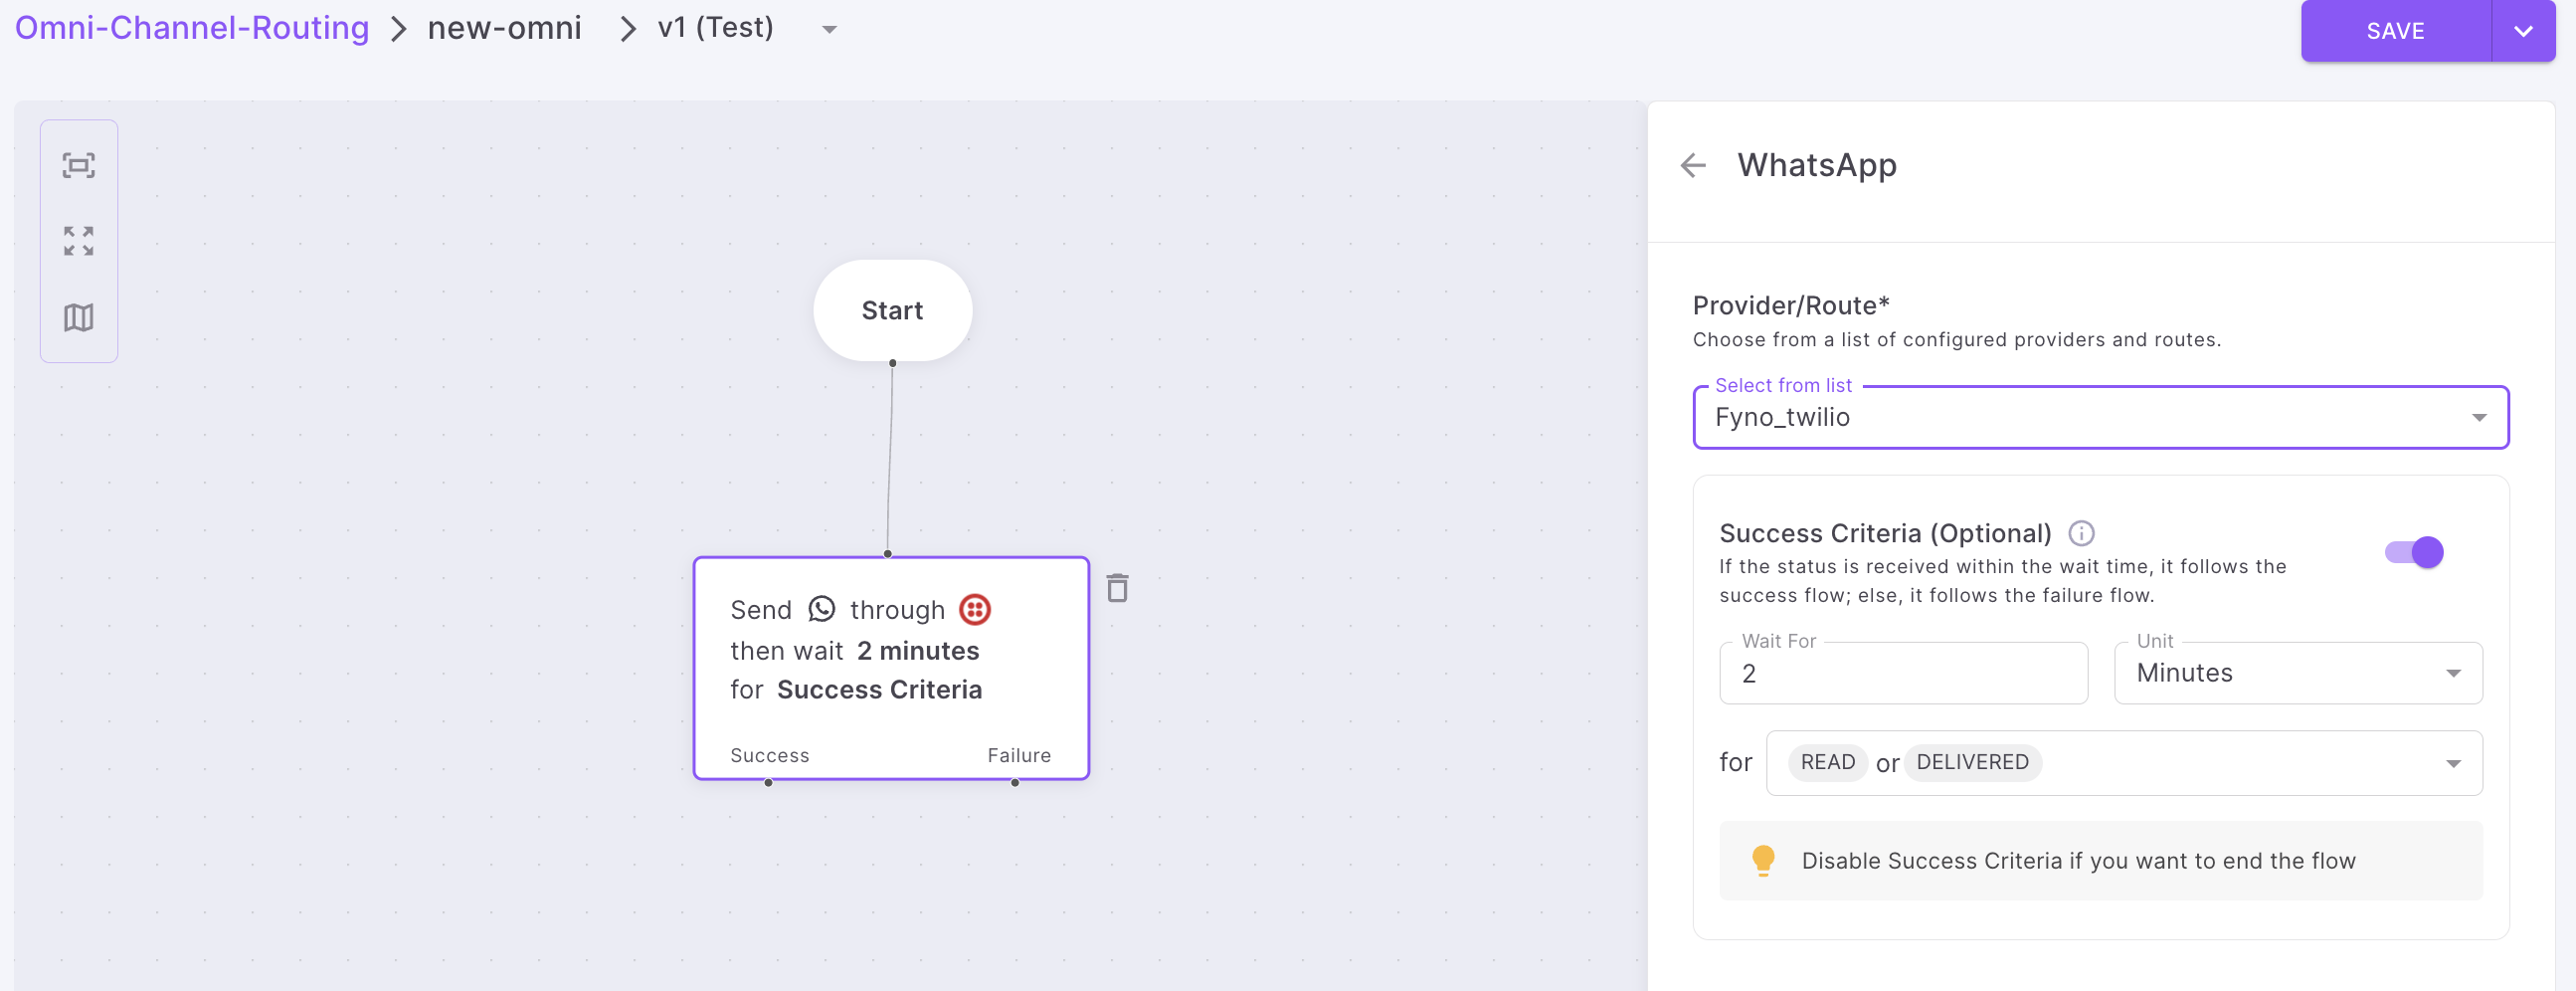
To end the flow, simply disable the Success Criteria section.
Status-Based Routing
Each Channel block has "Success" and "Failure" operations. - classify this section as Status based routing to make sure it stands out
- Success: When a notification satisfies a success criteria within the configured 'wait for' time ,then the Success flow will be executed
- Failure: When a notification doesn't satisfy a success criteria within the configured 'wait for' time ,then the Failure flow will be executed
Controls
Controls allow you to shape the direction that your Omnichannel Route takes with multiple functions to help you achieve this.
Under this, we have 2 components:
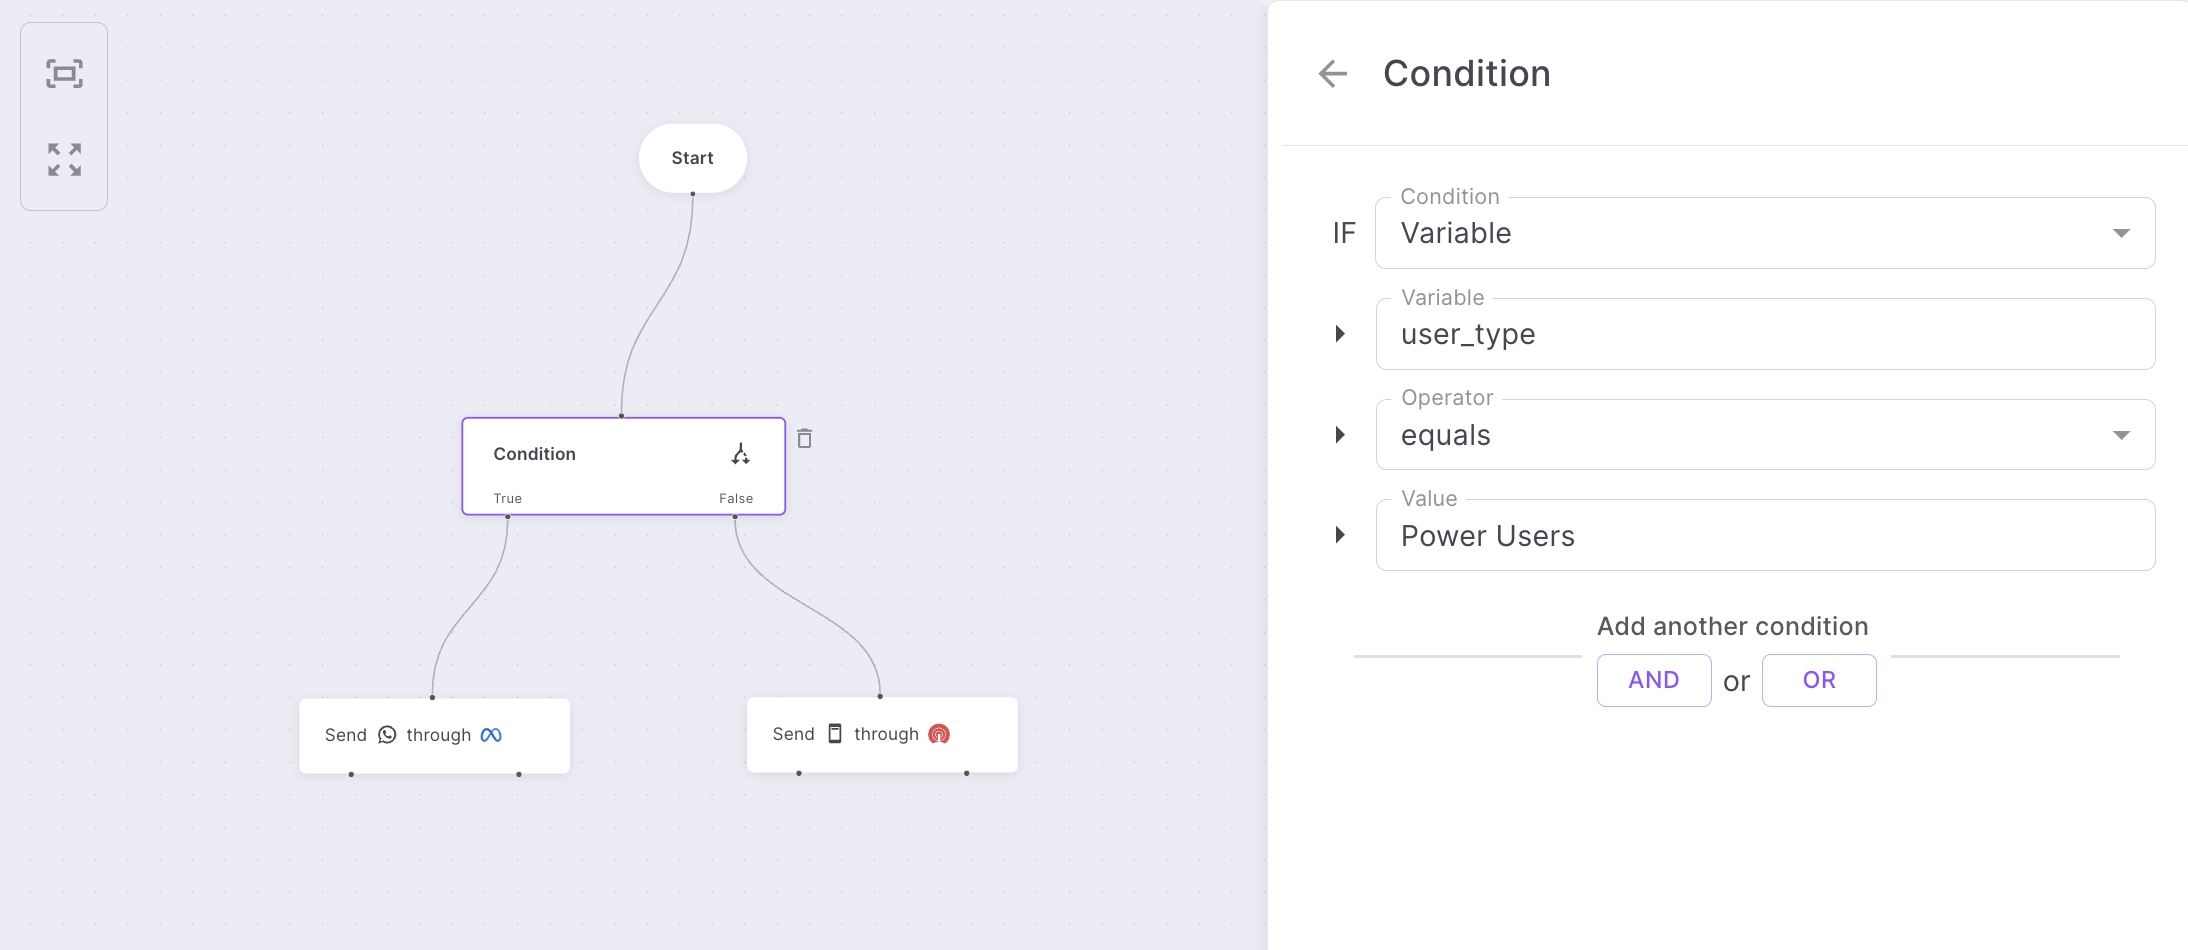
- Condition: Condition allows you to execute specific actions based on the set conditions. For example, based on user type, if you want to decide the channel, you can do it by using conditions. If the user type is Power User, then send WhatsApp else send SMS. This can be done as shown below.
-
Wait for: Allows you to add a delay to the route, so that you can create a stacked notification plan, without bombarding your end users across all channels. Under this, we have a few options:
- Enter Time: Enter the count of time here.
- Unit: Choose the unit of time for the delay.
You can only enter values upto 24 hours, for a delay.
This means you can :
- Enter upto 1440 minutes
- Enter upto 86400 seconds
Understanding how Omnichannel Routing works
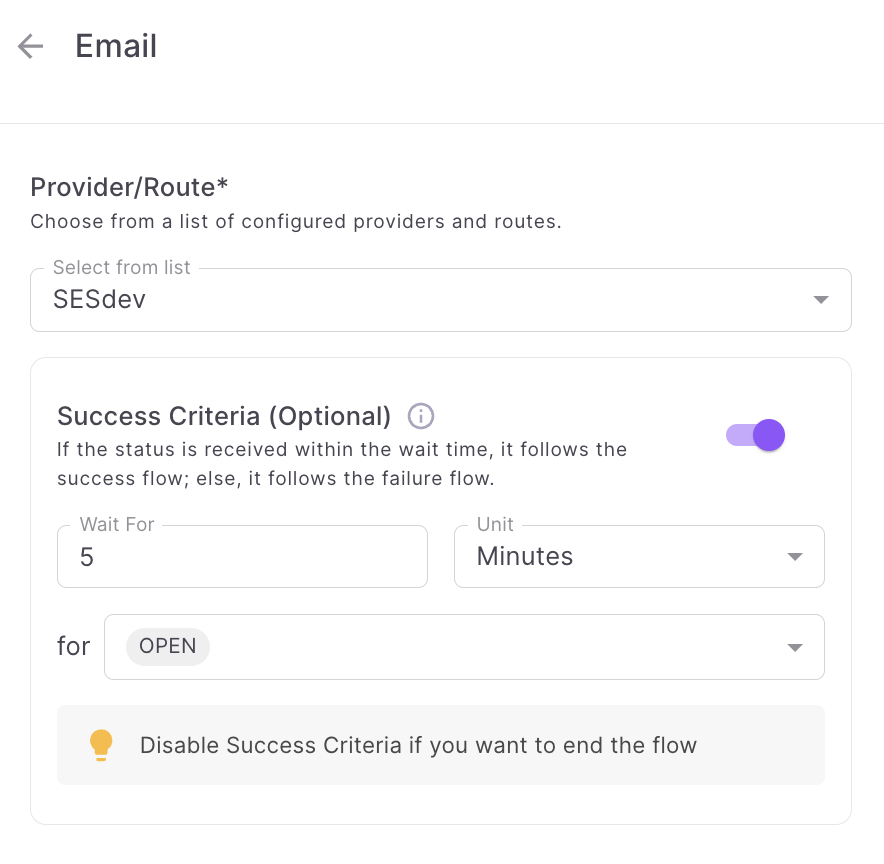
For example, you have 3 channels - WhatsApp, Email and Push. The objective of this OmniChannel Route is to make sure your user 'Read' the notification you sent.
-
Initially send an WhatsApp notification to a customer and wait for 5 minutes till its is Read. Based on this Success Criteria, the next flow will be triggered.
-
If the WhatsApp is successfully Read, this means you have achieved your objective and the flow will end. If the WhatsApp is not Read, then send Email and wait for 5 minutes till its Opened (In email, there is only Open status, not Read).
-
If the Email is successfully Read, this means you have achieved your objective and the flow will end. If the Email is not Read, then send Push.
On creating this on Fyno's Omnichannel Route builder, it would look like this.

Proximity Matters!
Our workflow builders are so receptive, we have proximity connectors that automatically connects to the component closest to it, which has a free connection node!
Updated 9 months ago