iOS specific configuration
To enable push notifications for iOS, you need to configure specific capabilities and handle the necessary app delegate code. Let's walk through the steps.
Step 0: Update iOS pods
- Run
pod installin the ios folder of your flutter application to install/update the pod dependencies.
Step 1: Add capabilities in iOS application
- Open your Flutter project in Xcode.
- Inside the Targets section, select your app target, and go to Signing & Capabilities.
- Click on + Capability and add Push Notifications and Background Modes capabilities.
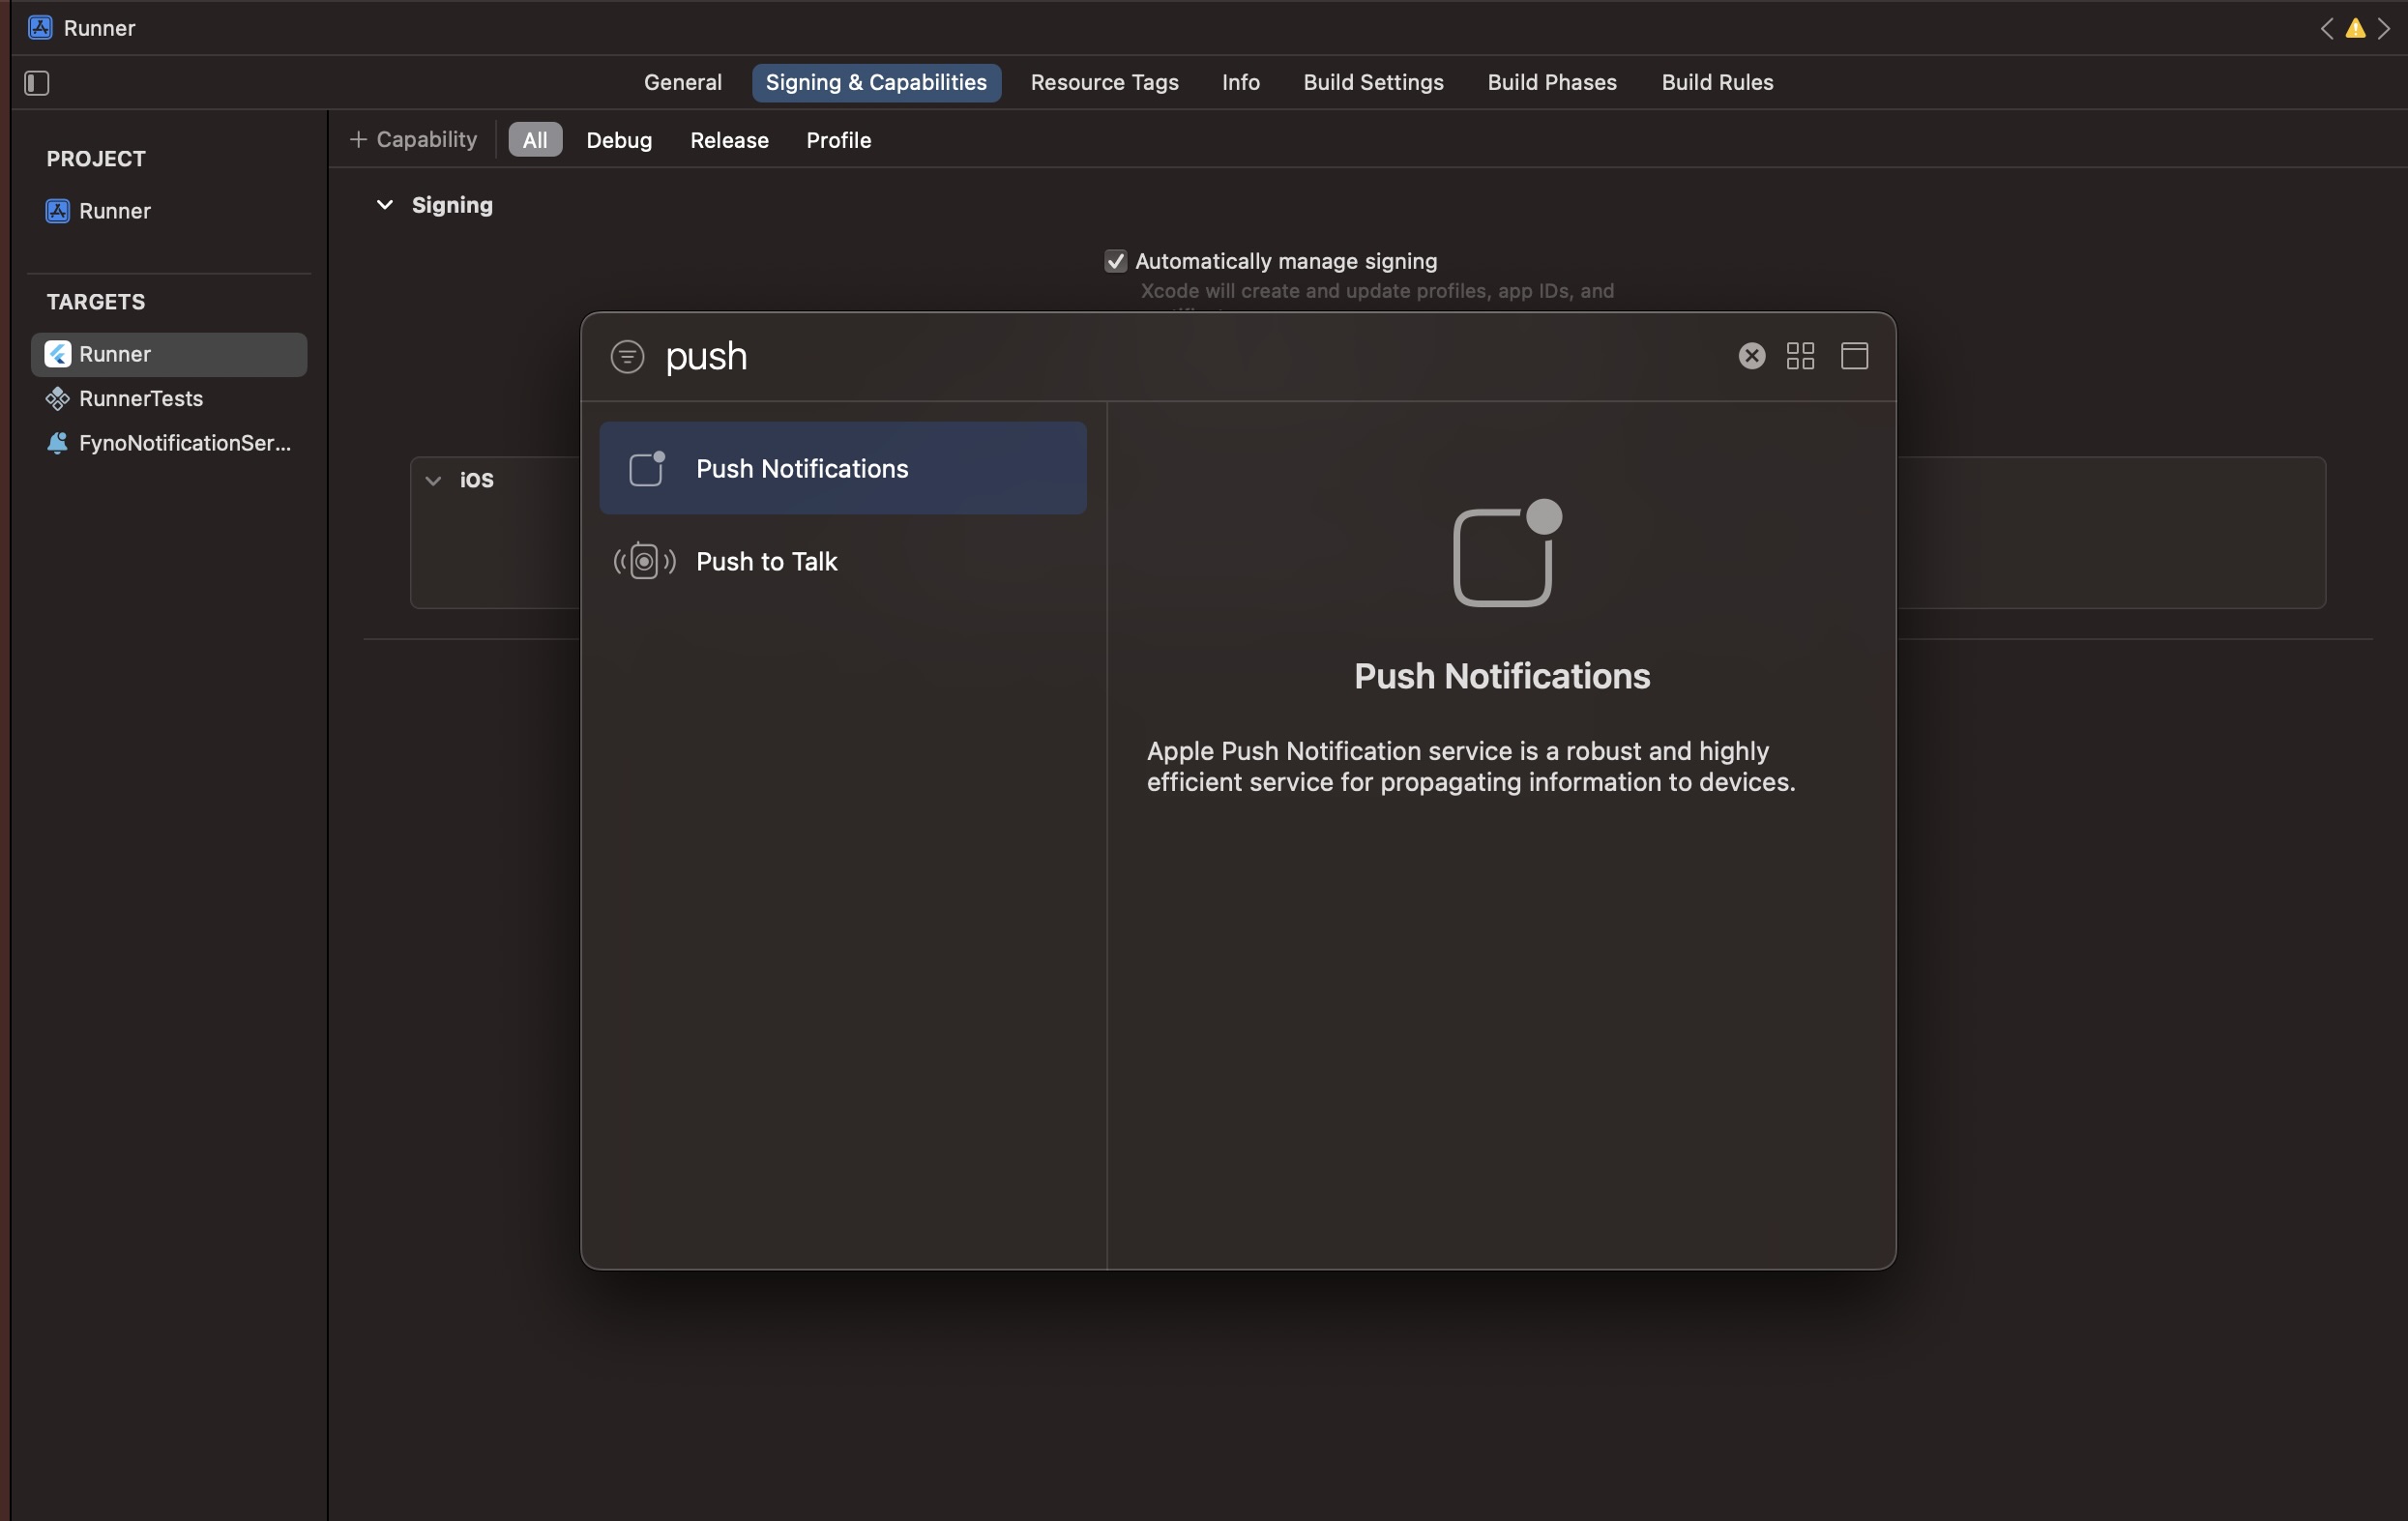
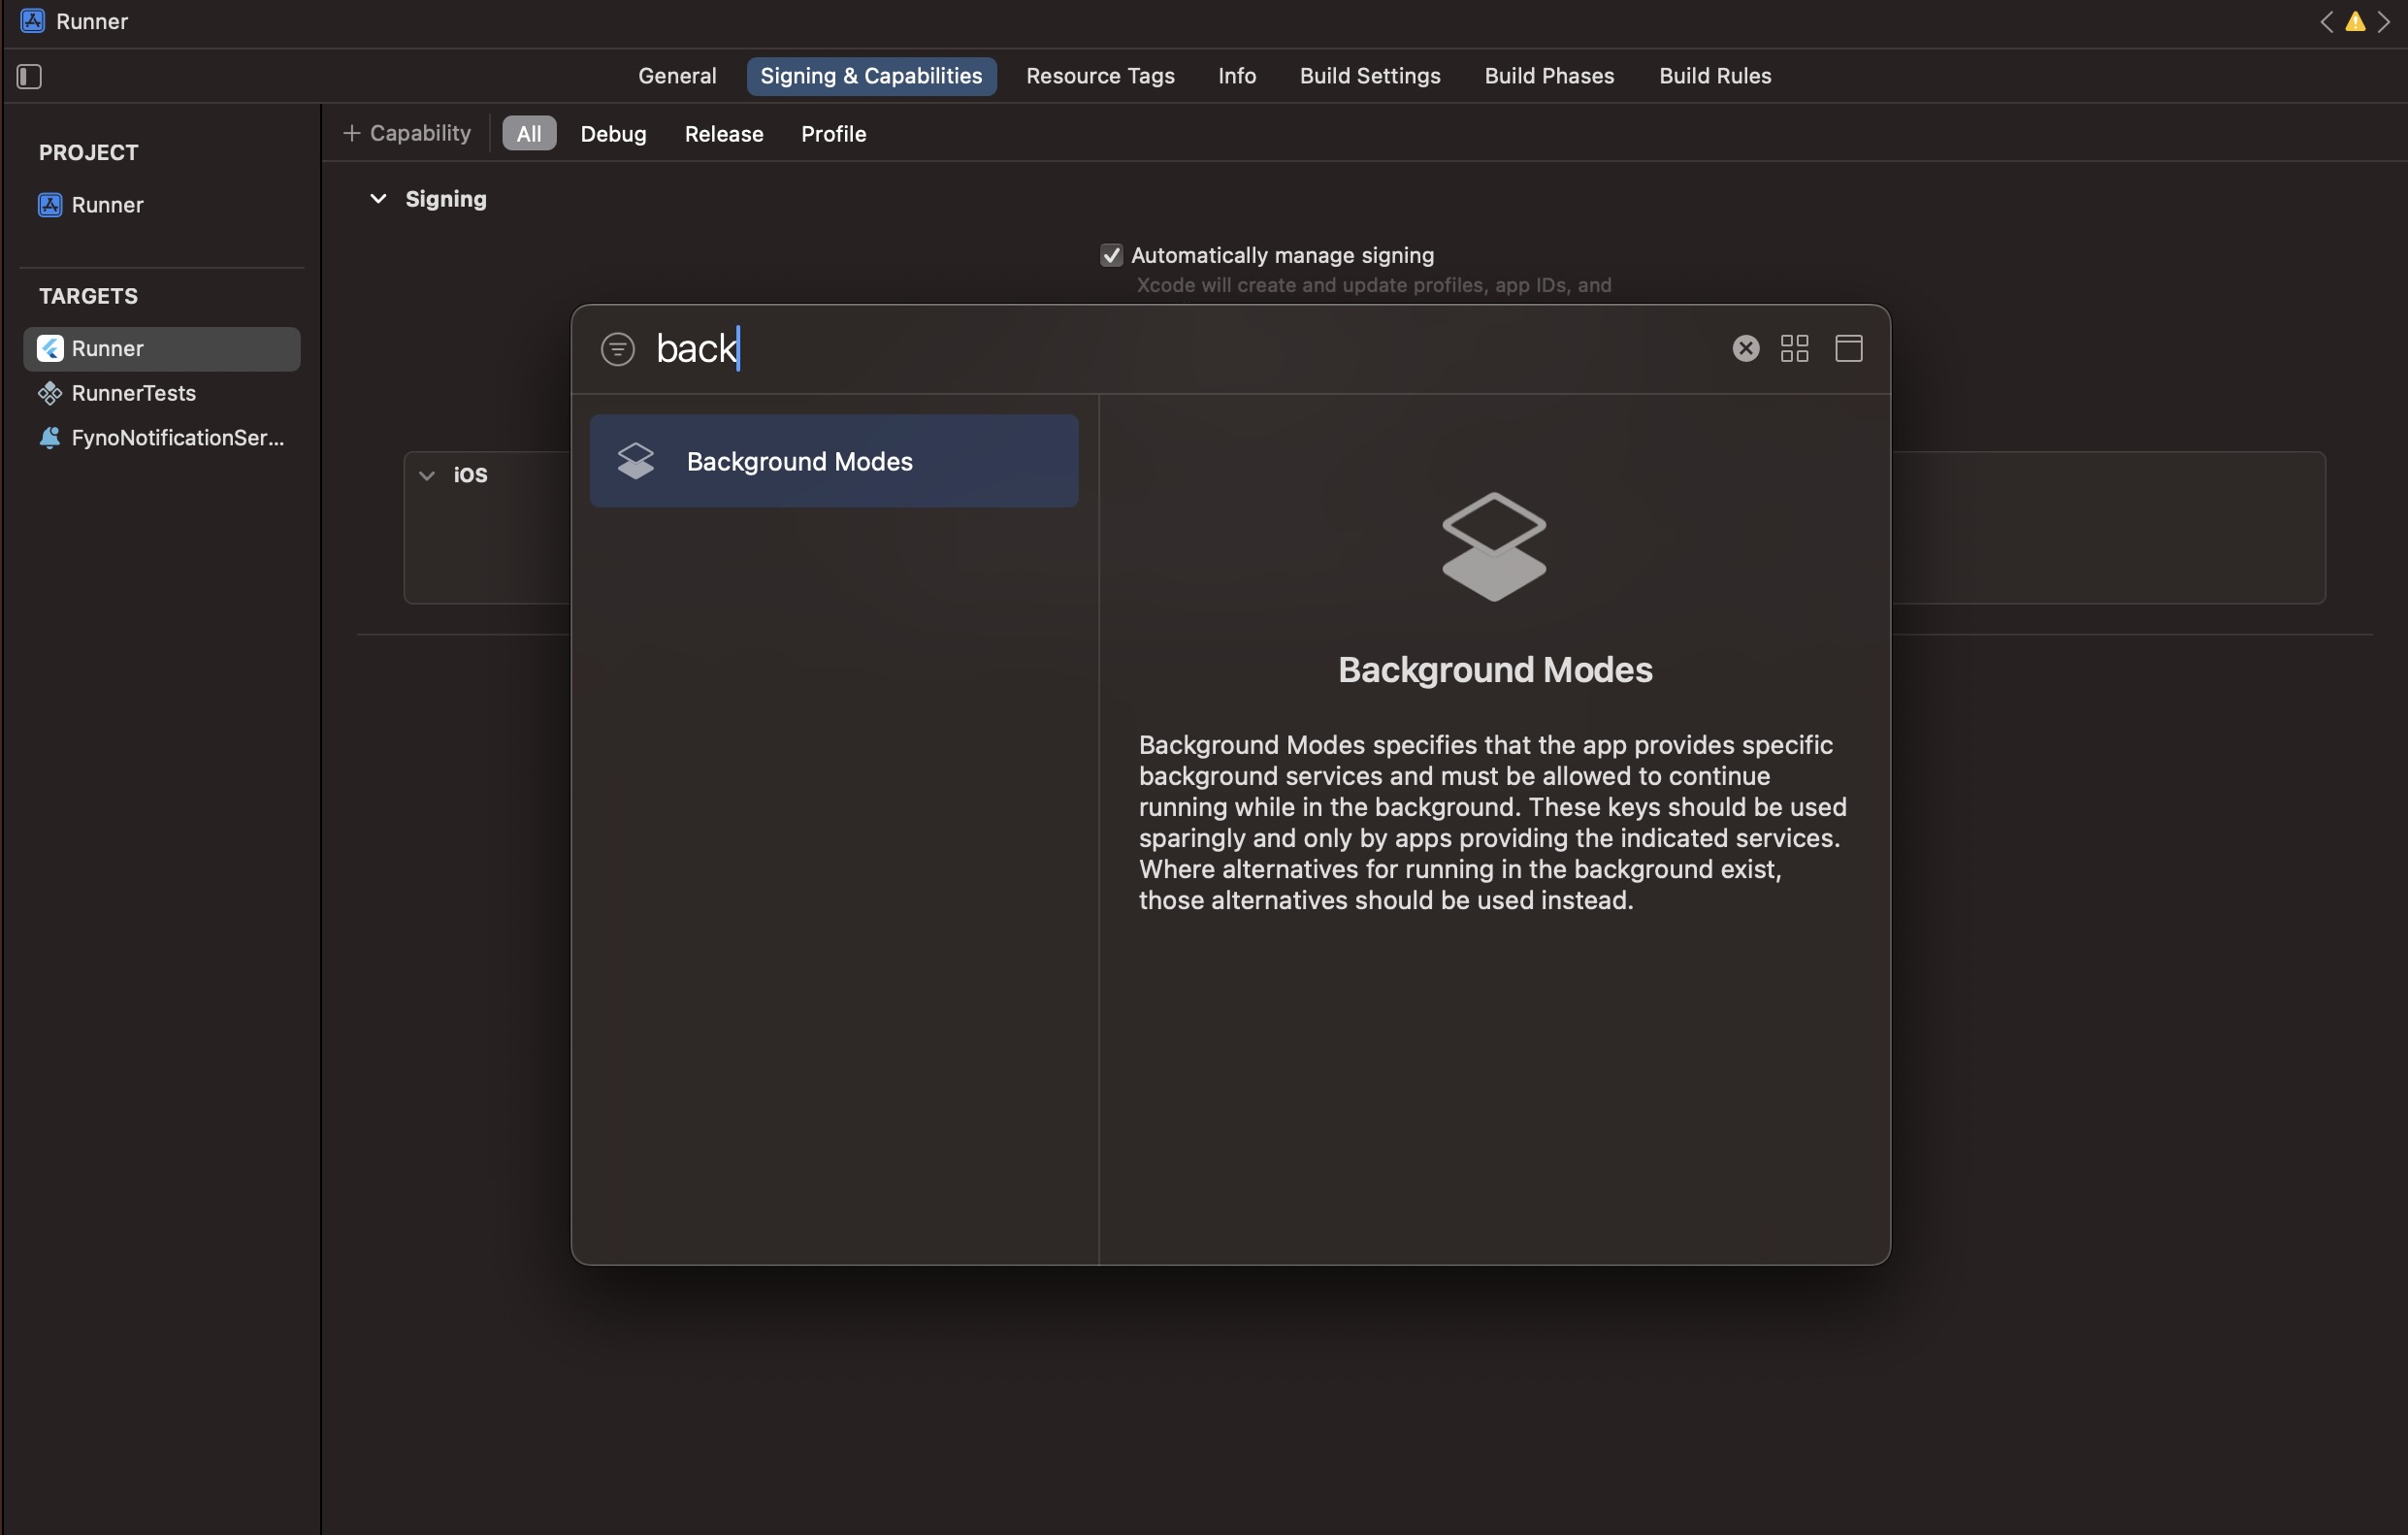
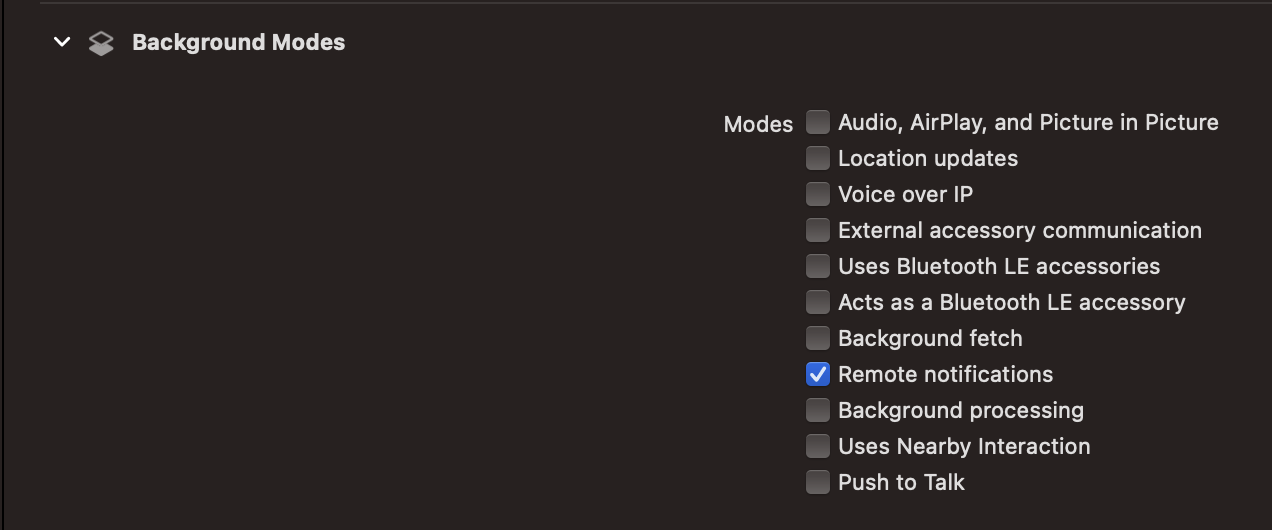
- In Background Modes, select the Remote Notifications option. This is required to receive background push notifications. Learn more about background notifications here.
Step 2: Register for push notification in AppDelegate.swift file
To handle push notifications in your iOS app, add the following code to AppDelegate.swift:
- Import the required packages:
import UIKit
import Flutter
import fyno_push_ios
- If you are using Firebase Cloud Messaging (FCM), add the Firebase imports:
import FirebaseCore
import FirebaseMessaging
- Extend
FlutterAppDelegateand implement the necessary methods:
@UIApplicationMain
@objc class AppDelegate: FlutterAppDelegate {
    let fynosdk = fyno.app

    override func application(
        _ application: UIApplication,
        didFinishLaunchingWithOptions launchOptions: [UIApplication.LaunchOptionsKey: Any]?
    ) -> Bool {
        GeneratedPluginRegistrant.register(with: self)

        UNUserNotificationCenter.current().delegate = fynosdk

        self.fynosdk.registerForRemoteNotifications()

        fynosdk.requestNotificationAuthorization { _ in }

        FirebaseApp.configure() // Optional: Configure Firebase if FCM is used

        return super.application(application, didFinishLaunchingWithOptions: launchOptions)
    }

    override func application(_ application: UIApplication, didFailToRegisterForRemoteNotificationsWithError error: Error) {
        print("Failed to register for remote notifications: \(error.localizedDescription)")
    }

    override func application(_ application: UIApplication, didRegisterForRemoteNotificationsWithDeviceToken deviceToken: Data) {
        fynosdk.setdeviceToken(deviceToken: deviceToken)

      	Messaging.messaging().apnsToken = deviceToken // Optional: Set APNs token for FCM
    }
}
Step 3: Add a Notification Service Extension
To ensure rich push notifications and proper handling of incoming messages, add a Notification Service Extension to your iOS project:
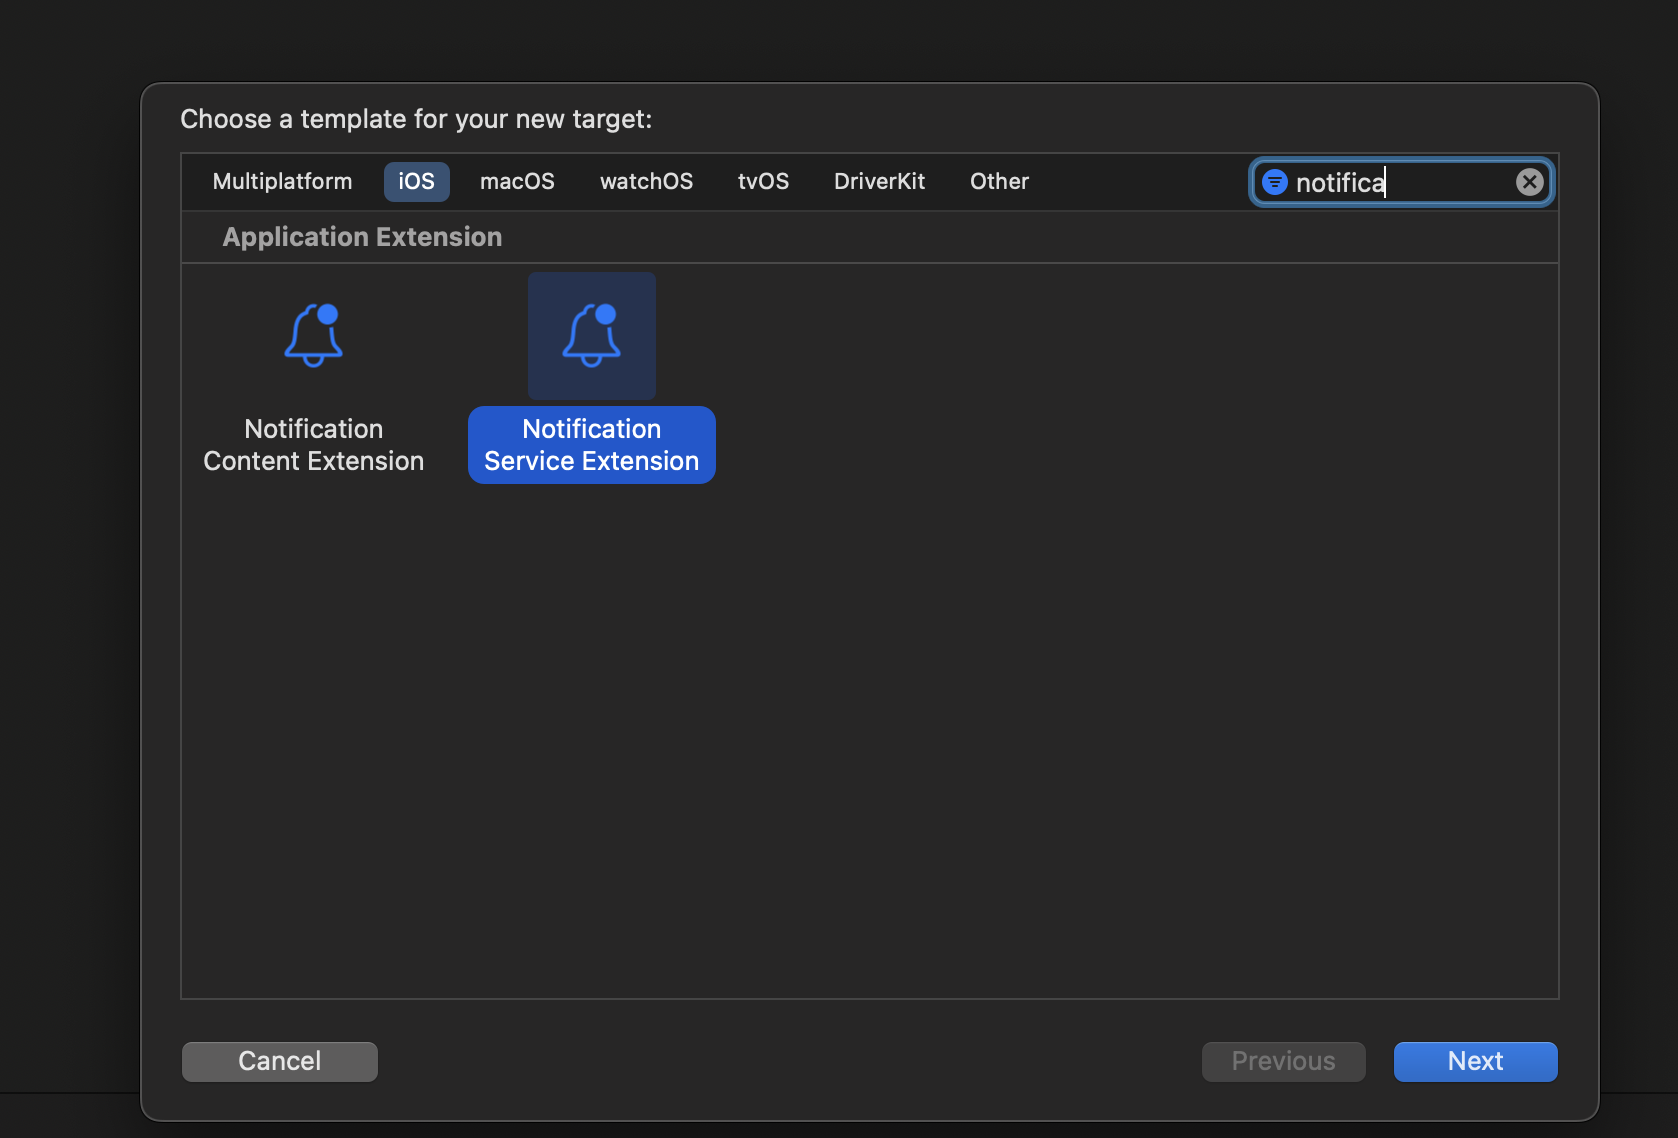
- In Xcode go to File > New > Target.
- Select
Notification Service Extensionfrom the template list. - Provide a product name, select your development team, choose Swift as the language, and click Finish.
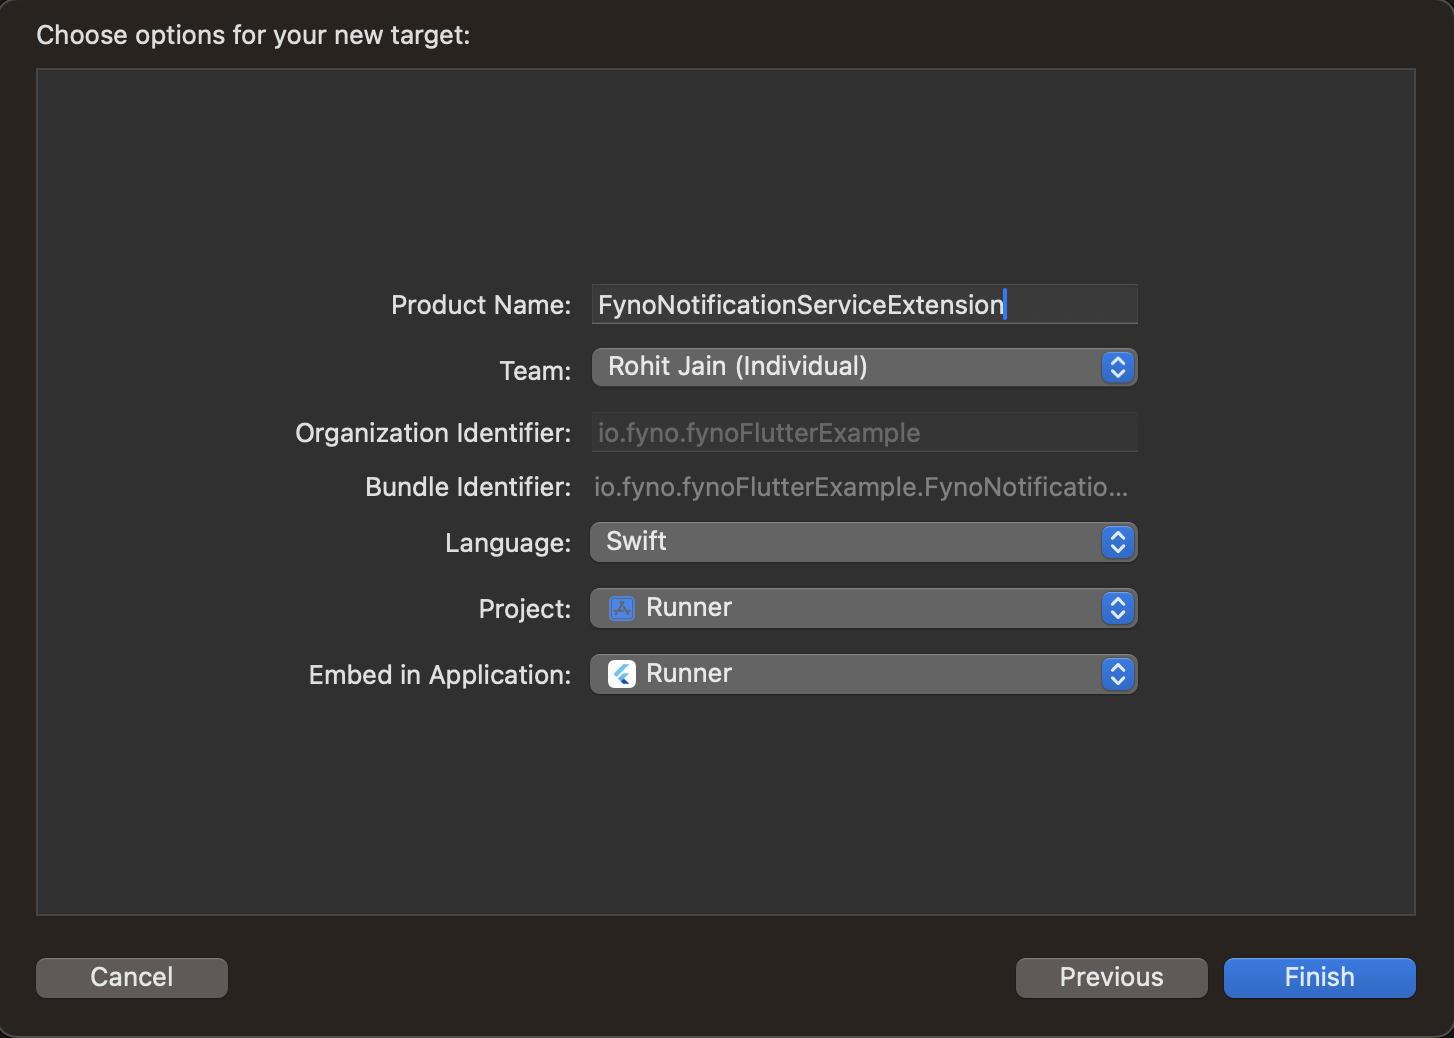
- Replace the contents of the generated
NotificationService.swiftfile with the following code:
import UserNotifications
import UIKit
import fyno

class NotificationService: UNNotificationServiceExtension {
    var contentHandler: ((UNNotificationContent) -> Void)?
    var bestAttemptContent: UNMutableNotificationContent?

    override func didReceive(_ request: UNNotificationRequest, withContentHandler contentHandler: @escaping (UNNotificationContent) -> Void) {
        fyno.app.handleDidReceive(request, withContentHandler: contentHandler)
    }

    override func serviceExtensionTimeWillExpire() {
        if let contentHandler = contentHandler, let bestAttemptContent = bestAttemptContent {
            contentHandler(bestAttemptContent)
        }
    }
}
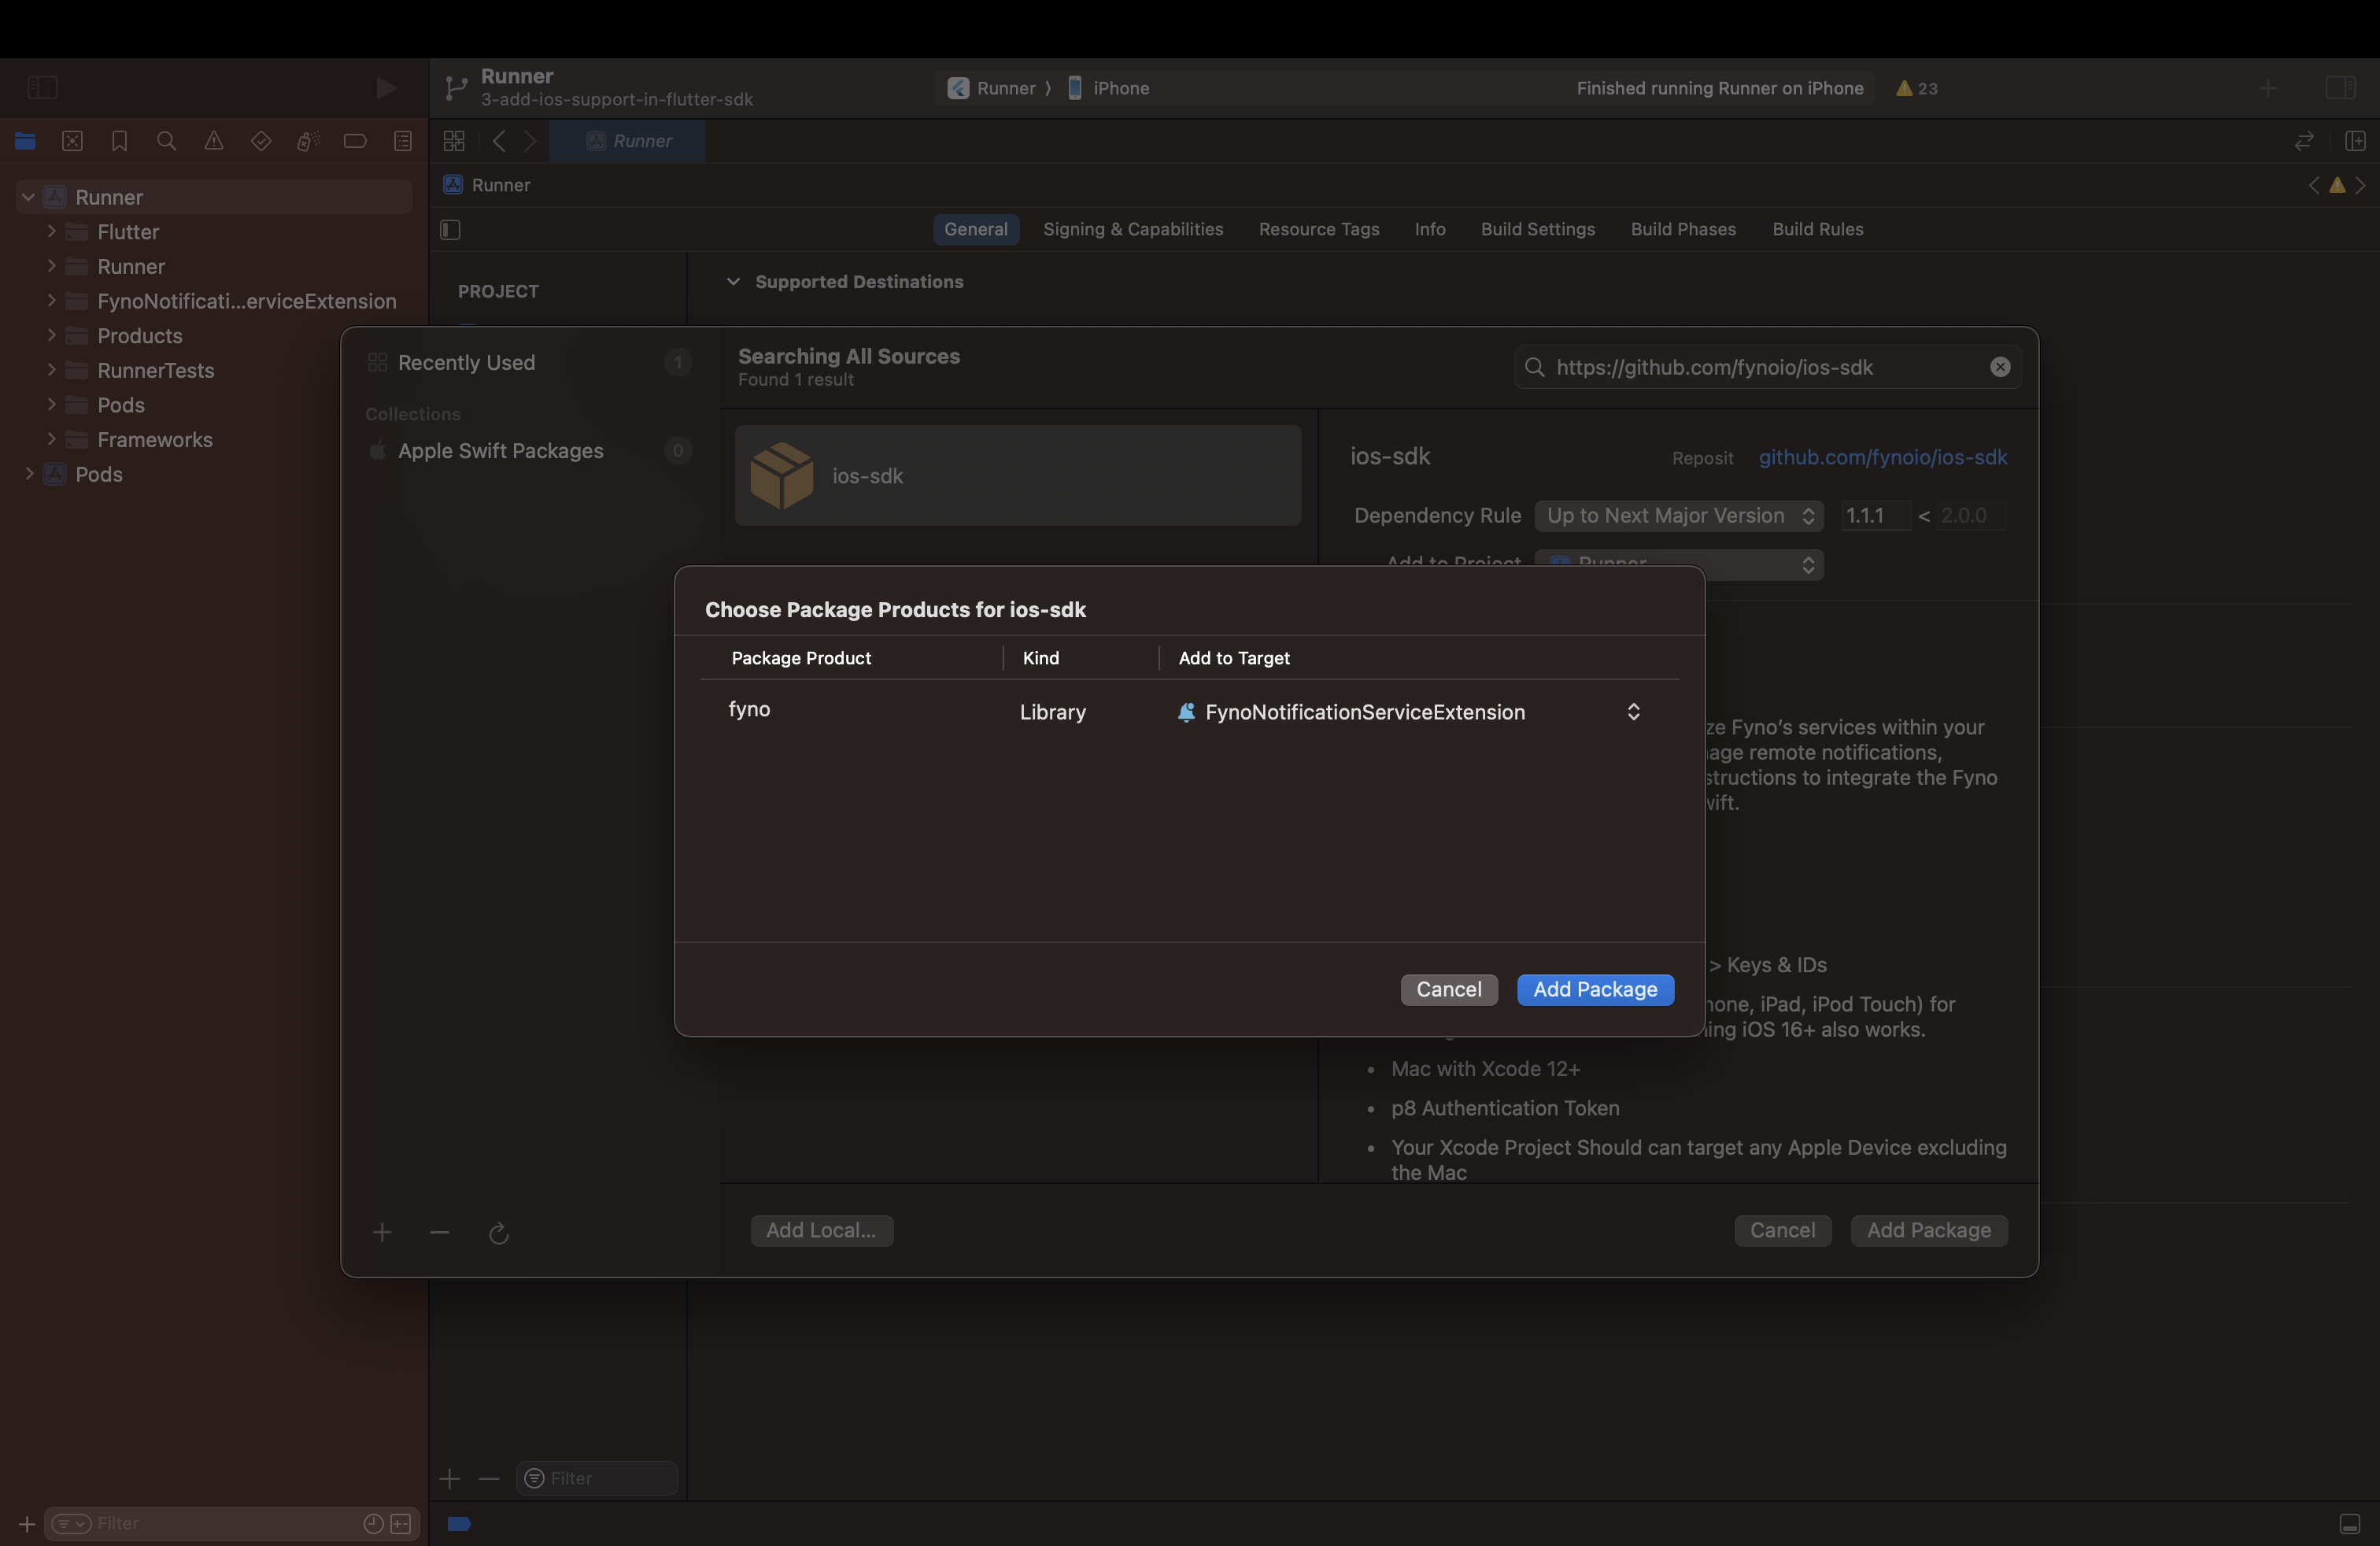
Step 4: Add Fyno SDK to the Notification Service Extension
To allow the Notification Service Extension to use the Fyno SDK, you need to import it:
- In Xcode, select your Notification Service Extension target.
- Under
Frameworks and Libraries, click on the + button.
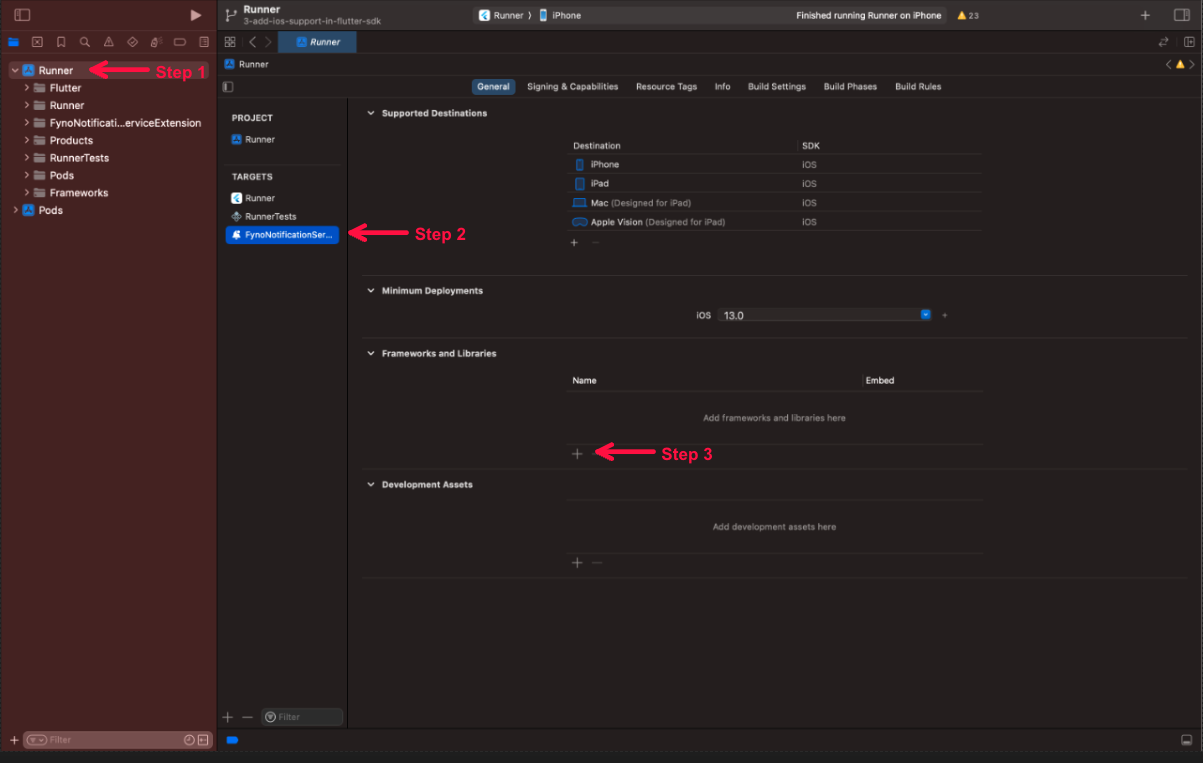
- Under
Add Other, click on theAdd Package Dependency.
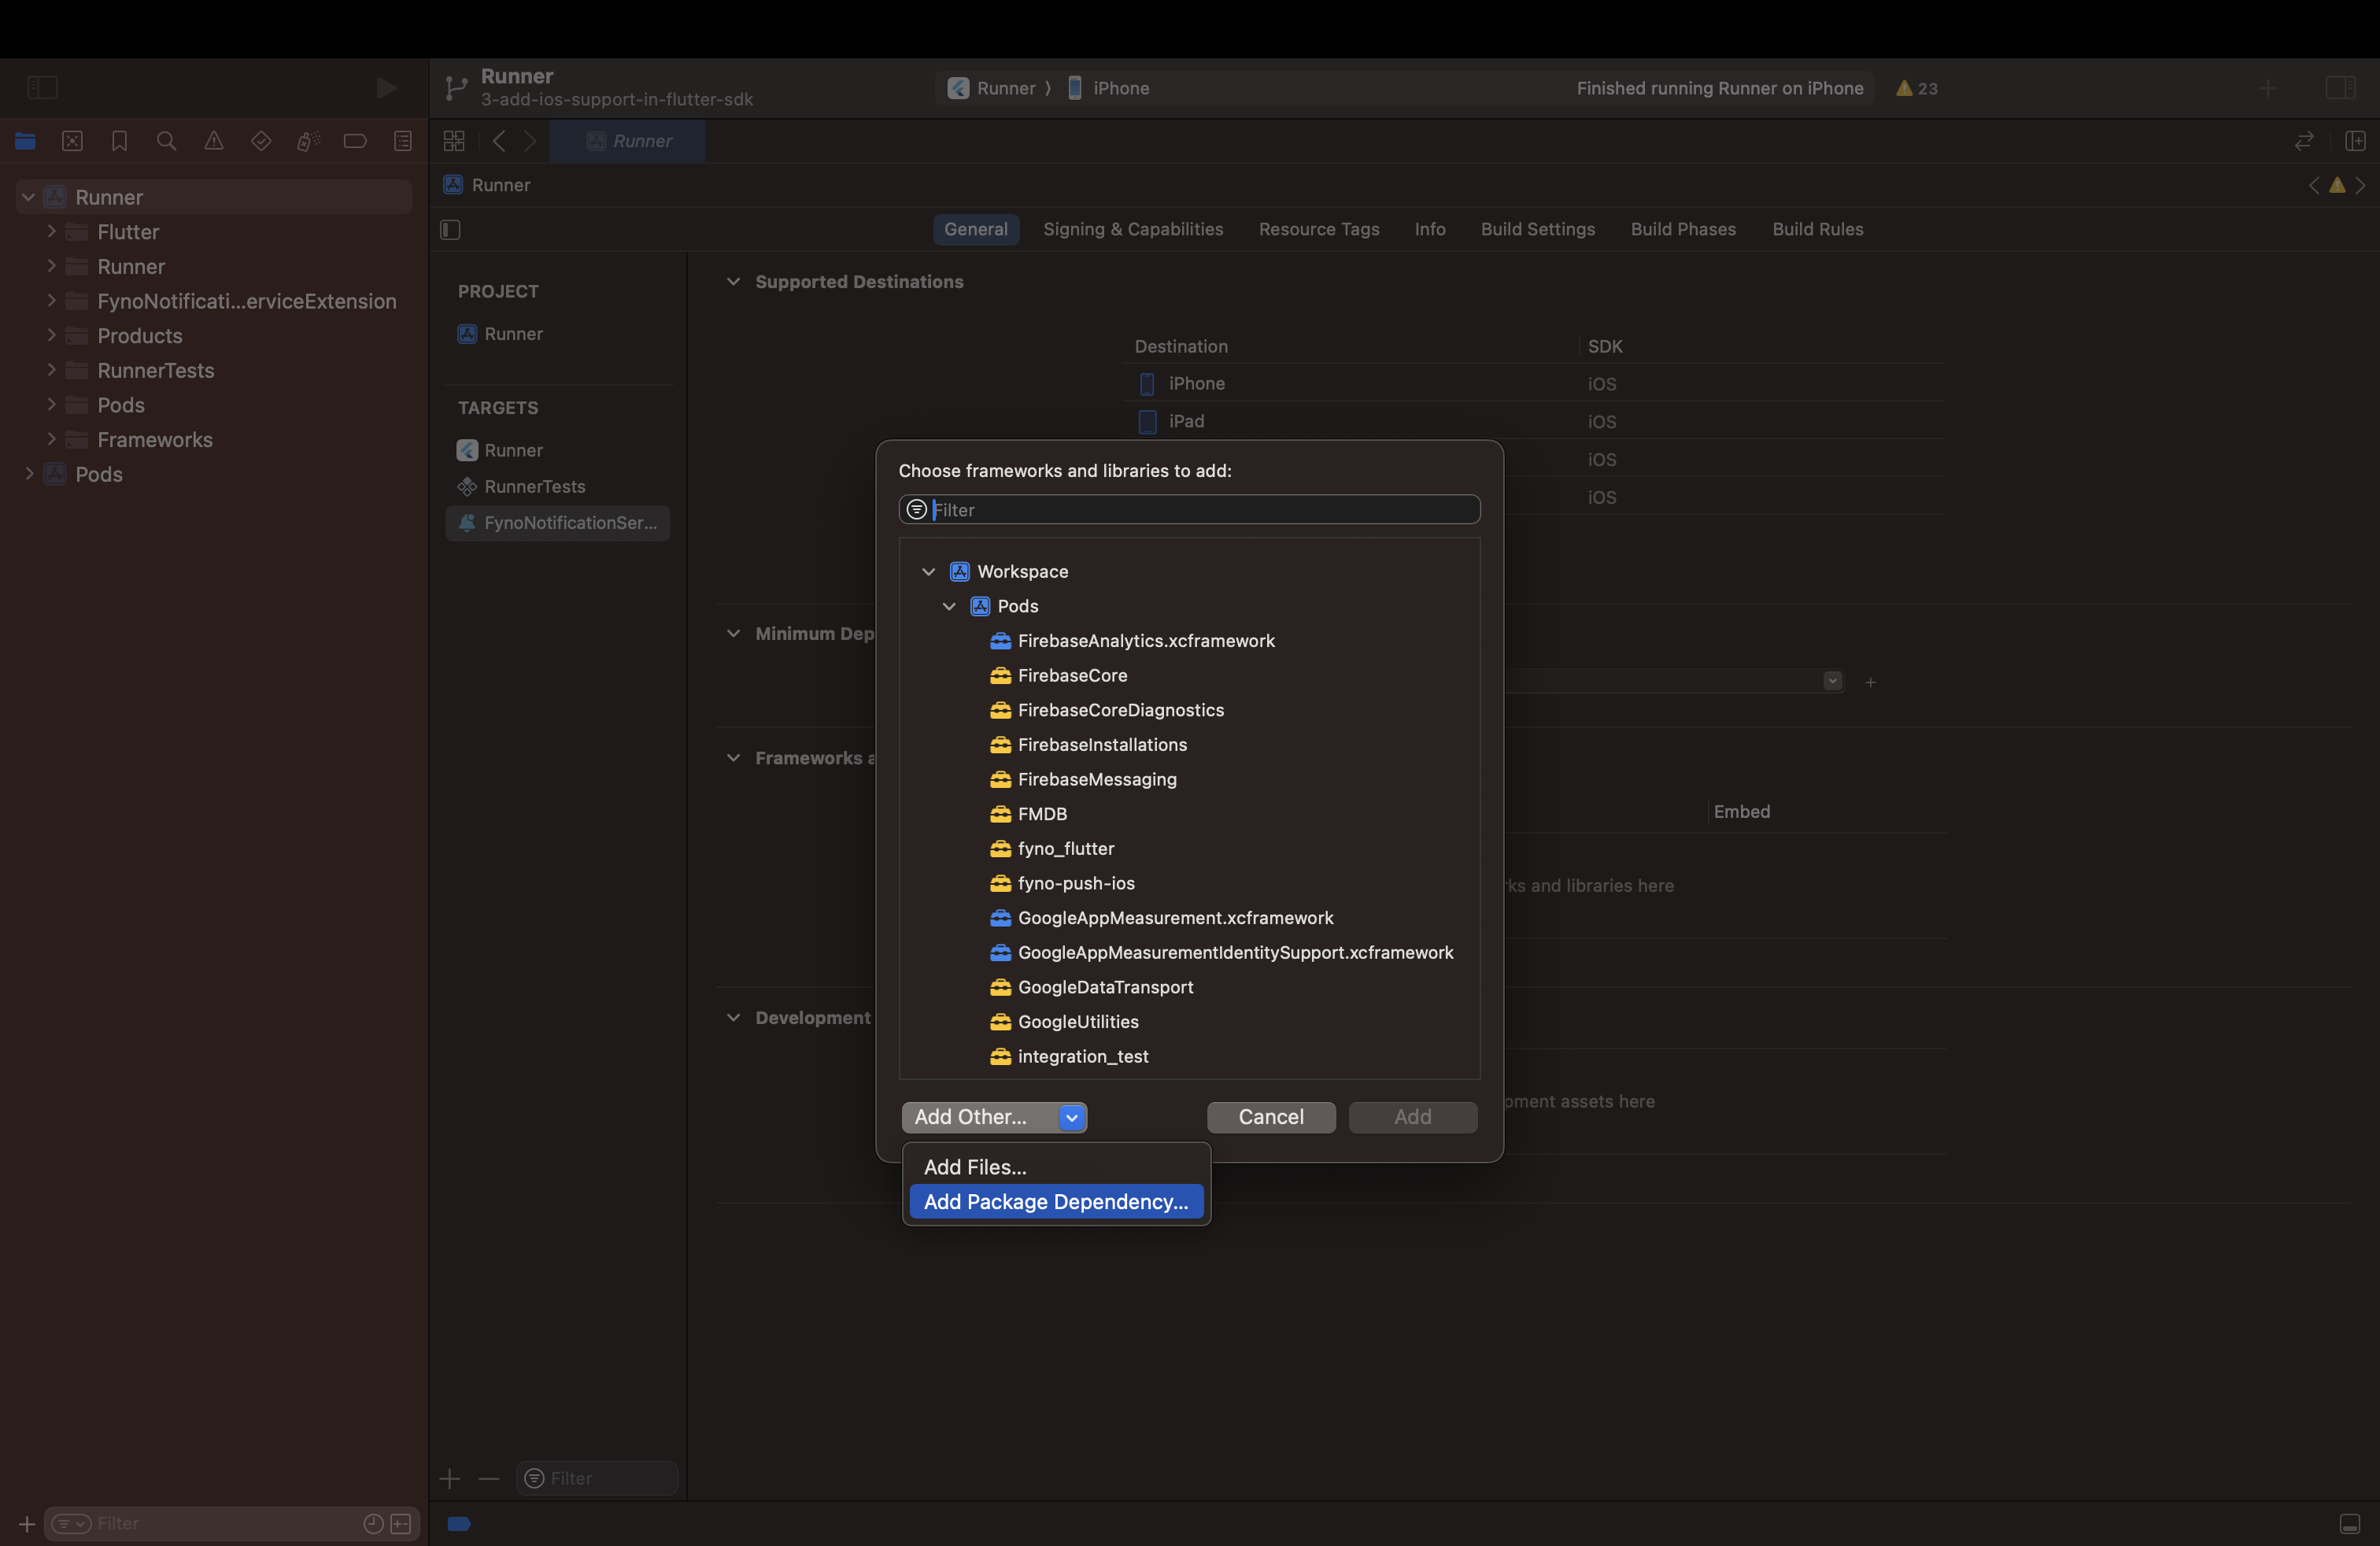
- Search for
https://github.com/fynoio/ios-sdkin the text box. - Select and add the
ios-sdkpackage.
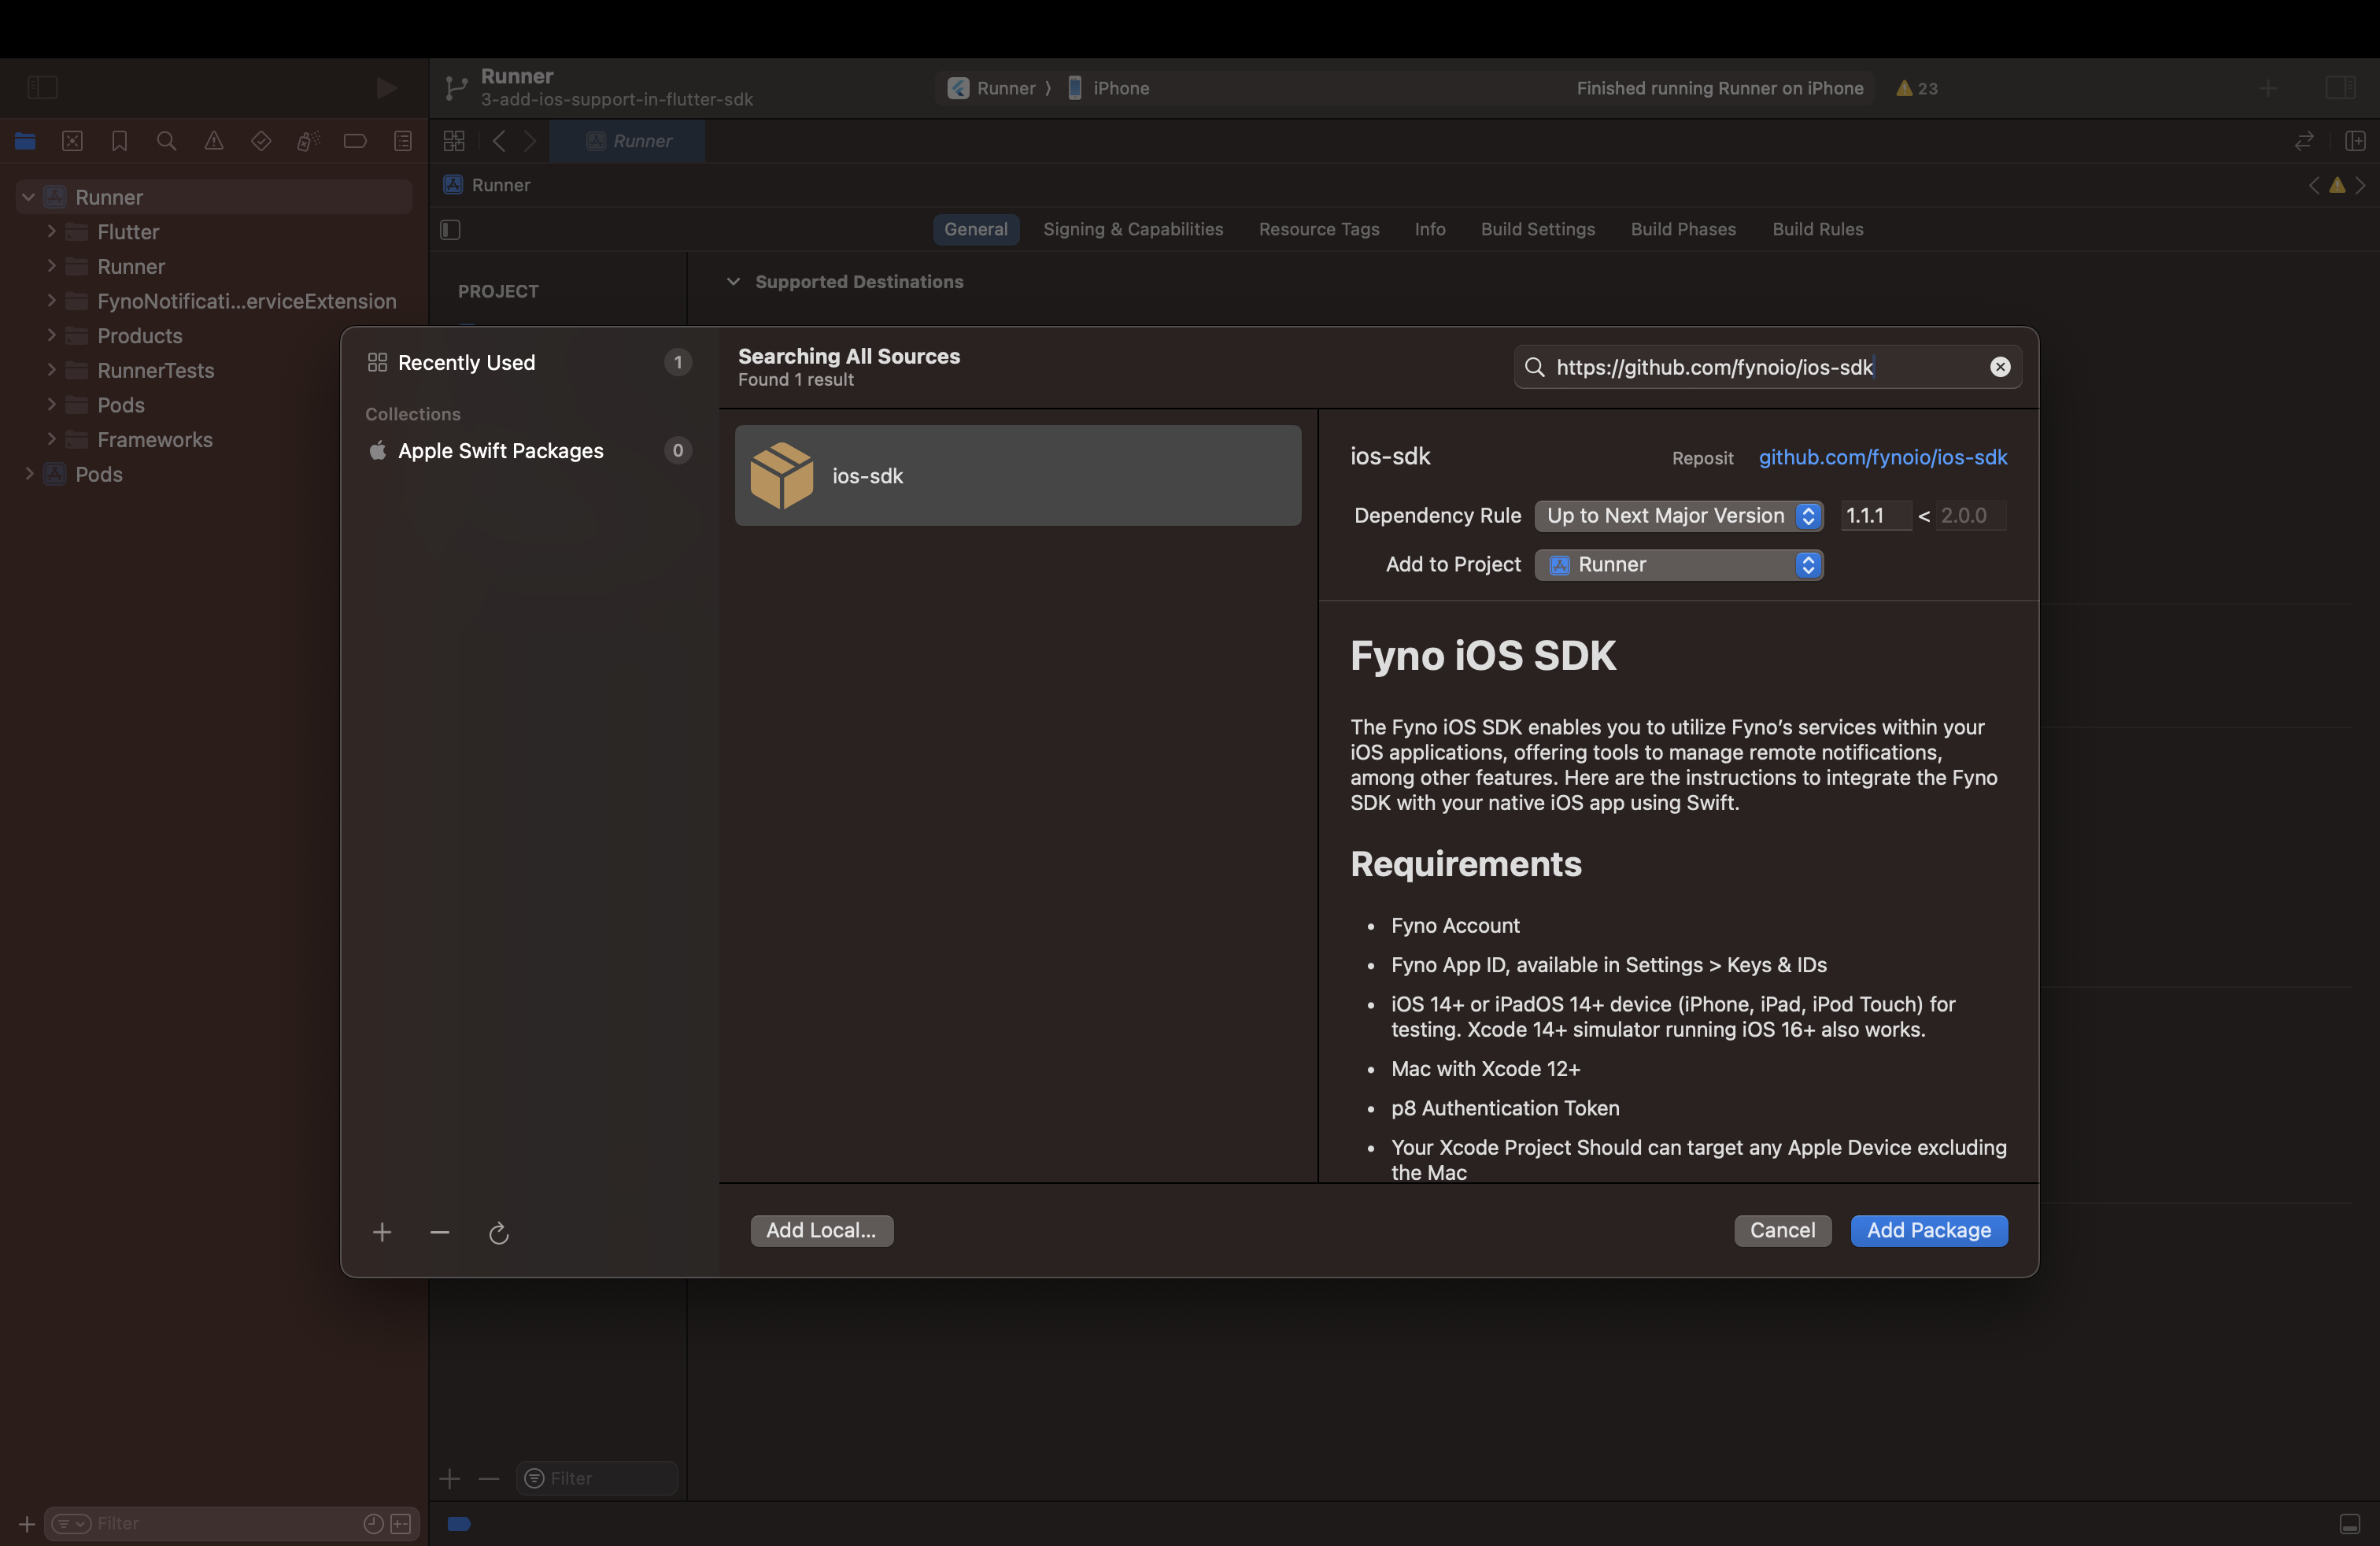
- Ensure the target is set to the Notification Service Extension you created, then click
Add Package.
You have successfully integrated Fyno's Flutter Push Notification SDK into your application. Go ahead and test the integration by sending a push notification using Notification Events
Updated 8 months ago
What’s Next
