WhatsApp Templates
WhatsApp templates are easy to use but can get complex, depending on what you are trying to achieve through the messages. Since Meta has covered all use cases, we have replicated the same, for ease of use, for you.
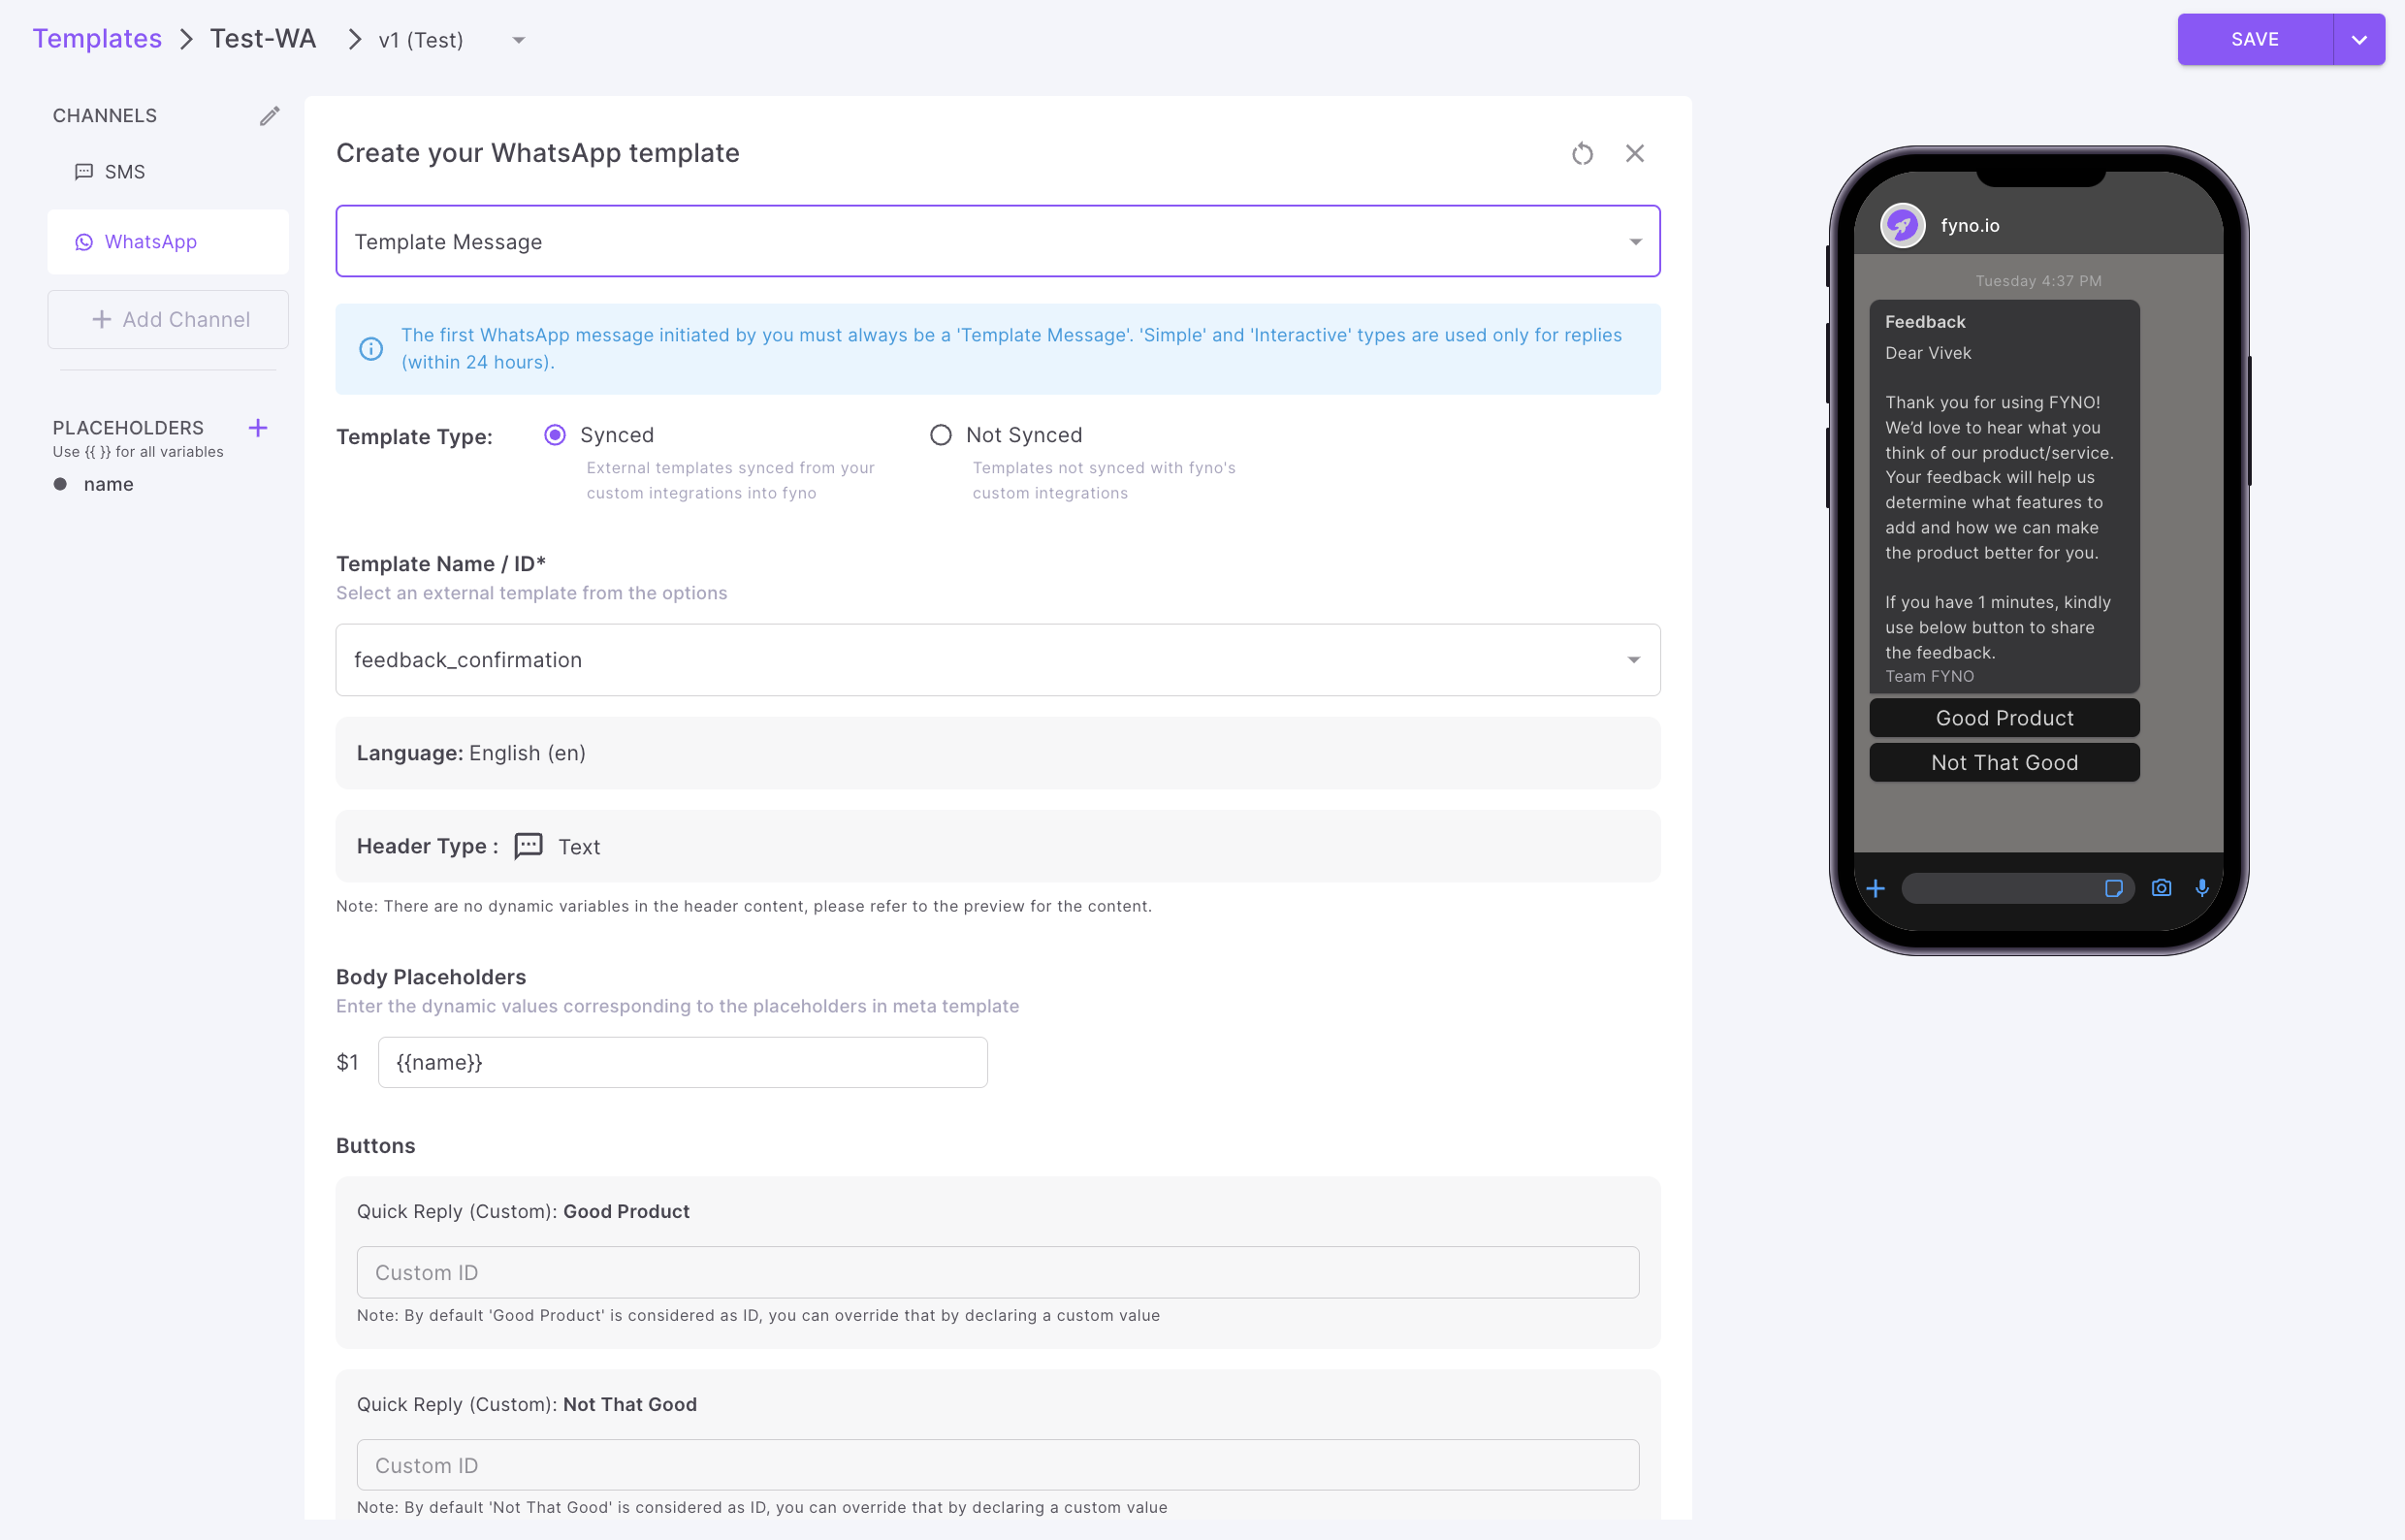
Clicking on WhatsApp, you can select one of the message types:
How to add dynamic content in template
You can add dynamic content in your templates using one of the 4 options mentioned below.
How to view change logs
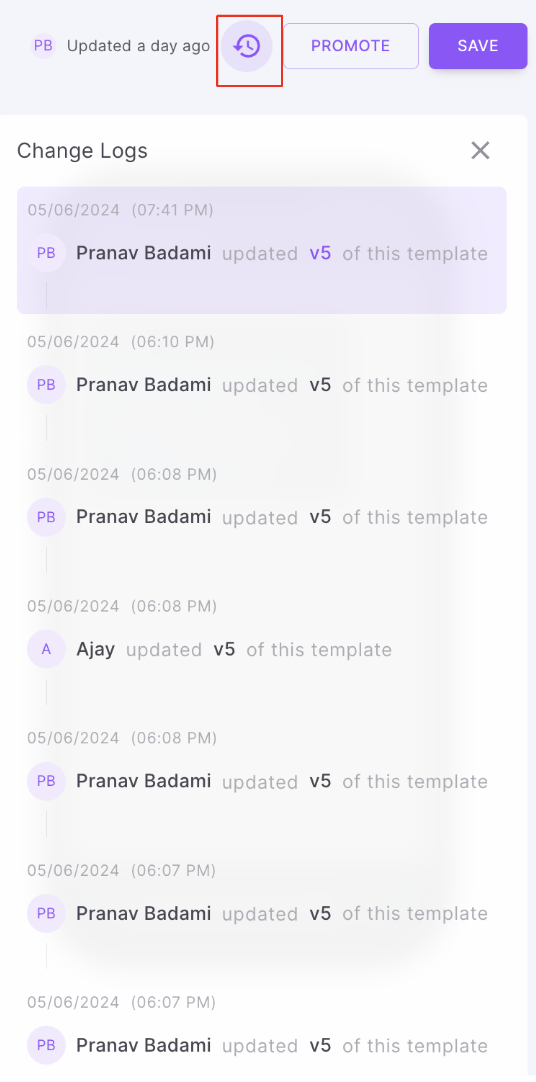
To view the history of all the modifications made to a template, you can utilize the change logs feature.
To do so, locate the history icon positioned at the top right corner of the template page, as shown in the image below, and click on it to view the change logs.
It shows the following details
- Who updated it
- Which version was updated
- At what date & time its updated.
Updated 4 days ago