Preferences
What is Preferences ?
Preferences make it easy for your users to manage their notification preferences they want and and select preferred channels for receiving notifications.
This can be accomplished by creating Subscription topics that users can toggle on and off, enabling them to specify the channels through which they prefer to receive each notification.
You can access Preferences from the Navigation menu. User -> Preferences.
The Preferences feature can be accessed only if your user details are managed through Fyno's User Profile.
How it works?
- Create a Section. Section are a group of subscription topics. For example, you can have a section such as Engagement, which will have all the subscription topics linked to Engagement like Resurrection, Activation, etc.
- Create a Subscription. Subscriptions are specific type of notification you send to users. For Example, Under Engagement section, you can have subscriptions like Resurrection, Activation etc.
- You can add channels to each subscription and select one the states - ON, OFF, REQUIRED.
- You can select any subscription while creating a notification event. The list of all notification events will be linked to a particular subscription.
- You can add users to Subscription and add the preference of users for any channel linked to the Subscription.
If a channel's state is set as "Required," notifications will be sent to that channel regardless of the user's preferences. It's recommended to reserve this state for critical use cases such as OTP.
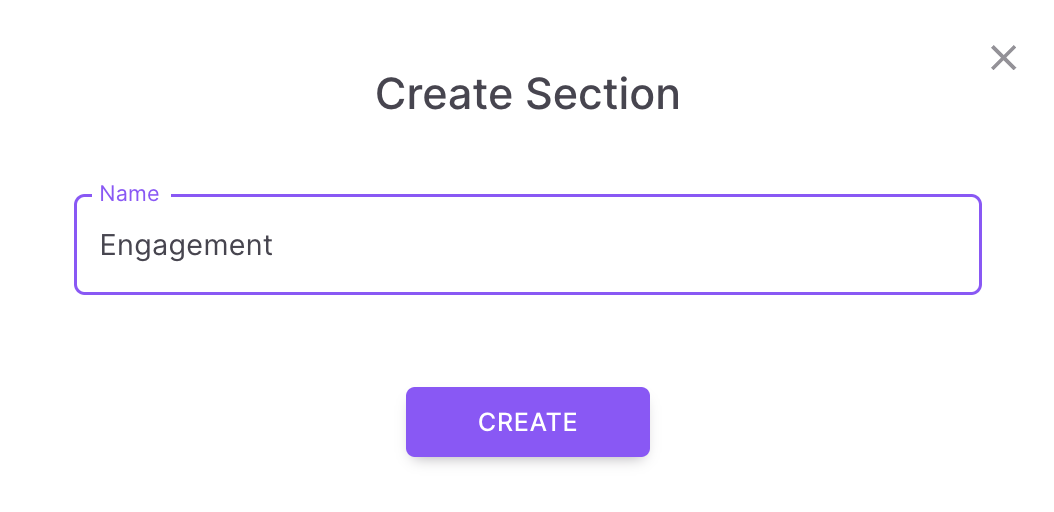
How to create a Section?
To create a new section, navigate to Users -> Preferences.
-
Click 'Create New Section' if you creating your first section or click 'Create+' if you have already sections.
-
Enter a appropriate name for the section you are creating.
-
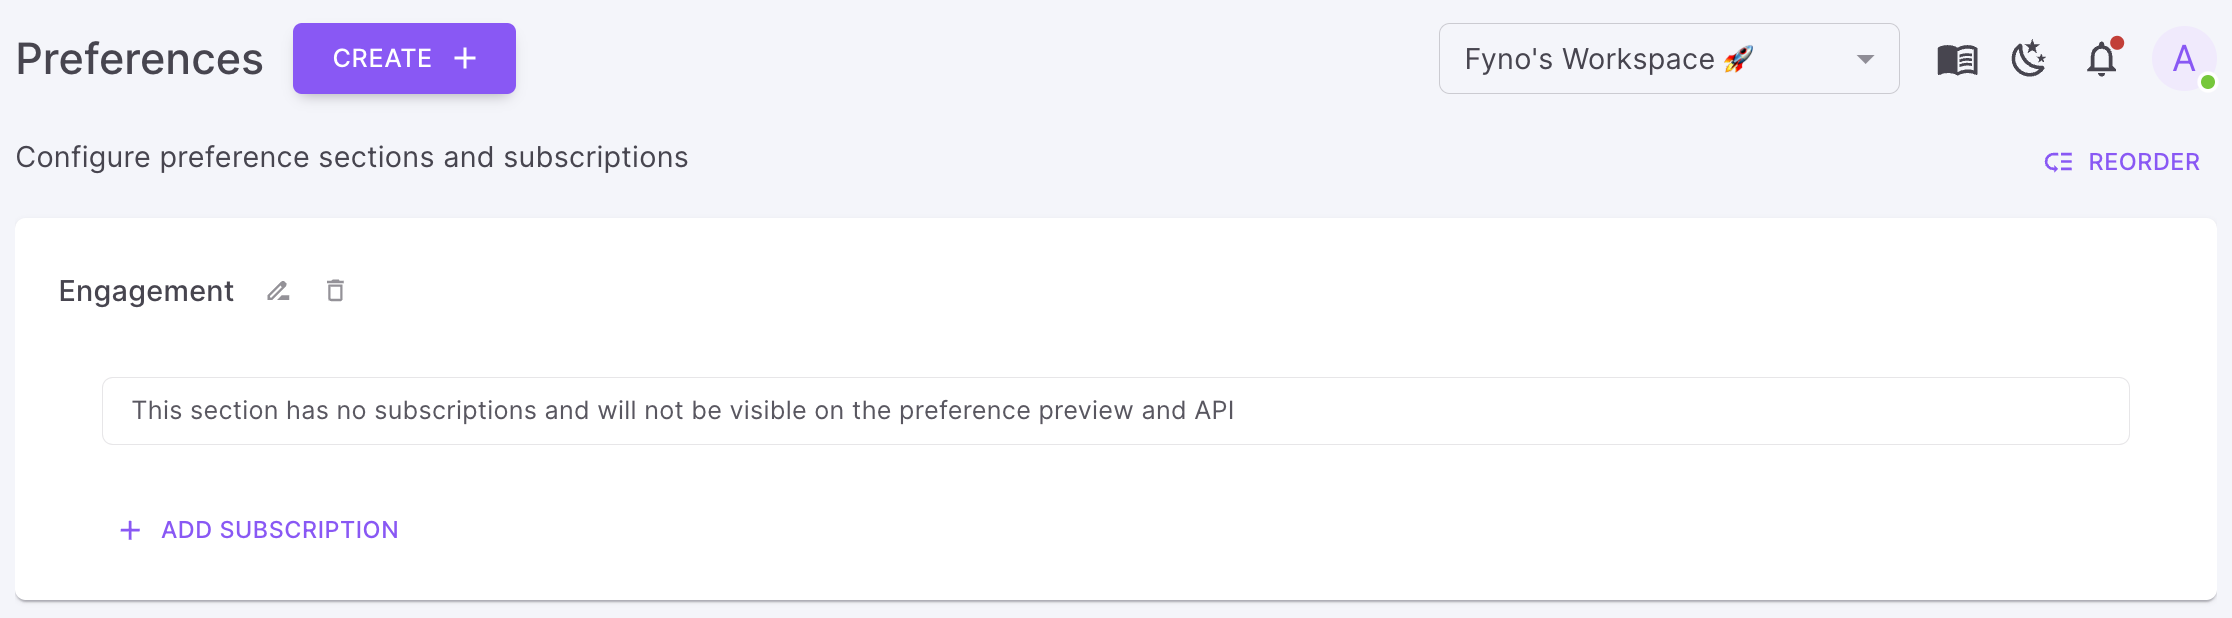
Once the section is created, it will look like as shown below.
How to create a Subscription?
-
Under the section, click 'Add Subscription'.
-
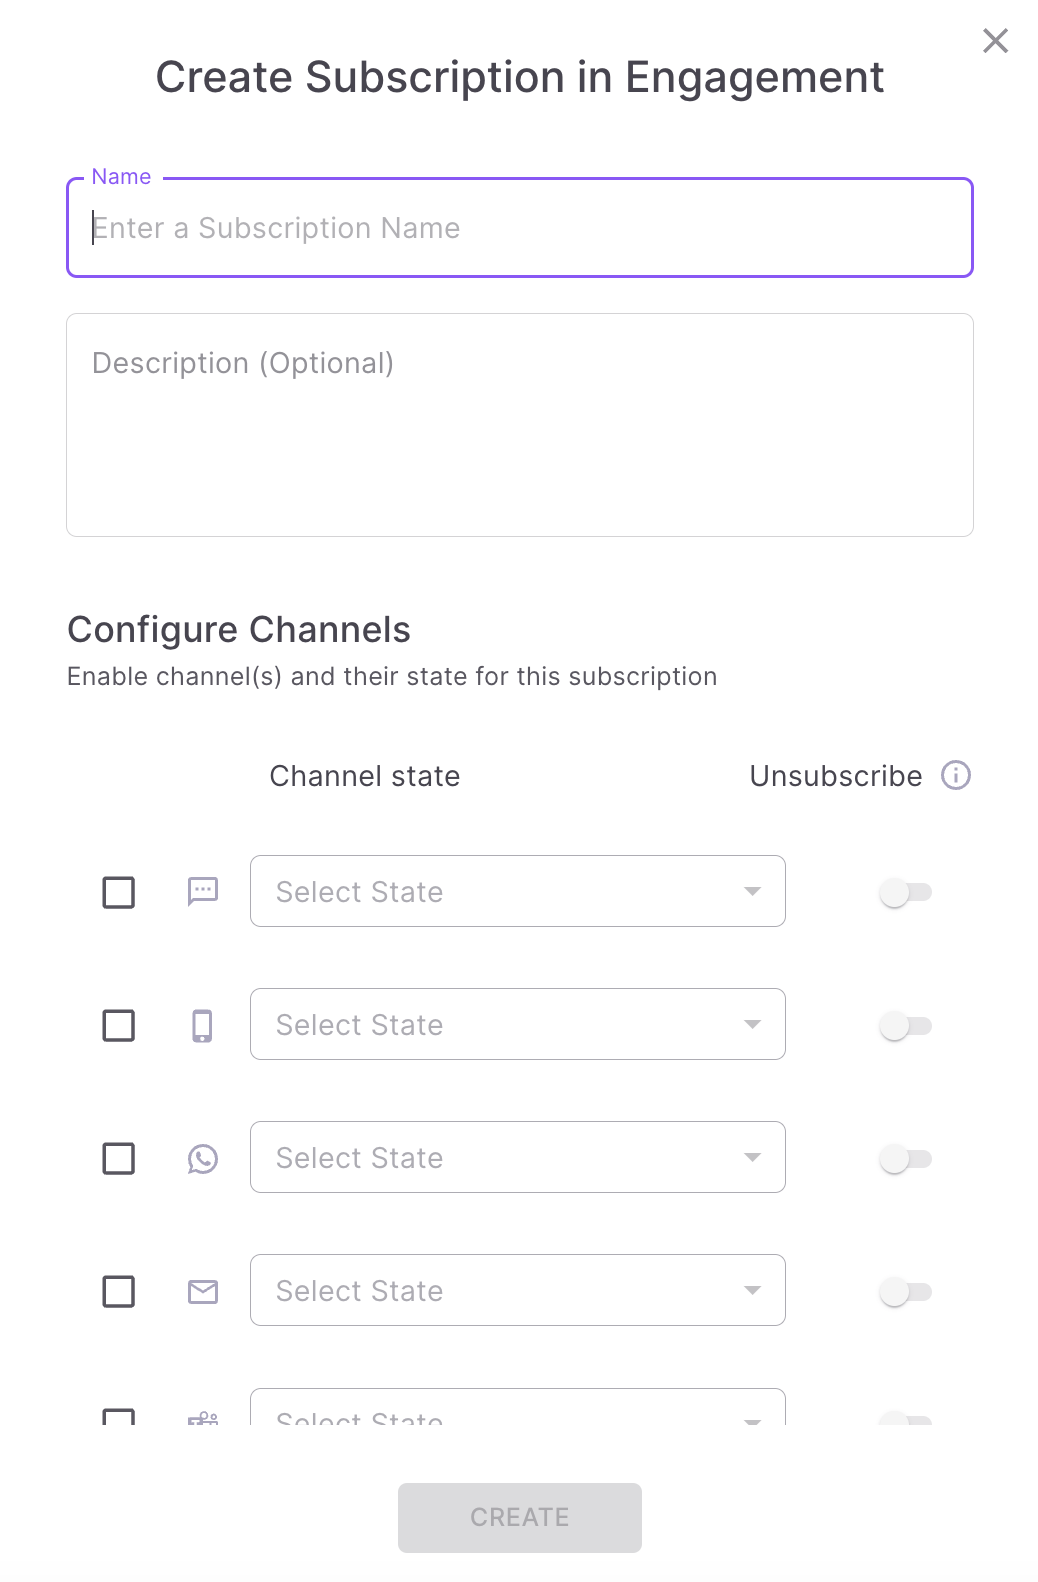
You will see the subscription creation popup as shown below.
-
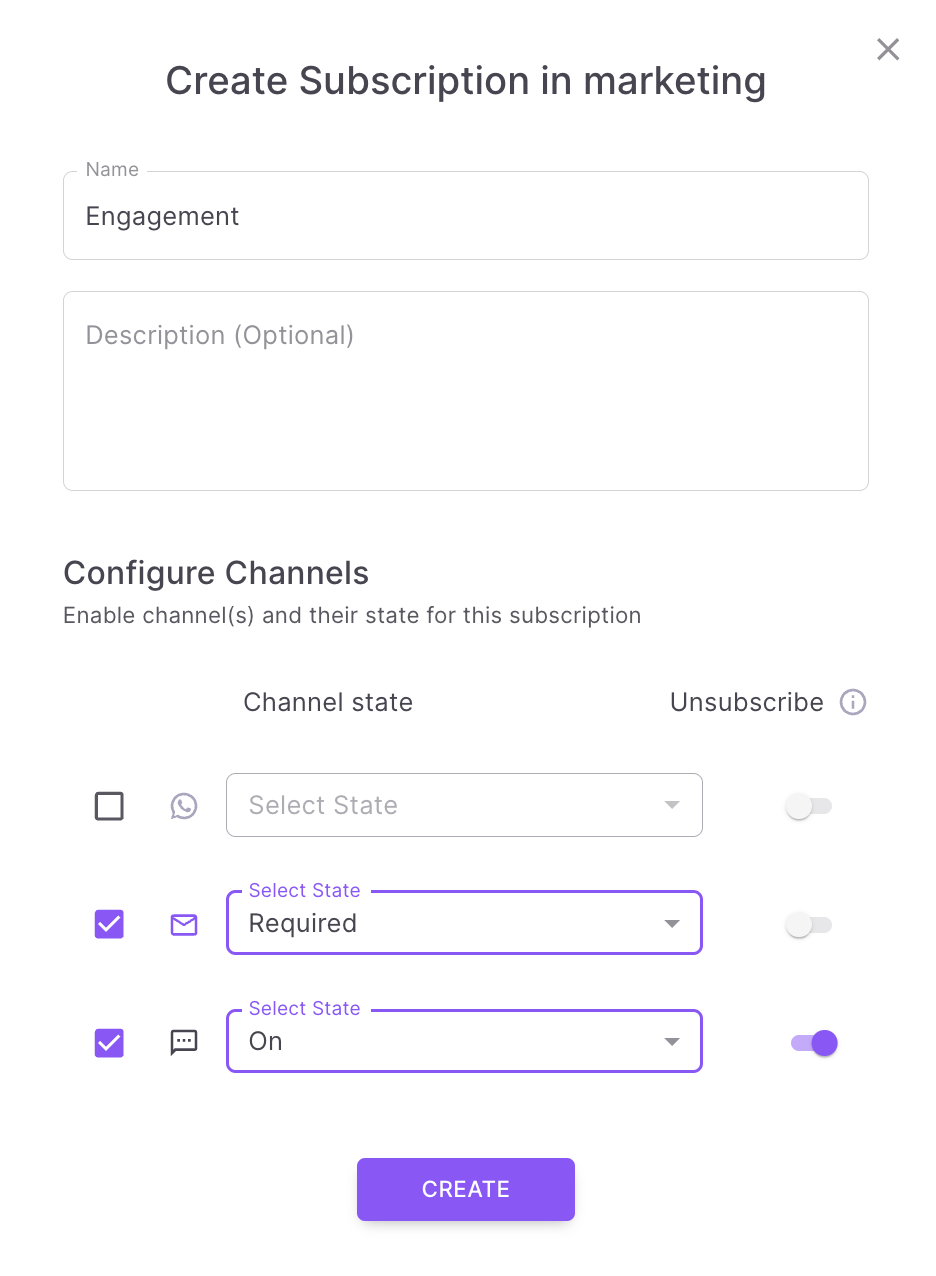
Enter an appropriate Subscription name.
-
Select default state for each channel. All the channels with at least 1 integration will be available for selection. You can select one of the states - Required, ON or OFF.
- Required - Users will always receive the notifications.
- ON - Users will receive the notification until they opt-out.
- OFF - Users will not receive the notifications until they opt-in.
-
Click 'Create'.
-
You will see the Subscription created as shown below.

-
3 channels are configured in this Subscription created above. You can hover over the icons to see their states.
- SMS - Required.
- Email - ON
- Push - OFF
-
Once the notification events are linked to this Subscription ( which will be done while creating Notification event), you will see a count in Notification Events column. You can hover over it to see the notification events linked.
-
You can enable Display to turn on the visibility of Subscriptions created in Preview or via APIs.
-
You can either edit or delete the Subscription by clicking on the ellipsis icon.
How to enable Unsubscribe in Subscription topic
Want to give users more control over their subscriptions? Enable the unsubscribe toggle. This lets you add special unsubscribe links (placeholders) to your templates. When users click these links, they'll be unsubscribed from the specific topic that notification was about.
-
For example, if you want to add Unsubscribe link in SMS, enable the Unsubscribe toggle button as shown below.
-
Please note that, you can't enable Unsubscribe option for Required channels, as the channels tagged as Required will send notifications irrespective of user's preferences.
How to add users to a Subscription?
-
Go to Preferences -> Subscription. Click 'Add Users' button.
-
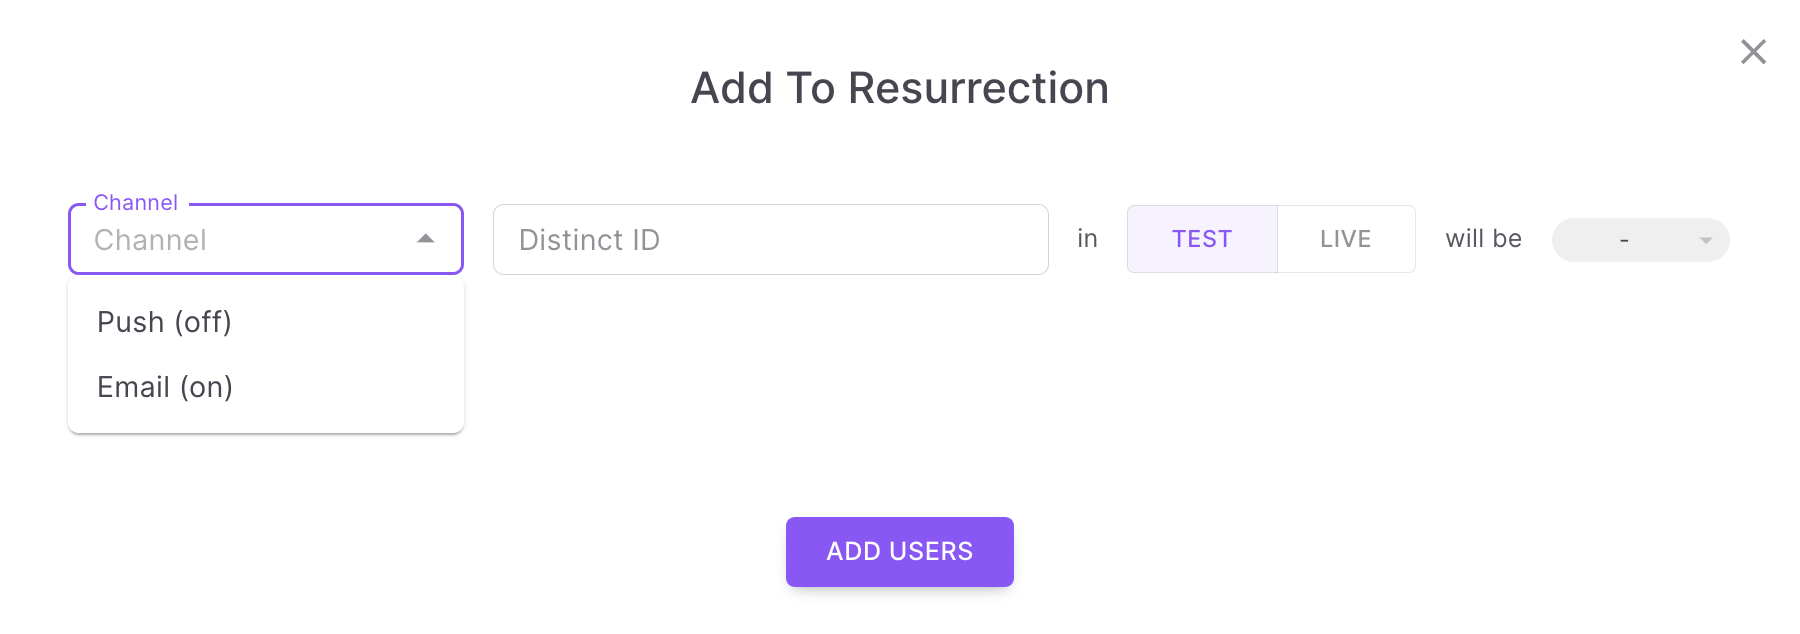
You will see the below popup to add users to the channels configured in Subscription.
-
In the channel dropdown, you will see the channels configured in Subscription.
Only channels with ON or OFF status will be visible here.
- For example, to opt-out a user from Email with distinct id 'abcde', you can do it as shown below.
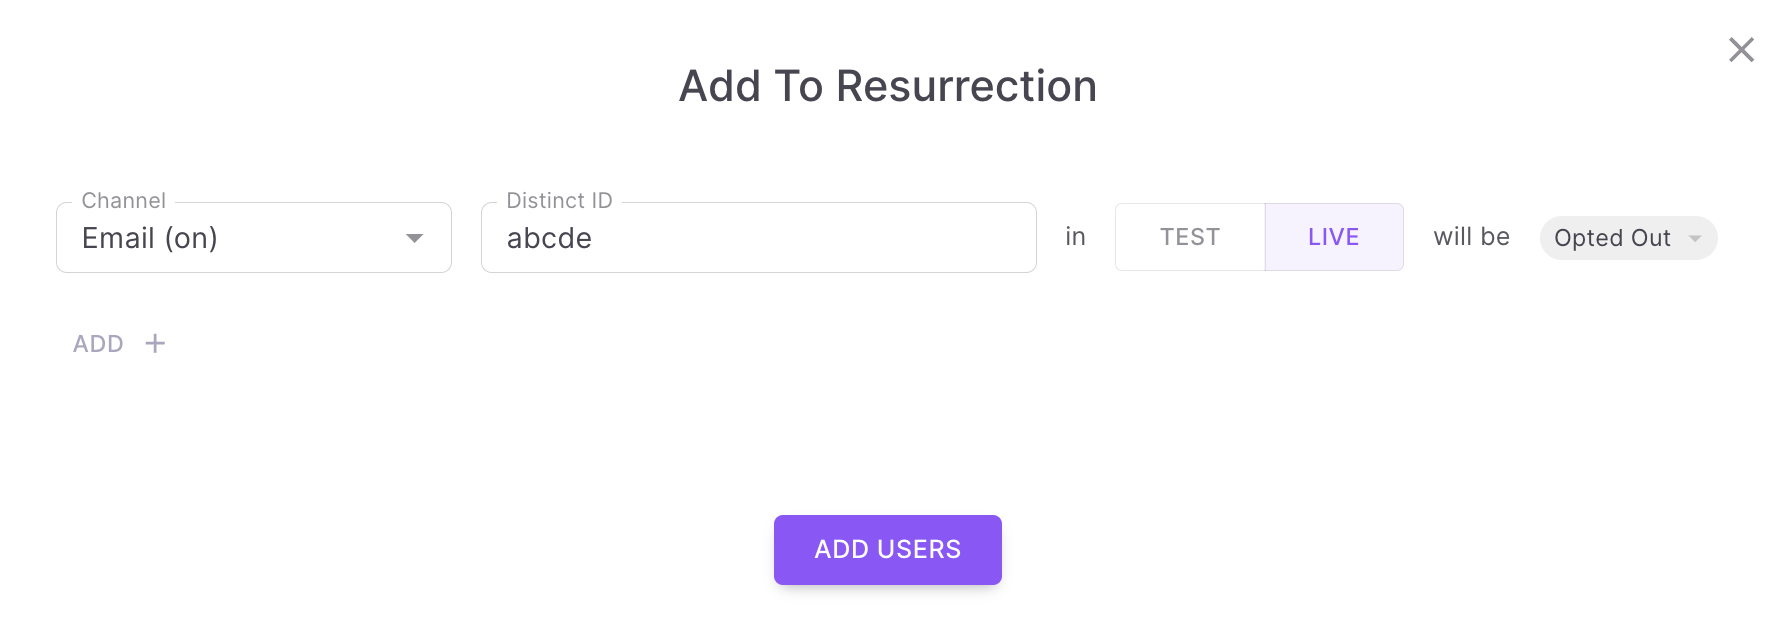
- You can add more users by clicking 'Add'.
- Once you have added all the users, click 'Add Users'. You will see the users added to the Subscription 'Resurrection' as shown below.
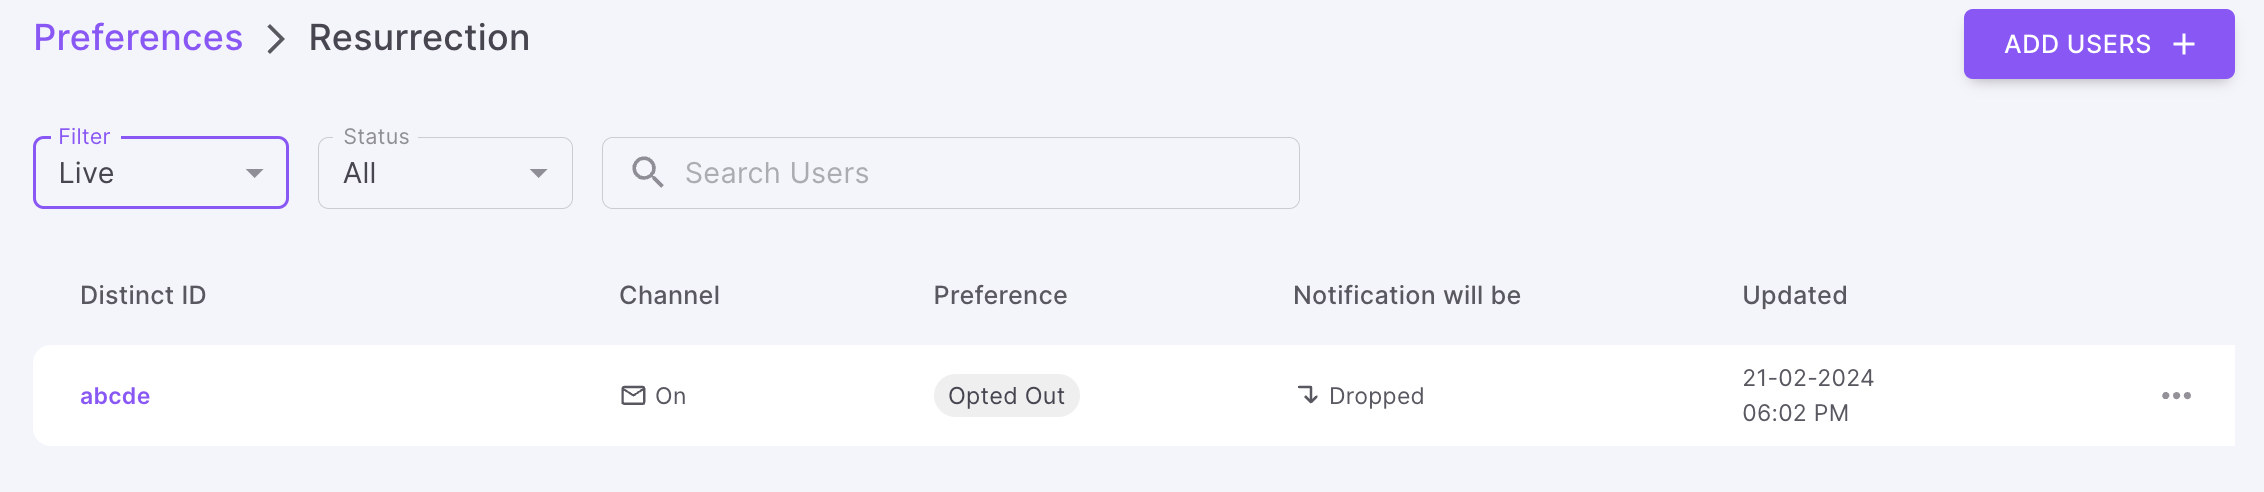
- Notifications sent via Email to this user with subscription 'Resurrection' will be dropped, as the user has selected opt-out for Email.
- You can link this Subscription to any notification event. Refer this document for the same
How to reorder Sections and Subscriptions?
- To reorder either section or subscriptions, click Reorder button at the top.

- Now you will be able to drag and drop sections and subscription using the 'drag and drop' icons highlighted.
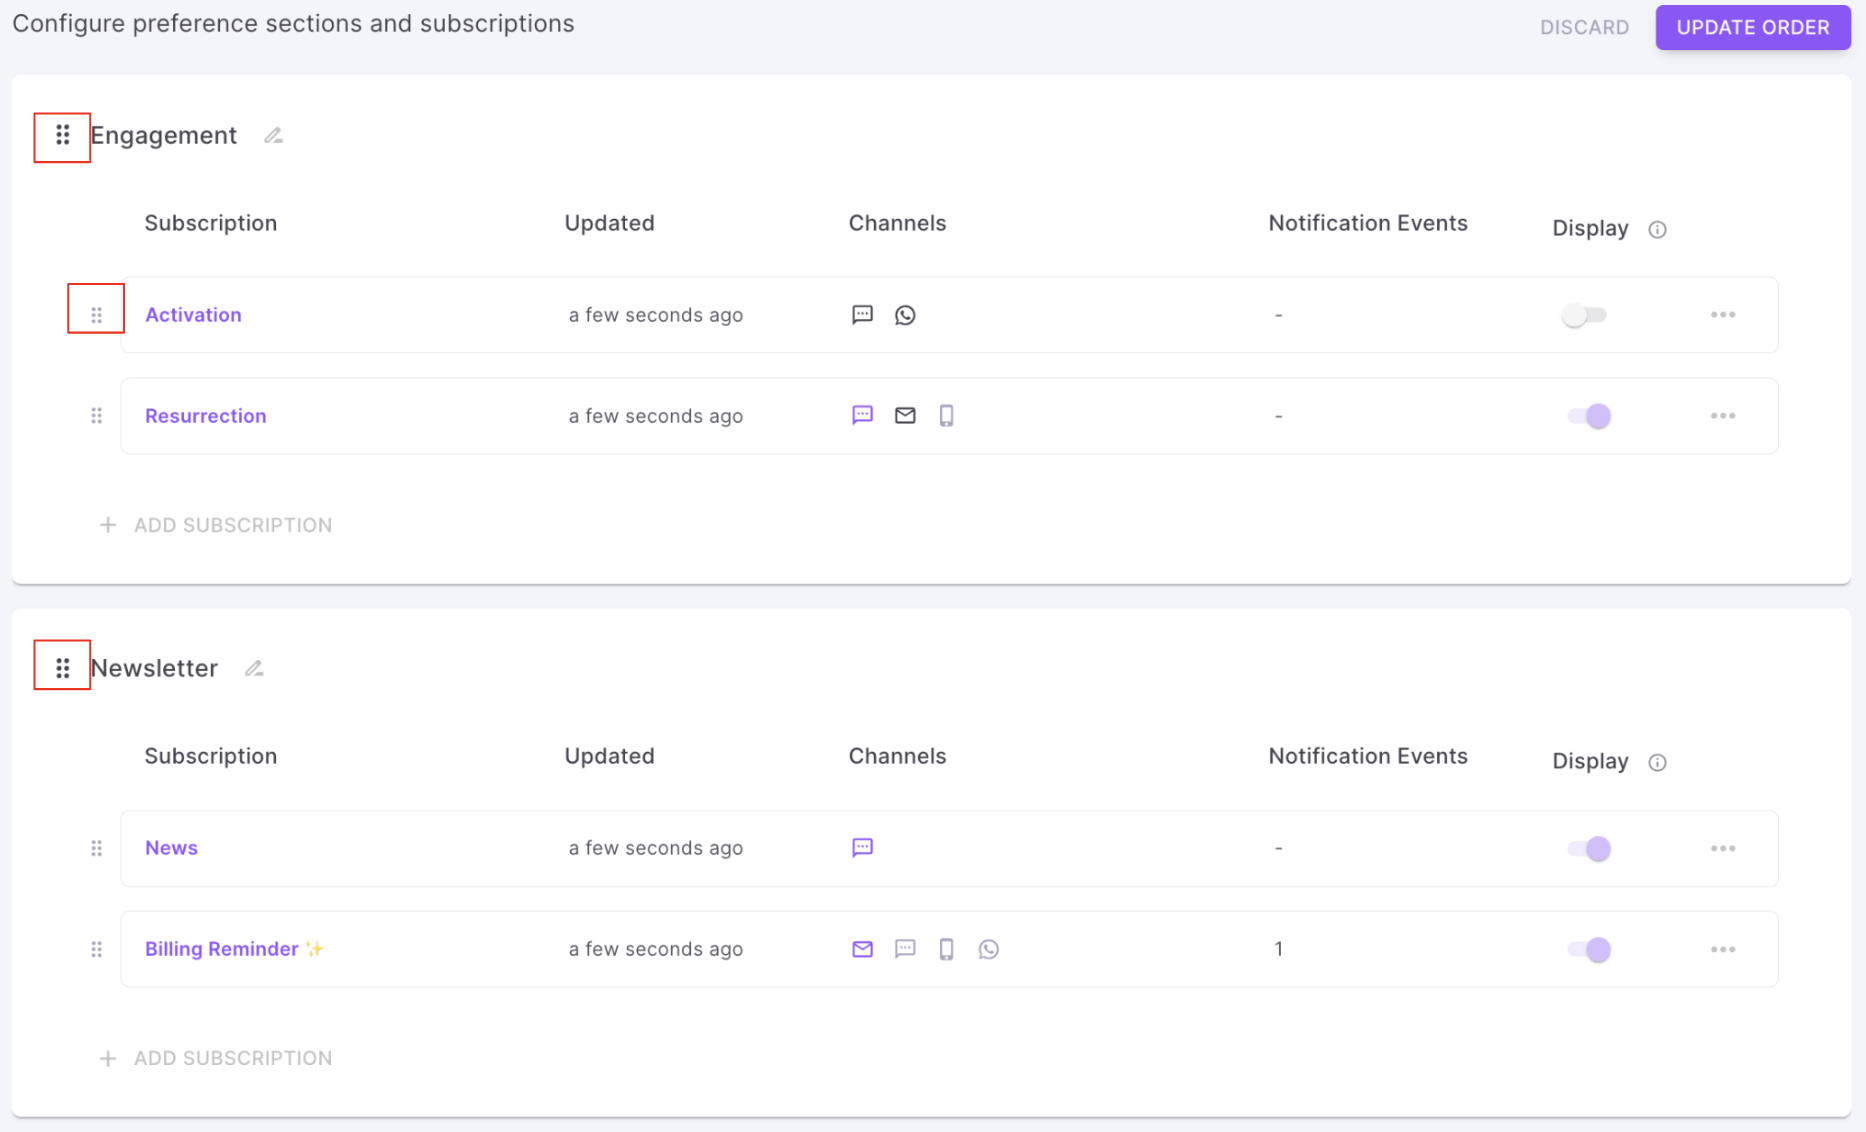
- Once you have re-ordered the sections/subscriptions, you can click 'Update Order' button to save the changes.
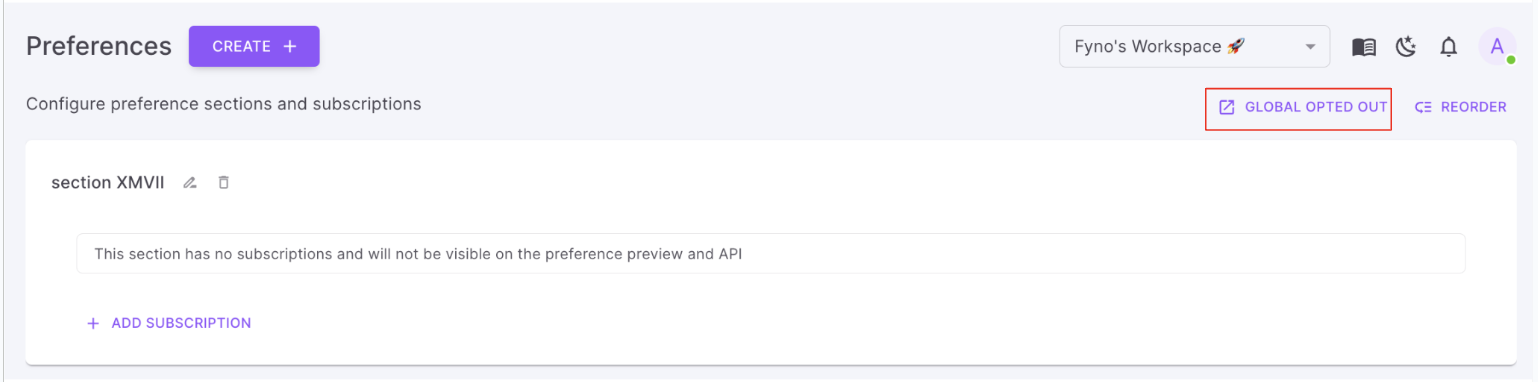
How to add Global preference for Opt-in or Opt-out
For example, if you want to opt-out of WhatsApp across all Subscription Topics, do the following.
- Click Global opt-out as shown below.
-
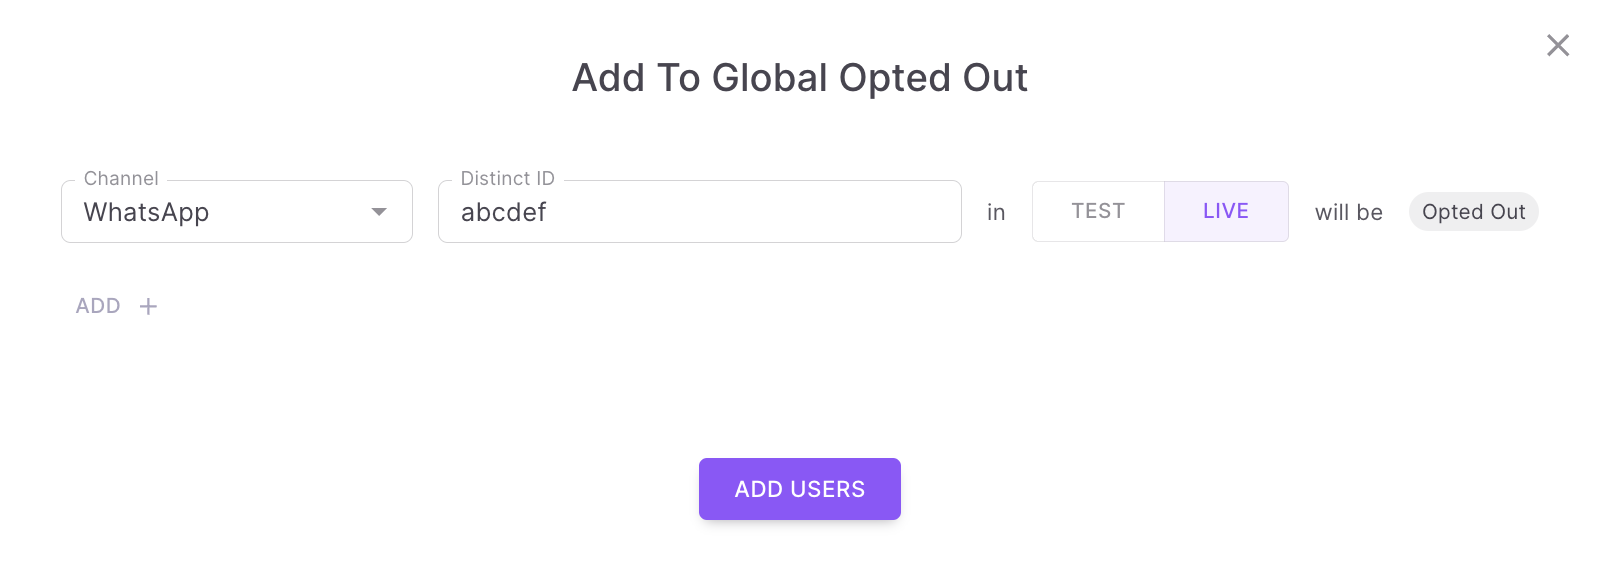
Click 'Add Users'.
-
Select the following
- Channel - For which channel you want to set Global preference.
- Distinct Id - Distinct Id of the user managed in Fyno.
- Version - Test or Live
- Opt-out - The preference is Opted out by default. You can't change the value.
You can add as many users as possible by adding 'Add'.
-
Once you have added Global opt-out preference for all the channels and users, click 'Add Users' to add them to Global preference.
-
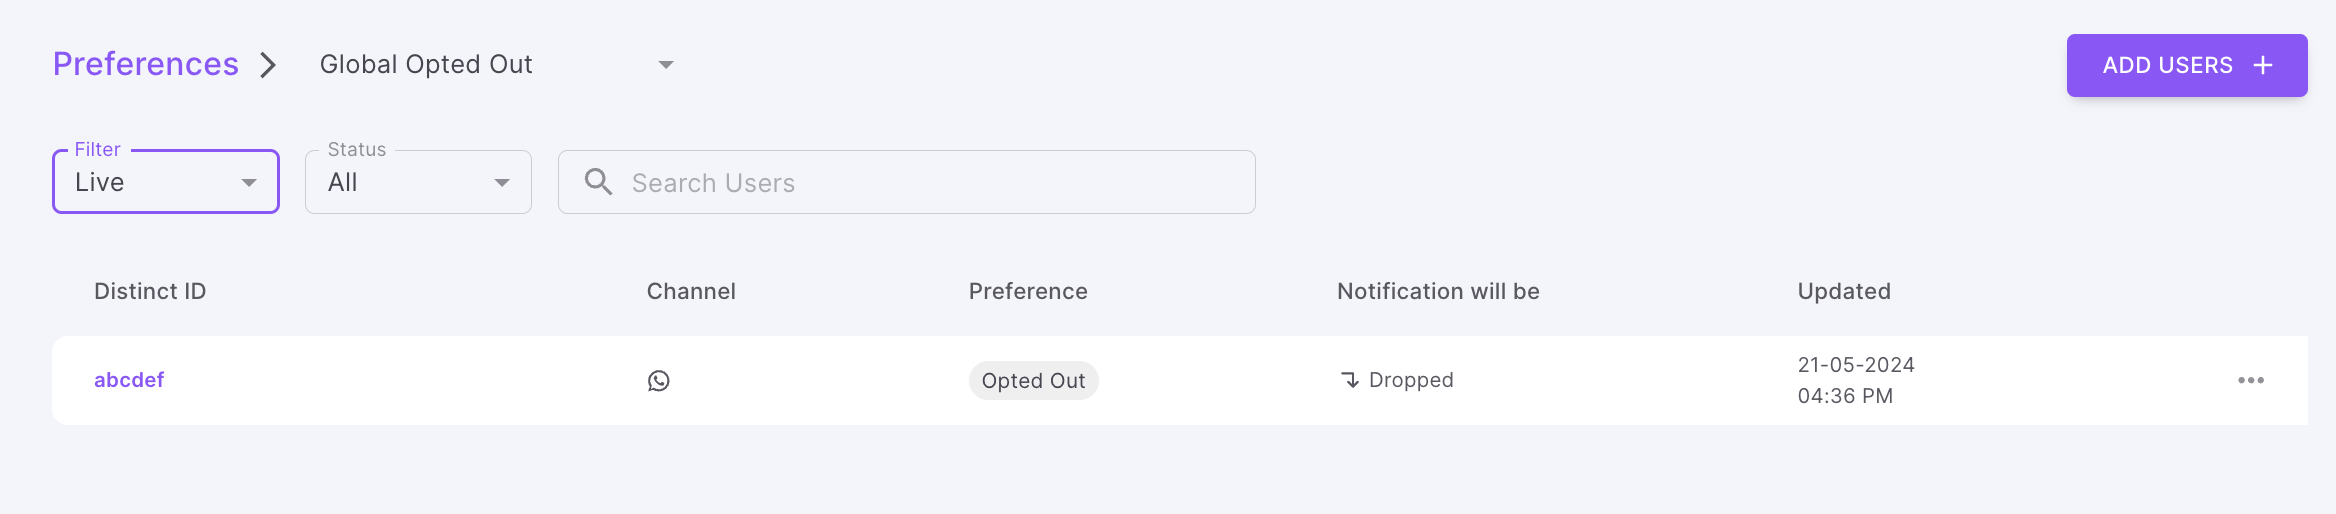
You will see the users added to Global opt-out preference as shown below.
Updated 8 months ago