Creating a Workflow using Digest
Digest Notifications work by collecting multiple trigger events, aggregating them into a single message, and delivering it to the user. This becomes useful when a user needs to be notified of a large amount of notifications and you want to avoid sending too many notifications.
How Digest works
- Creates a digest for each specified time window
- Starts from the first event trigger
- Sends the message when the digest window ends
Best For:
- Consistent communication intervals
- Periodic updates
- Non-urgent, informational notifications
This approach ensures regular updates without overwhelming users, regardless of activity levels or triggers.
Example
Consider the following scenario
Scenario: A user has 5 SIPs scheduled on 1st of every month and all SIPs failed due to insufficient balance.
Problem: Sending a notification for every SIP failure could spam the user.
Solution: Use digest notifications
How it works:
- Collect SIP failures over a set period (e.g., 1 hour)
- Send one summary notification
Benefits:
- Reduces notification fatigue
- Provides a comprehensive overview
This approach keeps users informed without overwhelming them, enhancing their experience with your app.
This use case can be implemented with the below steps.
-
Create a Workflow with Webhook as trigger. You can read how to create it here.
-
Digest - After adding a digest node in the workflow editor, each node below the digest node will be only triggered once in the specified digest interval. You can decide to send messages before adding a digest node and they will be triggered in real-time.
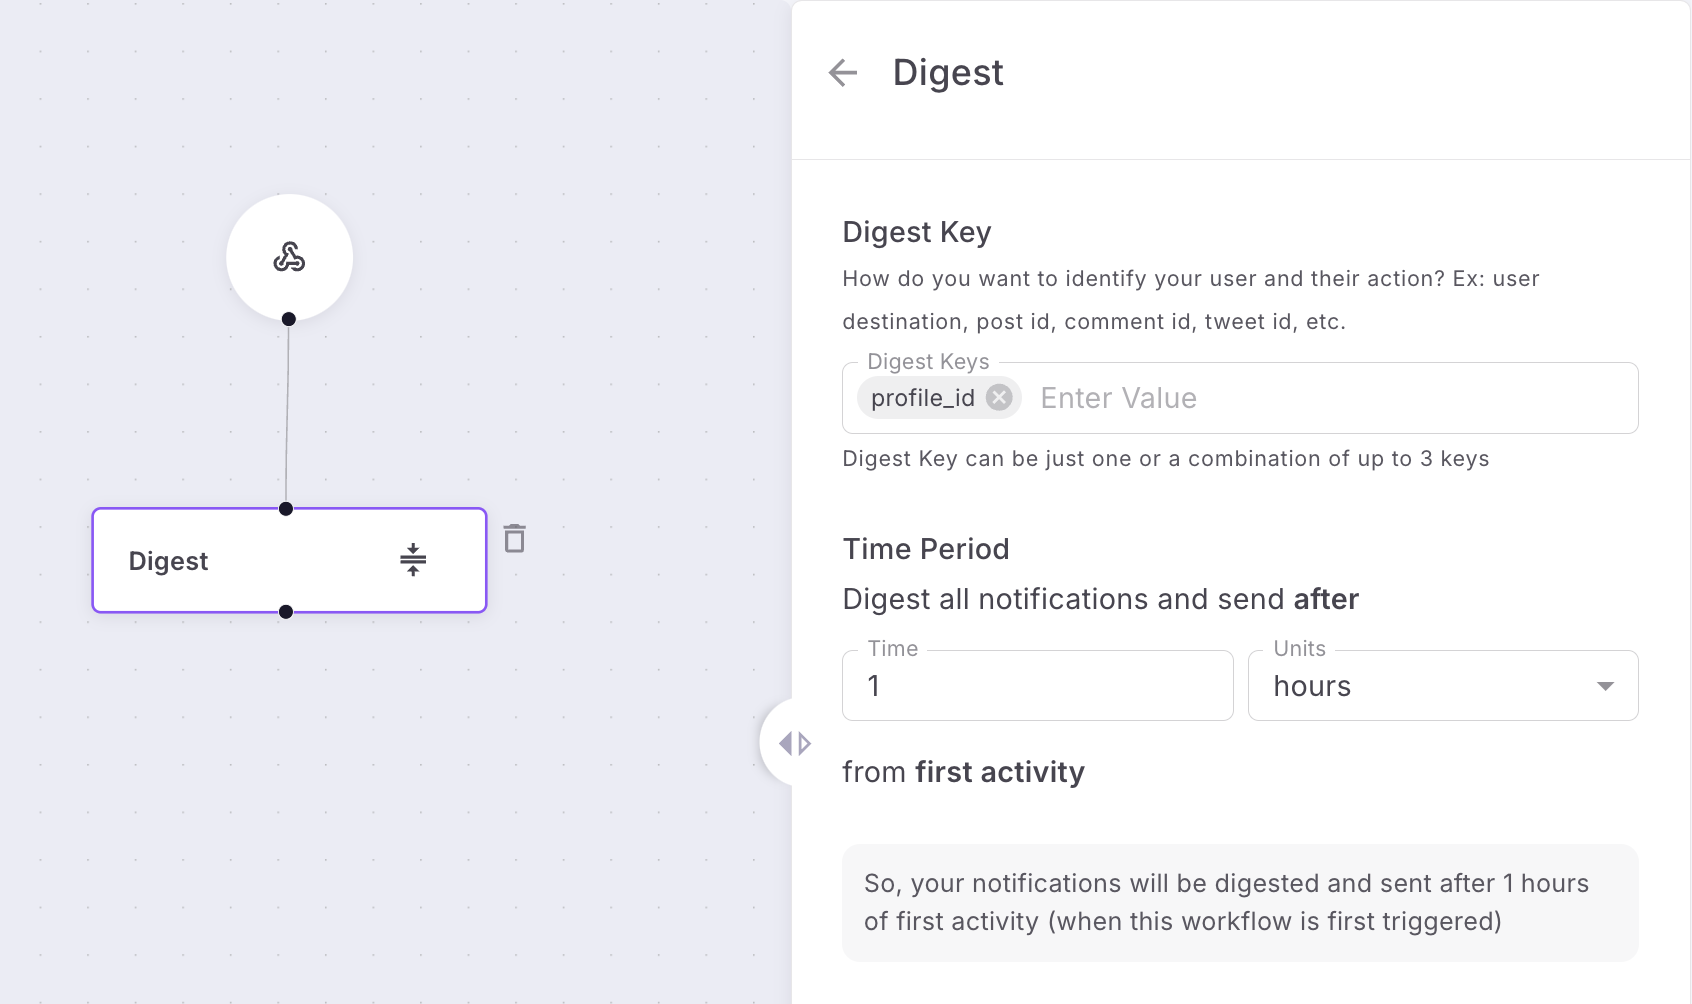
-
Digest Key - You need to provide a unique key to identify the user. This will help the workflow to digest the notifications for that user. In this case, user's profile_id in your system will be the Digest Key.
-
Time Period - Specify how long you want to digest the notifications. Minimum 1 second to maximum 7 days.
-
Notification event - Add a notification event block after the digest depending on what communication you want to send.
How to use Digest data in Template
In the template, you will find System variable on the LHS of the template editor.
For example, if you want to use the users' who have liked your post in the notification. You can do it as shown

- $digest.head will give you the top 5 payloads by default. You can see the payload in logs section
- $digest.tail will give you the last 5 payloads by default. You can see the payload in logs section
- $digest.count will give you the total count of the payload received.
In this example. $digest.head.SIP_name will give you the SIP which failed.
How to see logs for Digest
You can see the Digest logs in Logs -> Workflow. Sample logs below

- Summary - You will see the Digest Key and count will show the no of requests digested. Total time taken will be updated once the Digest is completed and shows the total time taken.
- Head - It will show the first 5 payloads received for Digest
- Tail - It will show the last 5 payloads received for Digest
How to receive delivery reports
Fyno allows you to forward delivery reports to your own system or integrate them with third-party analytics tools like Mixpanel and Amplitude. This feature enables you to track and analyze the success of your notification deliveries seamlessly.
You can read more about it here
How to configure Idempotent Key
Workflows now supports idempotency, ensuring you can safely retry requests without the risk of performing the same operation twice. This feature proves invaluable in scenarios where an API call gets interrupted in transit, leaving you without a response.
You can read more about it here
How to configure overrides
Fyno allows you to override pre-configured values within an Integration, enabling you to use different values for specific notifications in a Workflow. This flexibility is useful when you need to customize the sender information or other details based on the requirements of each notification.
You can read more about it here
Updated about 1 month ago