Triggering a Notification Event
A notification event that has been successfully created and saved can be run or executed by hitting the cURL request.
From the Notification Events section:
- Find the Notification Event you want to trigger.
- You can trigger a notification event in 2 ways:
- Within the Notification Event page, click on the "<>API CODE" icon in the top right corner. This will open up the Notification Event Playground page.
- From the notification event card, click on the "<>" on the top right corner of the corresponding Notification Event card. This will open up the Notification Event Playground page.
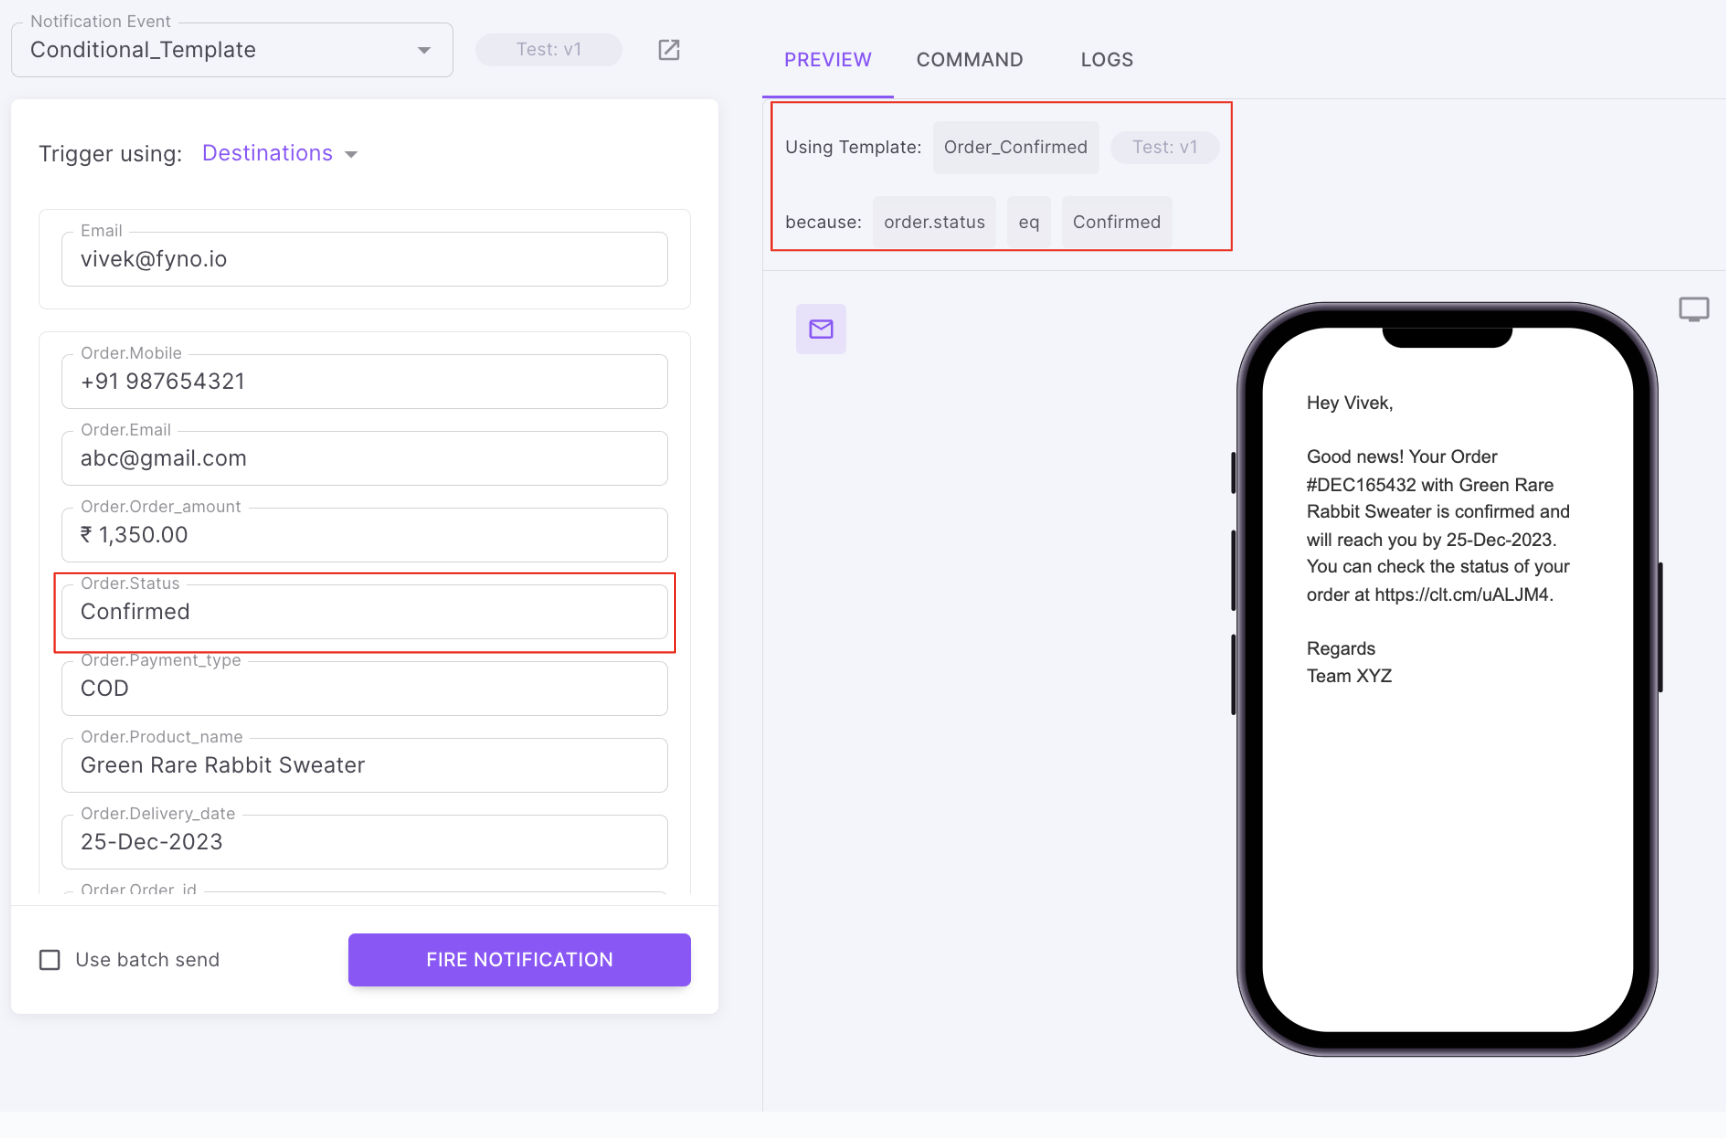
Notification Event Playground
The notification playground allows you to visualize, trigger and view logs of the test notification that you have triggered from Fyno's application.
Let's have a look at the Notification Playground and how to use it most efficiently.
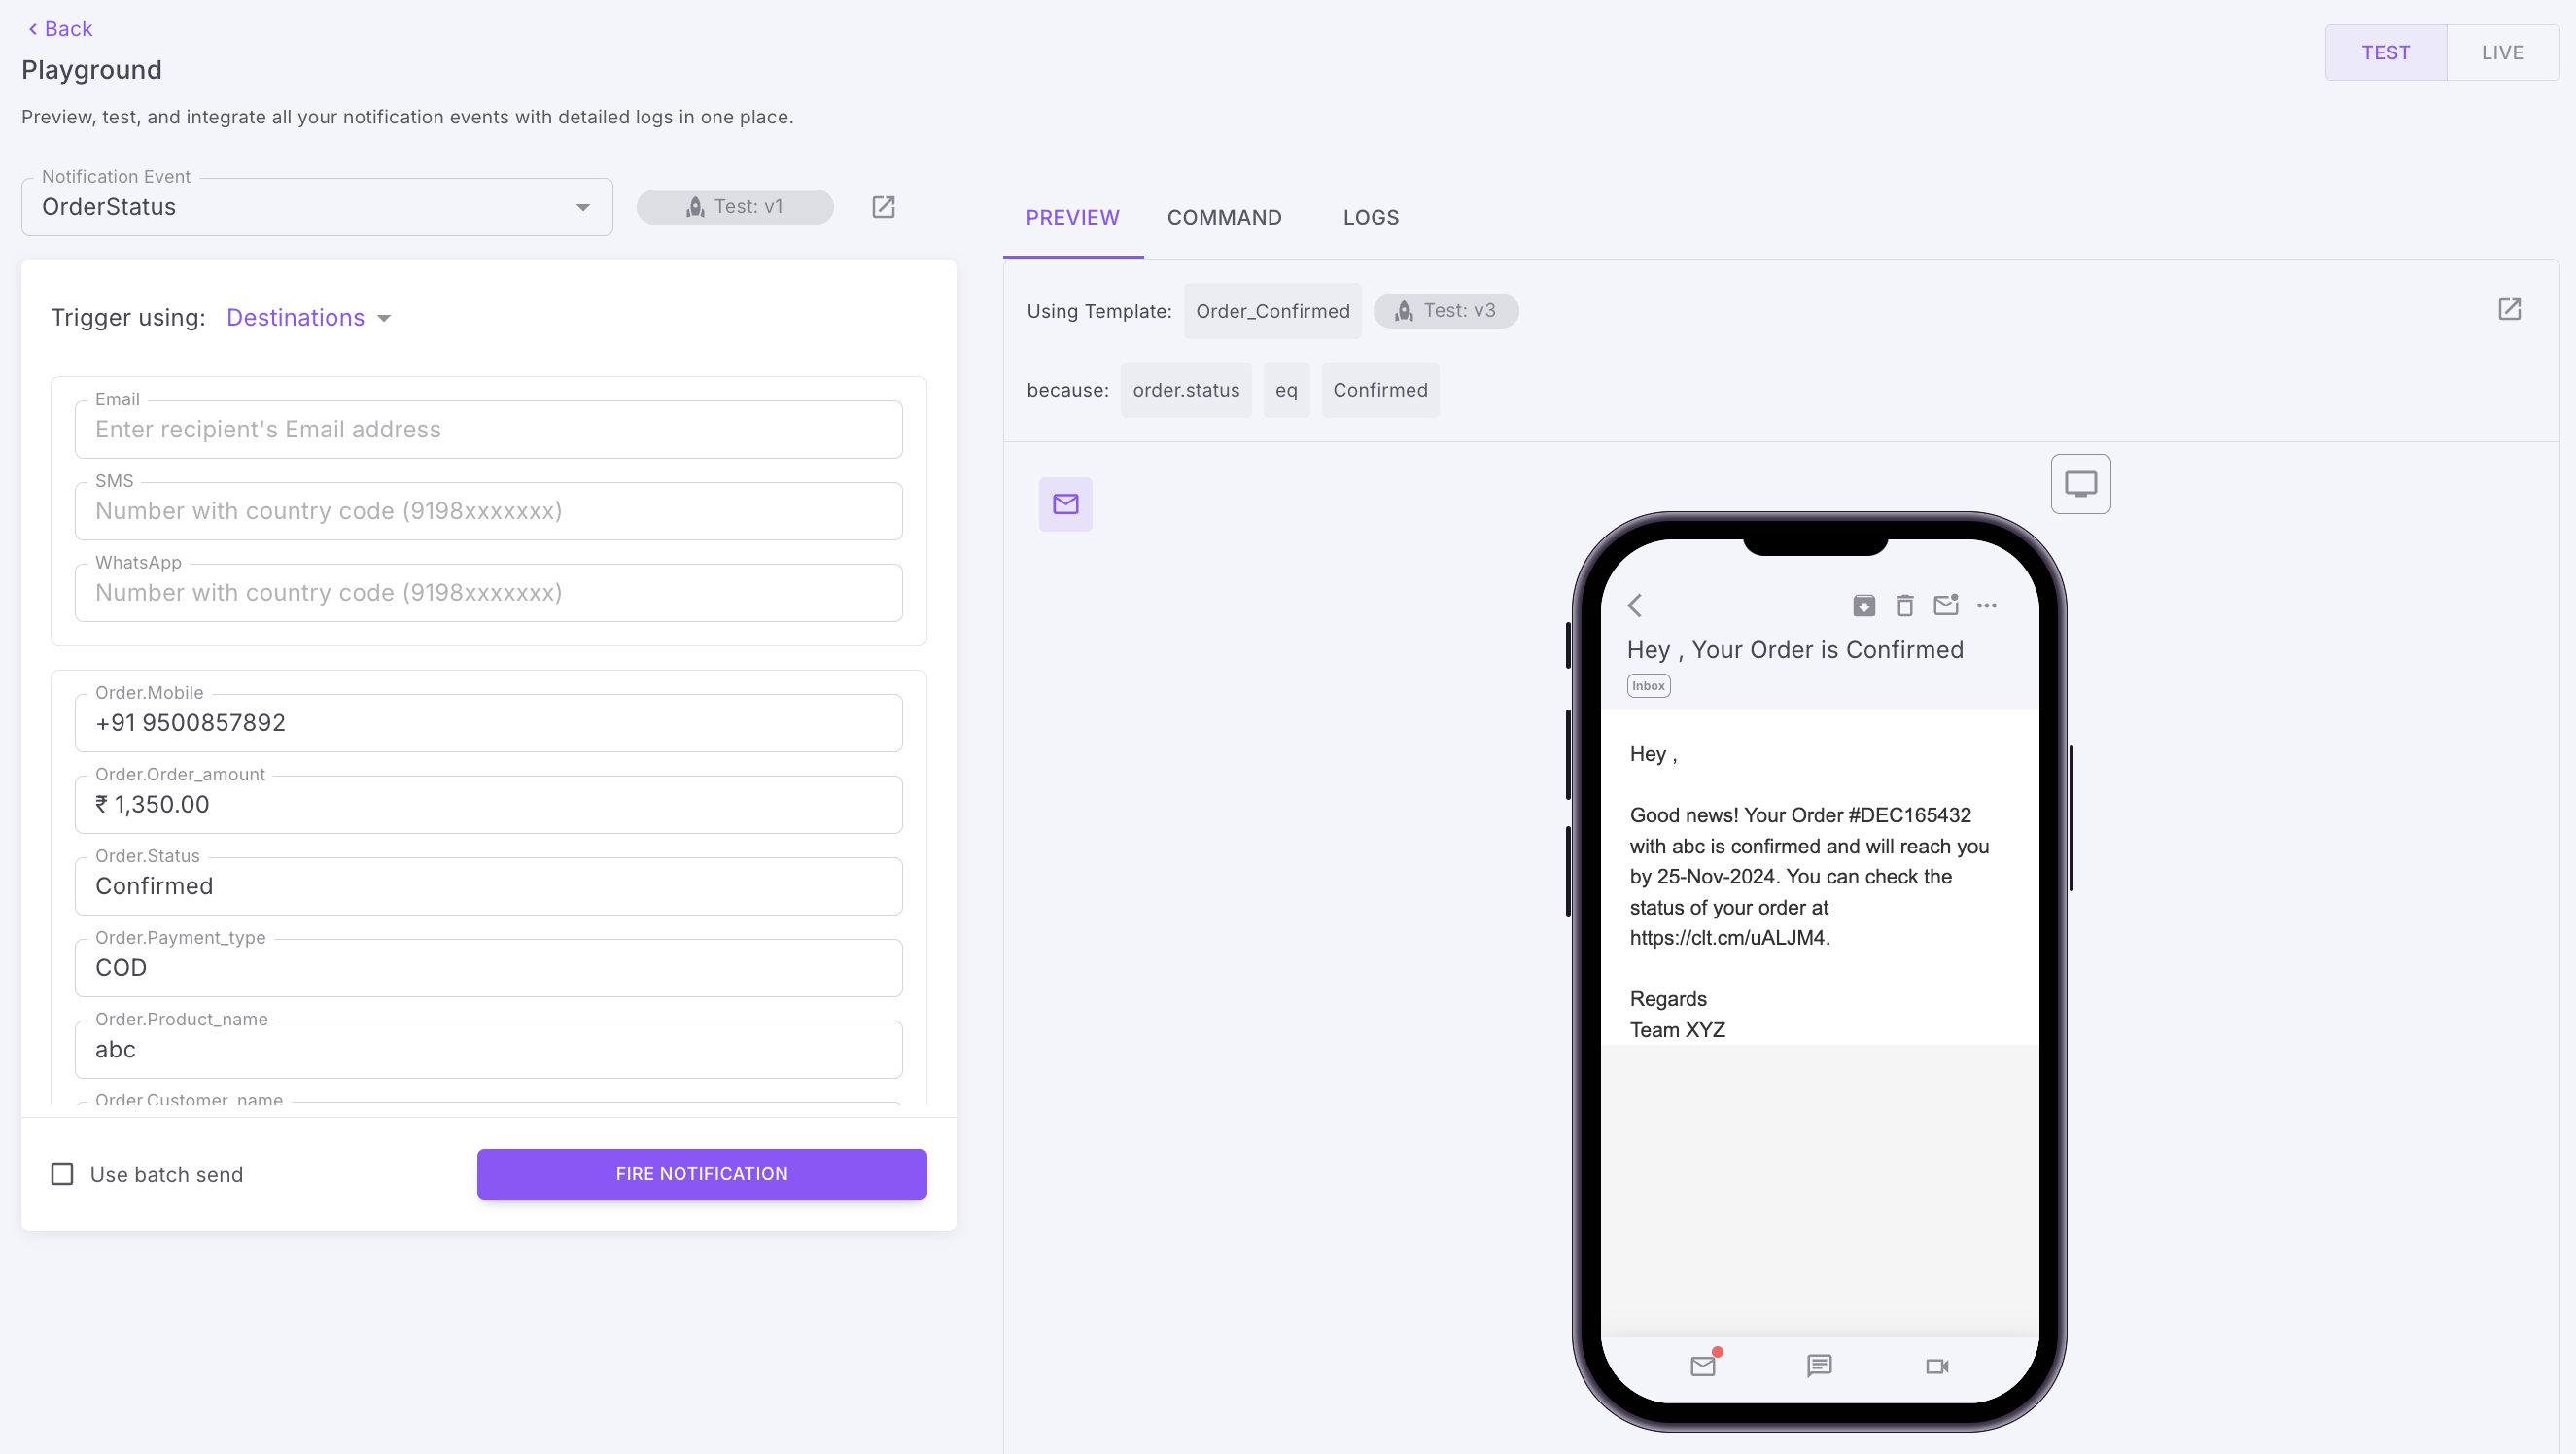
In the Notification event playground, you will see the following:
- Notification Event: Gives you the option to select a notification event from the ones you have created, in a drop-down. Select the one you would like to trigger. You can also open the notification event in a separate browser by clicking on the icon next to the Event name.
- Trigger using: Select one of the destination options:
- Distinct ID - Distinct ID is the user profile identifier unique to that recipient. Use this only if you manage Distinct Id in your user profile.
- Destination: On selecting manual you would be able to add one of the below details for the recipient.
- Both: The API will understand to accept either the Distinct ID or the recipient details directly.
- Additional data: This allows you to provide the data for testing the "Placeholders" with dynamic values, which would have to be written in JSON.
- Preview: The Preview tab shows the details of the notification that is about to be triggered. You can take it to the next level and see how it looks for each channel by clicking on the respective icon. For Email, you can preview both Desktop and Mobile views.
- Preview with Conditional Templates : If you have used conditional templates in the notification event, you will see the Preview, as shown below. The template will be selected based on the satisfaction of a particular condition.
- Using Template: "Template_name" (template version)
- because "placeholder" matches the condition
- Command: The command tab displays the cURL command that has been generated for this Notification Event and can be copied and placed into your code easily.
- Logs: When the notification event is triggered, the logs that would be generated can be seen on the logs tab as well for a quick overview of the status.
- Template: Displays the name of the template that is being used for the respective Notification Event. Click on the pop-out icon to revisit the template and make edits.
Copy your All-In-One API
Under the Command tab, you will be able to copy the API by clicking on the Copy button on the top right corner of the cURL window.
Test your All-In-One API
From the same notification event's playground, find the "Fire notification" button on the bottom left.
Use Batch Send
Batch Send or Batching allows you to use the same Notification Event API to send information to multiple users, like a campaign.
When creating a Notification Event, if the check box is marked for Use Batch Send, then this Notification Event API can be used like a campaigning or bulk send API.
Notice that your API will also be appended with "Bulk" when you select the Batch Send option.
How to receive delivery reports
If you want to receive delivery reports in your system or any third party tool, you need to send callback object in the API call as shown below
{
   "event": "YOUR_EVENT_NAME",
   "to": { // you channel destination },
   "data": {  // your template placeholders  },
   "callback": {
       "custom_id": "YOUR_CUSTOM_ID_VALUE",
       "custom1":"YOUR_CUSTOM_VARIABLE_1",
       "custom2":"YOUR_CUSTOM_VARIABLE_2"
       "allowlist_url": ["DynamicWebhookSite", "Mixpanel"]
    }
}
| Parameter | Type and Value |
|---|---|
| enable | Default: true, true: enable delivery status over callback. false: disable delivery status over callback |
| custom_id | string; an alpha-numeric unique identifier of your notification. Length: 200 characters OR number; numeric unique identifier of your notification. Length: 20 digits |
| custom1 | string; (Optional) additional information that you want to tag your notification. Example: order-id Length: 50 characters |
| custom2 | string; (Optional) additional information that you want to tag your notification. Example: Category Length: 50 characters |
| allowlist_url | string; (Optional) Allowlist url name where you want to receive delivery reports. Can be array of allowlist url names if you want the delivery reports in multiple URLs. Example: ["DynamicWebhookSite", "Mixpanel"] . If you have only 1 allowlist URL, it will be automatically will be sent to that URL. |
Updated about 1 month ago