Create an Automation using Mixpanel cohorts
Set Automation in motion with Mixpanel Cohorts
Fyno enables you to sync directly with cohorts created in Mixpanel and trigger communications based on the cohort data. All this with zero code.
Benefits
Effortless Communication, Zero Code Needed
With this powerful duo, you can now trigger targeted communications effortlessly, all without the need for a single line of code.
Simple Setup, Maximum Impact
Our user-friendly interface ensures that you'll be up and running in no time. Say goodbye to complex configurations, and hello to streamlined efficiency.
Complete the Cycle with Fyno's Delivery Callbacks
This feature ensures that every piece of valuable information is seamlessly sent back to Mixpanel, closing the loop using Fyno's Delivery Callbacks.
Track Your Entire Funnel in Mixpanel
With Fyno's Delivery Callbacks, you now have the power to track your entire funnel within Mixpanel. No more gaps in your insights. No more missed opportunities. Every interaction, every engagement, meticulously recorded for your analysis and optimisation.
How it works?
Step 1 - Create an Automation
-
Choose Mixpanel as your input source.
-
Copy the URLs (either Test or Live) and use your Username/Password to set up Mixpanel as demonstrated below.
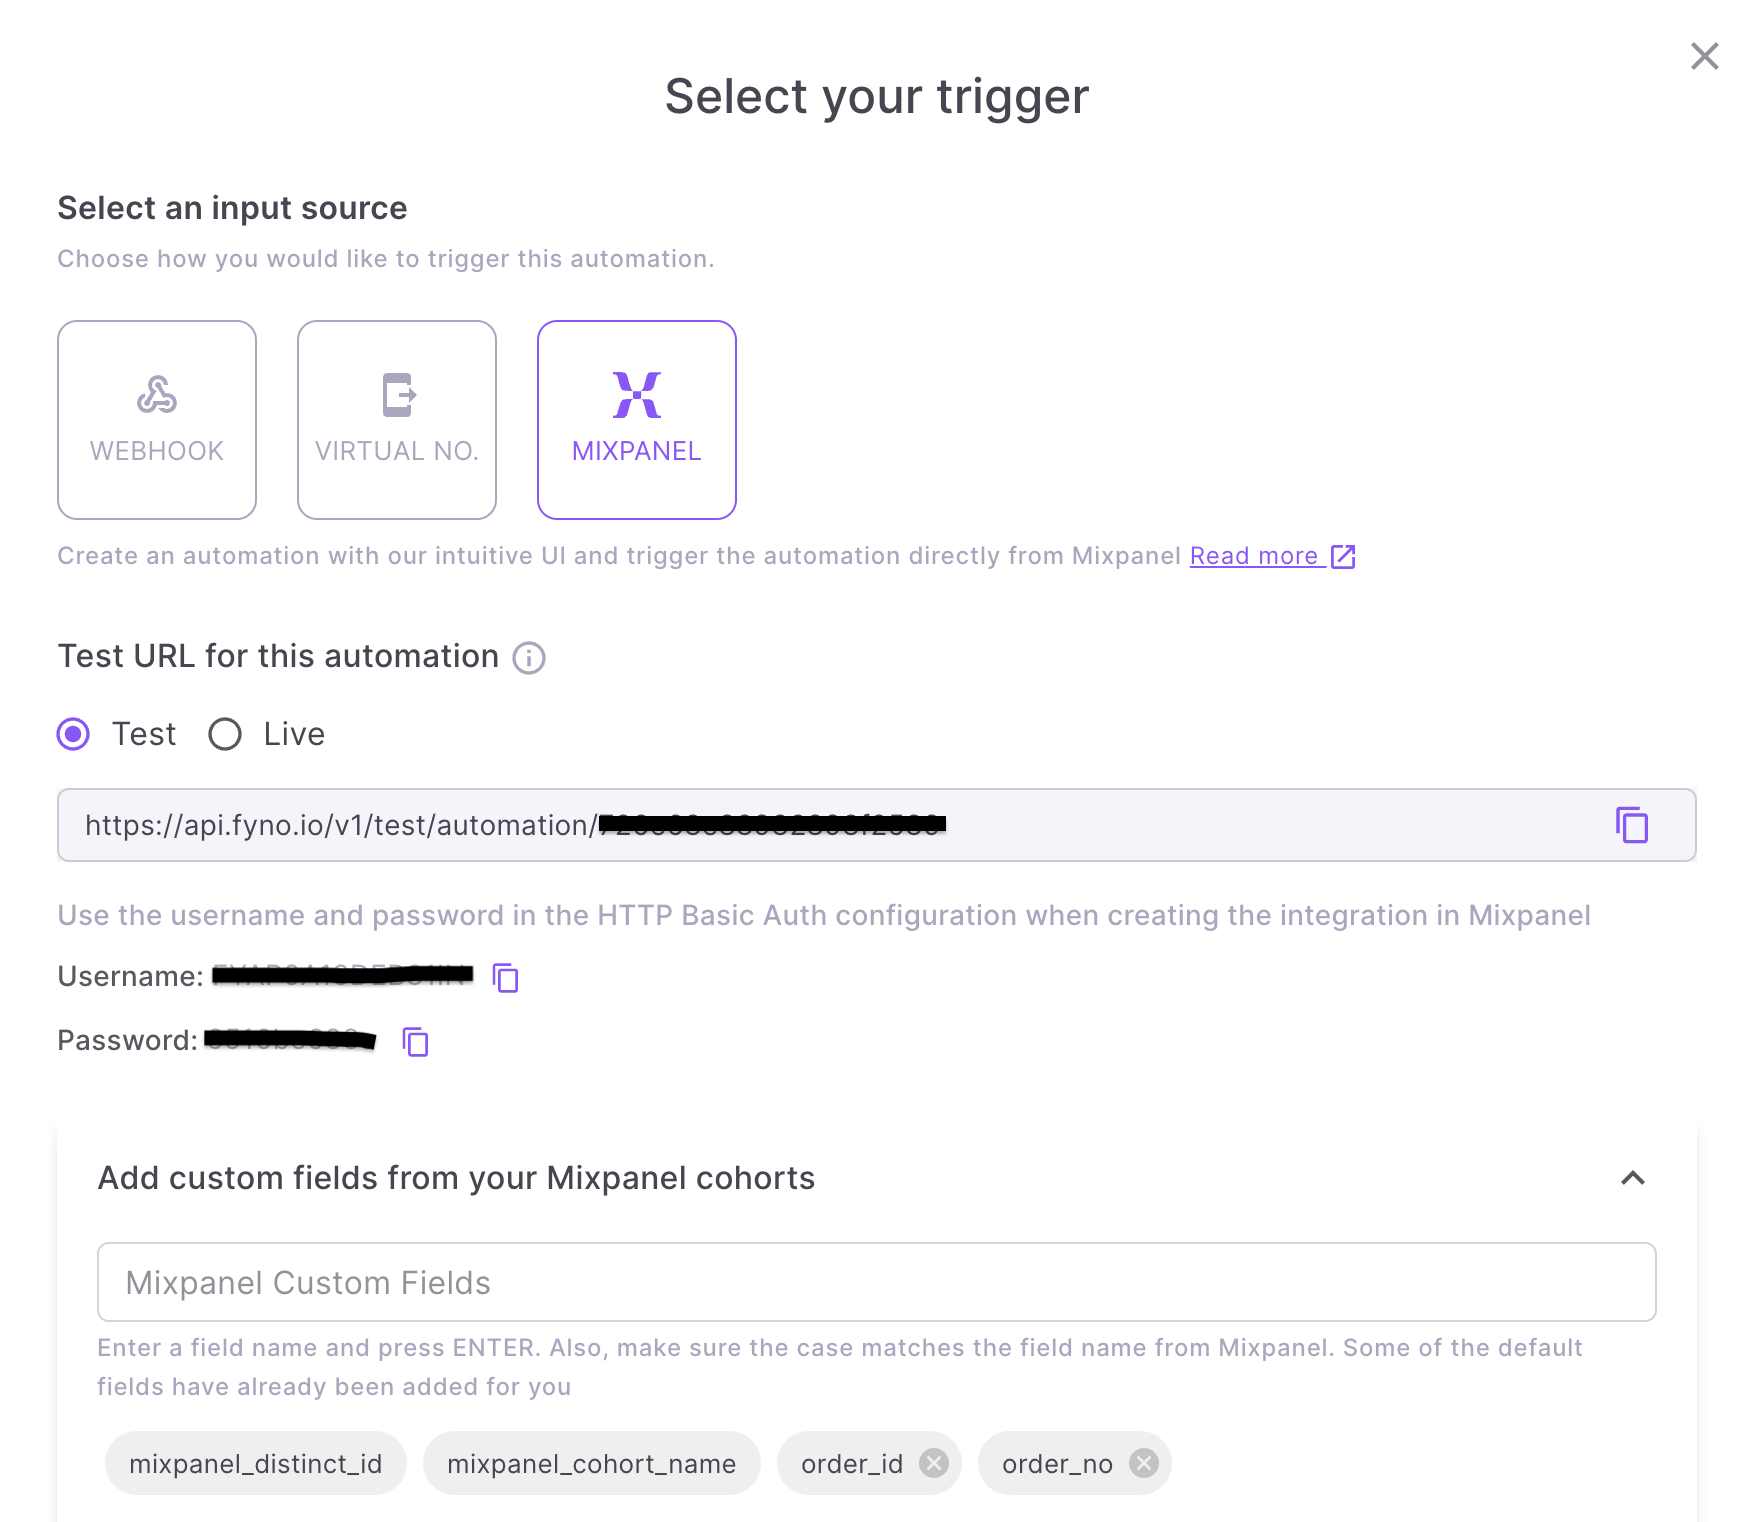
Having both Live and Test URL options offers the advantage of configuring both URLs within Mixpanel. This allows you the ability to thoroughly test your flows using the Test URL. Once everything functions as anticipated, you can seamlessly transition to using the Live URL for actual operations.
- Navigate to Mixpanel's Integrations page.
- Go to Custom Web hooks and click "Add Connection.”
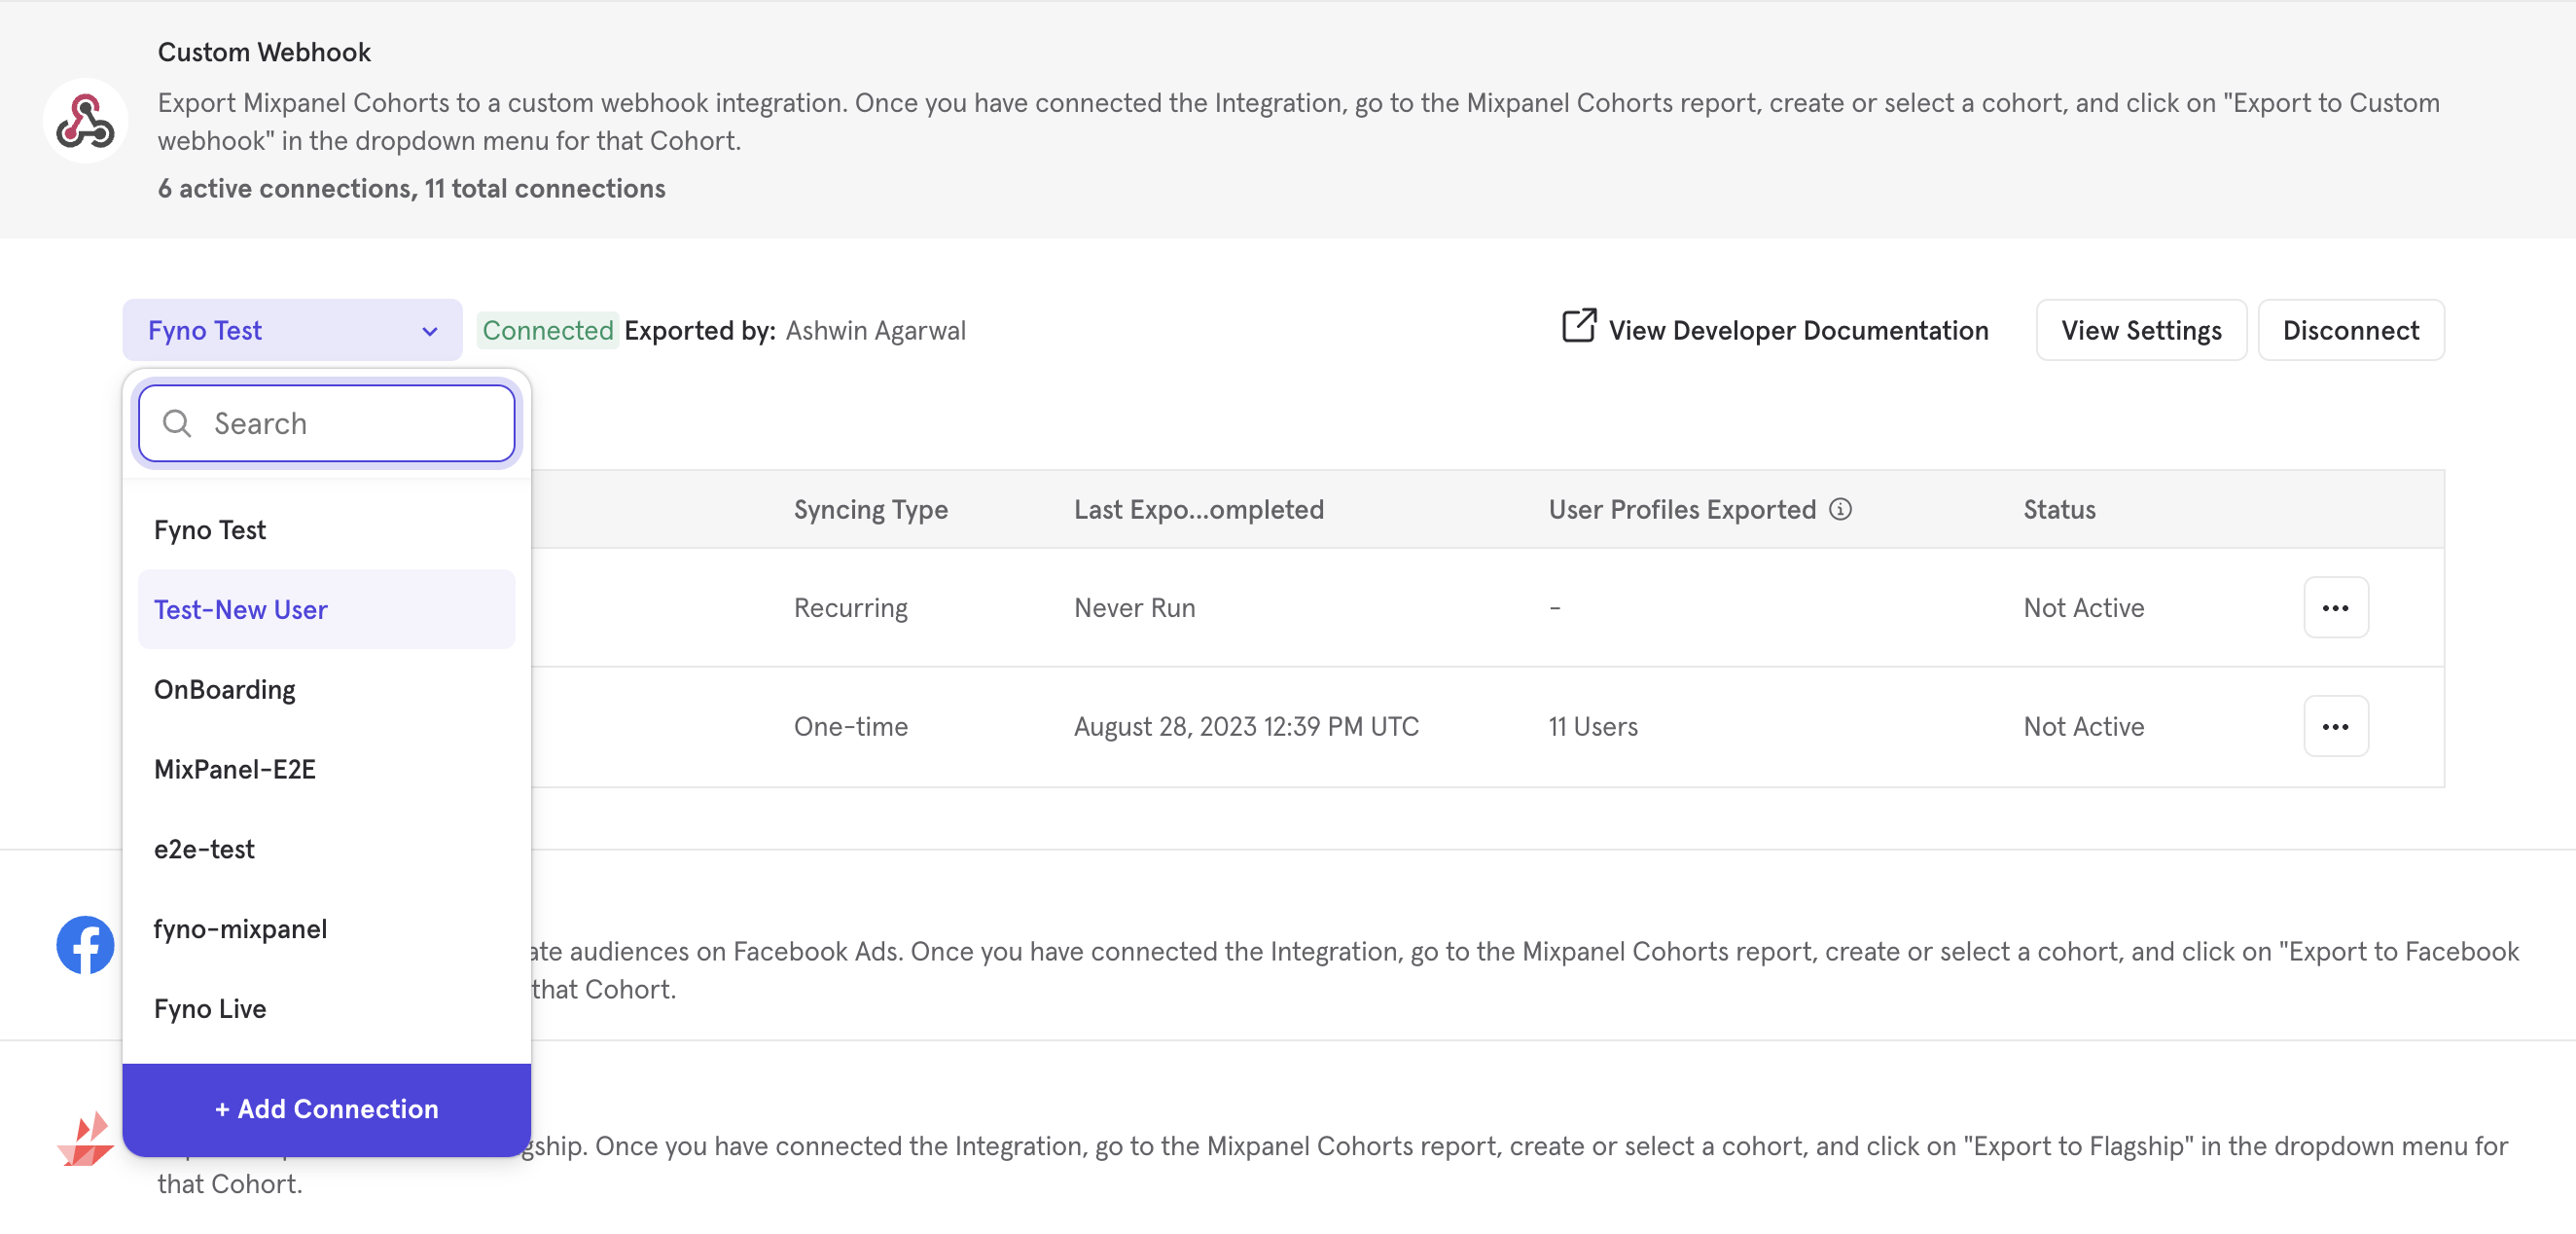
- Follow the below steps to setup a custom webhook
- Choose a unique name for the Connector.
- For the URL, select either the Test or Live URL from Step 2.
- Configure HTTP Basic Auth with the username/password from Step 2.
- Add Columns in 'Properties to export', if you need to send additional custom fields other than Mixpanel's default fields to Fyno.

- Custom Fields - By default, every Mixpanel cohort includes the
mixpanel_distinct_idandmixpanel_cohort_namein any cohort data. If you require any additional Mixpanel fields to be mapped to specific placeholders, you can add them under 'Add custom fields' section. For instance, if you added order_no and order_id in your placeholders in the template, you can add those custom fields under 'Add custom fields from Mixpanel cohorts' section
Add all relevant custom fields for smooth data mapping. Note that certain default Mixpanel properties, like $city and $name, are tracked with a $ prefix. Ensure to add them exactly as tracked in Mixpanel.
Step 2 - Configure Cohort and Actions
Cohort Name: Input the Mixpanel cohort name based on which you want to trigger the notification event. Ensure it matches case sensitivity.
Actions:
Select at least one of the below actions based on for what user segment you want to trigger the notification event.
- First Run - Includes all the users during the initial cohort sync. Use this option if you want to do One Time Sync.
- Members Added - Includes users who joined the cohort since the last sync.
- Members Removed - Includes users who left the cohort since the last sync.
After selecting the action, choose the notification event to trigger. Then, on the right-hand side, proceed to map the corresponding data.

Within a single automation, you have the flexibility to incorporate any number of cohorts. Each cohort will be triggered based on the data received from the Mixpanel payload.
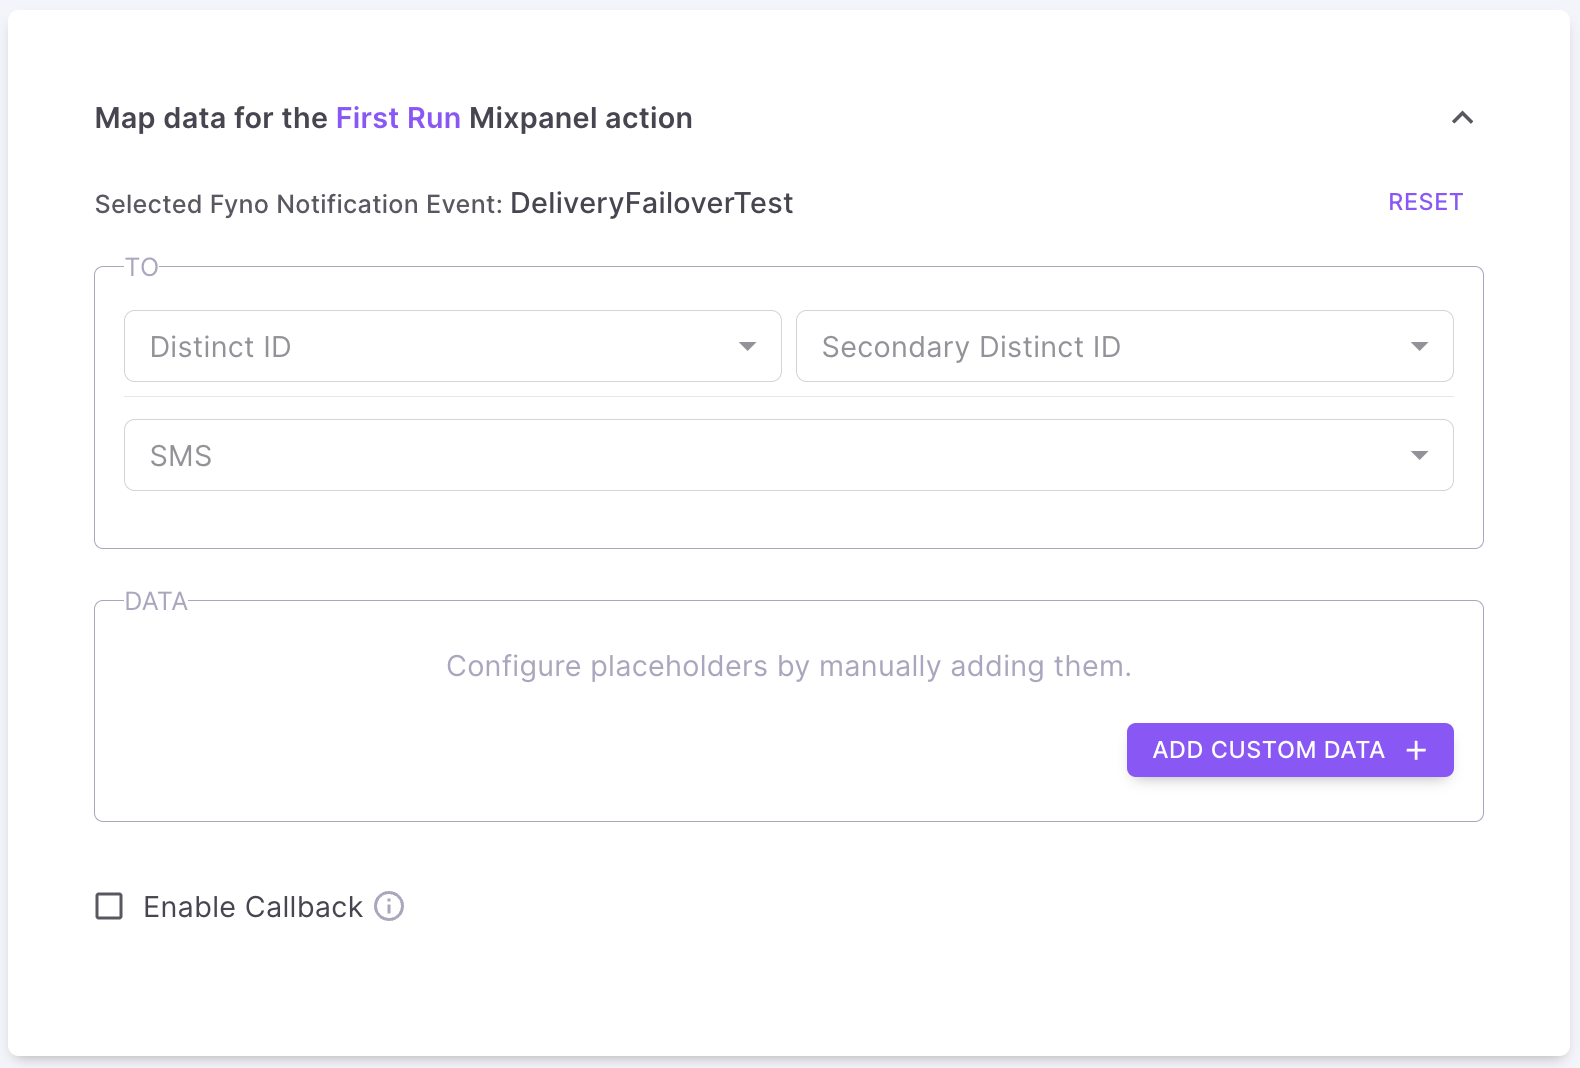
Step 3 - Map Data points
-
To: Select the appropriate field from the payload fields that corresponds to the "Destination" options listed in the "Notification Event.”
Distinct Id - Map this field to
mixpanel_distinct_idif you want to use Fyno’s user profile.
Secondary Distinct Id - This field is used as a backup. If the Mixpanel distinct id and Fyno user profile’s distinct id are not matching due to any merge issues, then this field will be used to identify a user. Its an optional field.
Channels - All configured channels from the event will be listed. Use this only if you are not using Fyno's user profile. For example, if one of the fields in "To" is WhatsApp, select the parameter from the payload that contains the customer's WhatsApp number for executing notifications through WhatsApp.
Distinct id is mandatory only if you are using Fyno's User profile. Alternatively, if you're not using User Profile but still want to send delivery status to Mixpanel via Callback, it's essential to include the Distinct ID.
- Data: In the "Data" section, you'll find the fields specified as placeholders (variable parameters or dynamic values) in the Template associated with the selected Notification Event.
- Custom Data: This section allows you to specify additional data in the form of a payload, if needed. It's in a Key-Value format and is optional.
A use case for this is when you haven't manually added placeholders during template creation. For example, if your template contains Hi {{name}} but you haven't specified name as a placeholder during template creation, Fyno will still identify it as a placeholder since it's in the {{ }} syntax. In this case, you can include the value of "name" in the Custom Data section. To do this, specify "name" as the key and select a corresponding value from the dropdown.
Ensure all custom properties from the Mixpanel payload are defined when creating automation.
When selecting the same event for multiple actions, mapping it once will automatically apply to all corresponding actions.
Step 4 - Enable Callback
Choose this option if you need to send the delivery status back to Mixpanel.
- Make sure at least one allowlist URL is configured and verified in Fyno.
- Configure Delivery Endpoint - add parameters that Fyno will use to send delivery status information to Mixpanel.
- See Creating Delivery Webhooks for more details.
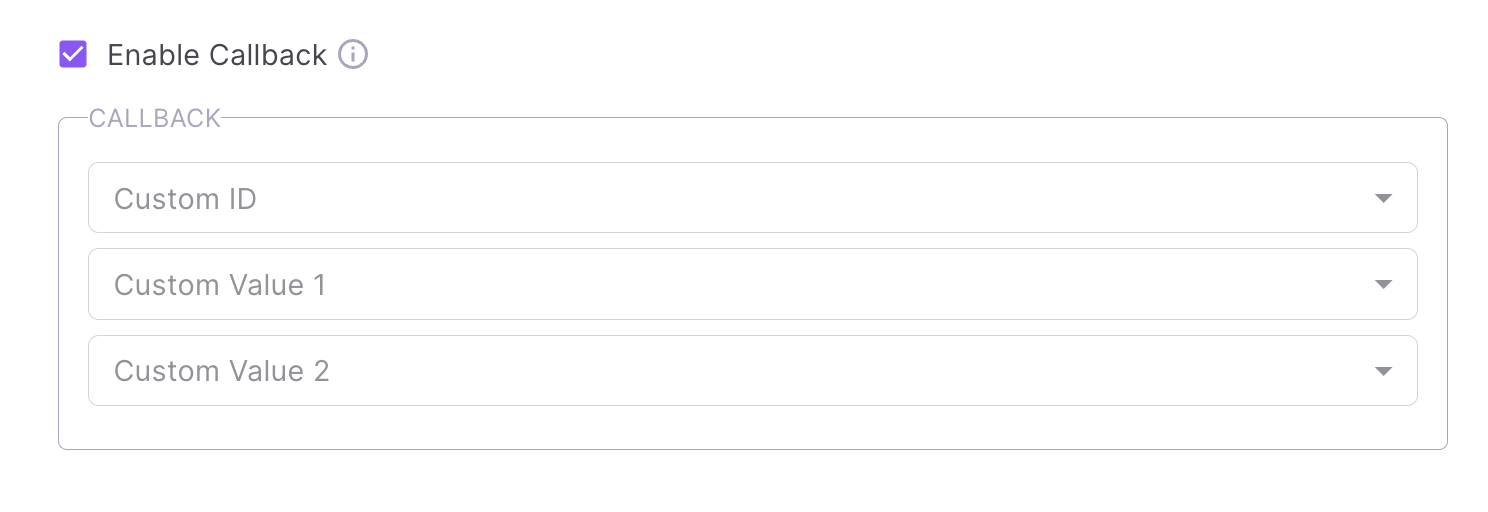

Custom ID - It allows for the unique identification of delivery callback data in Mixpanel. Using the cohort name is recommended for clarity.
Custom Value 1 - Optional field. Select one of the Mixpanel custom fields if you want to send it as part of callback.
Custom Value 2 - Optional field. Select one of the Mixpanel custom fields if you want to send it as part of callback.
Updated 9 days ago