Creating a Campaign
Pre-requisites
To create a Campaign, you will first need to have a few things in place:
- A provider integration in Fyno's platform
- A notification template (it may be any channel)
- A Notification Event
- A CSV file with the user base to whom you would be triggering the campaign.
Once we have these in place, we are all set to go with campaigns!
Creating a Campaign
Sample Campaign file

- Every record in the file should have either distinct_id or at least 1 destination. Otherwise it will show as Not Valid after uploading the file.
- Use distinct_id if you are using Fyno's user profile.
- You can also other data points in data_columns if you need them in your template placeholders.
To create a campaign,
- Login to your Fyno account and find Campaigns from the left navigation bar.
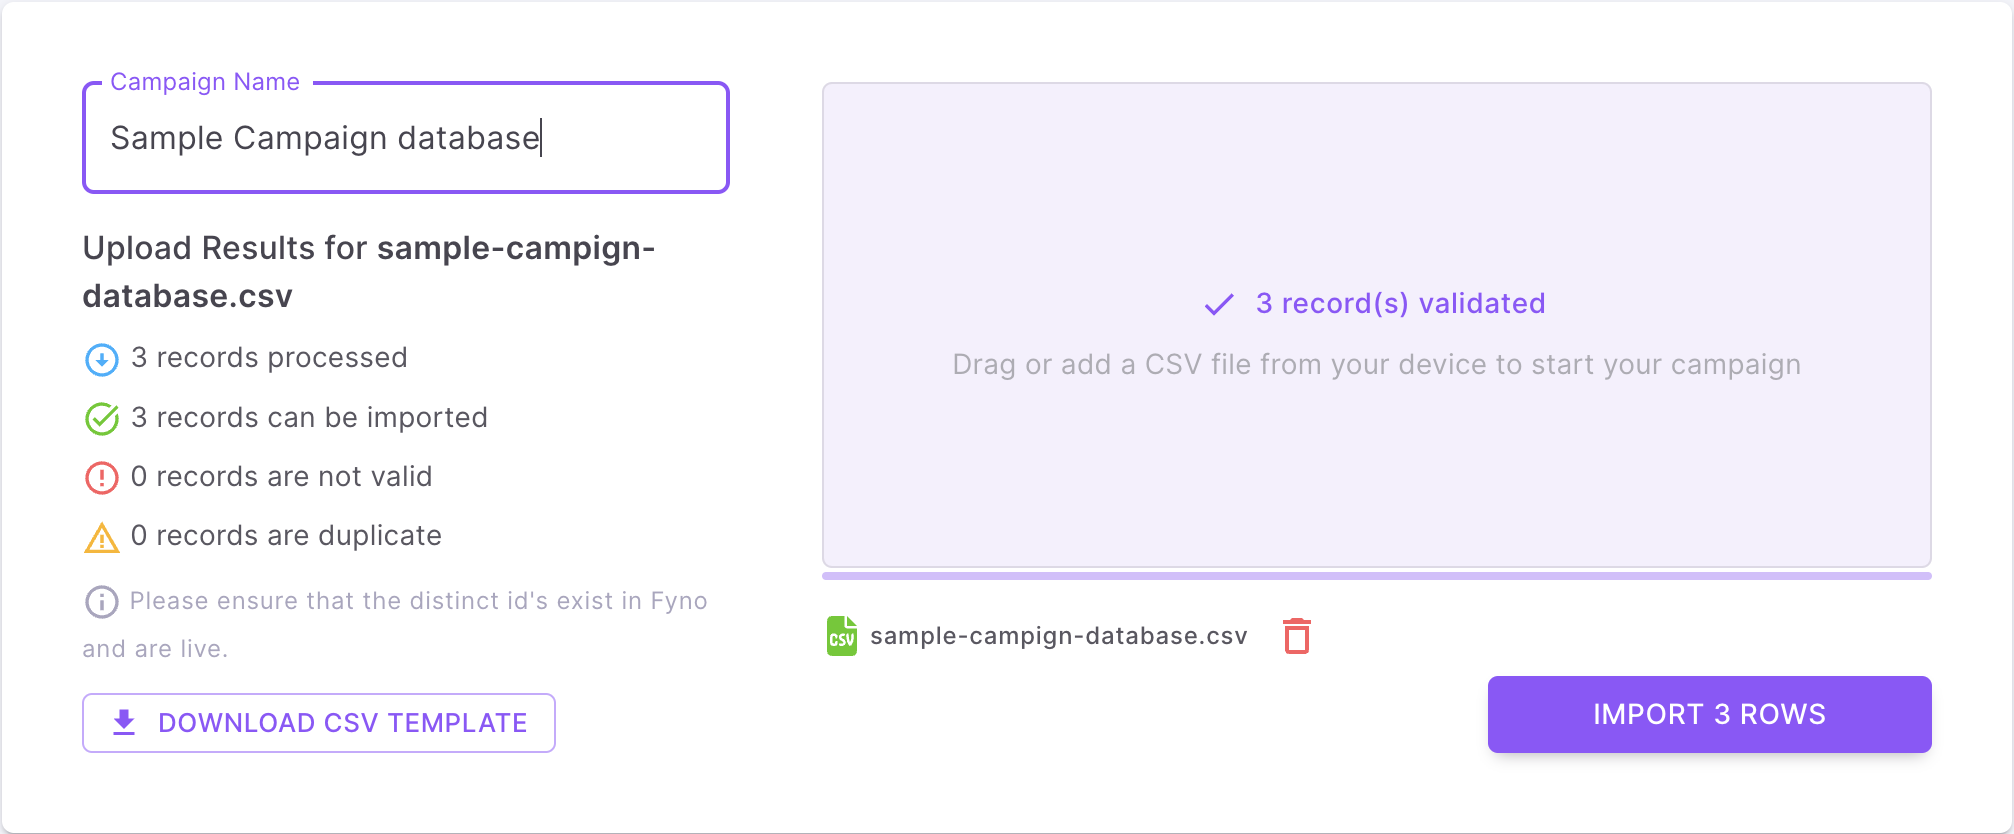
- On the landing page of Campaigns, click on the Campaign name field and enter a name for your Campaign.
- Next to this, click on Upload CSV to upload your file with your campaign data.
- Once the file is uploaded, you will see a few important details:
- Number of records processed
- Number of records ready to be imported
- Number of records that are not valid (as per the checks in place). This could happen if there are any records without any destination and distinct Id etc.
- Number of duplicate records that were found.
- If you are importing data with Distinct IDs, ensure that this data matches the pre-existing records in User Profiles on Fyno.
- Name of the file uploaded with the option to delete the file and re-upload a file.
- When you feel ready, proceed to the next part of configuring the campaign by clicking on the Import x Rows button.
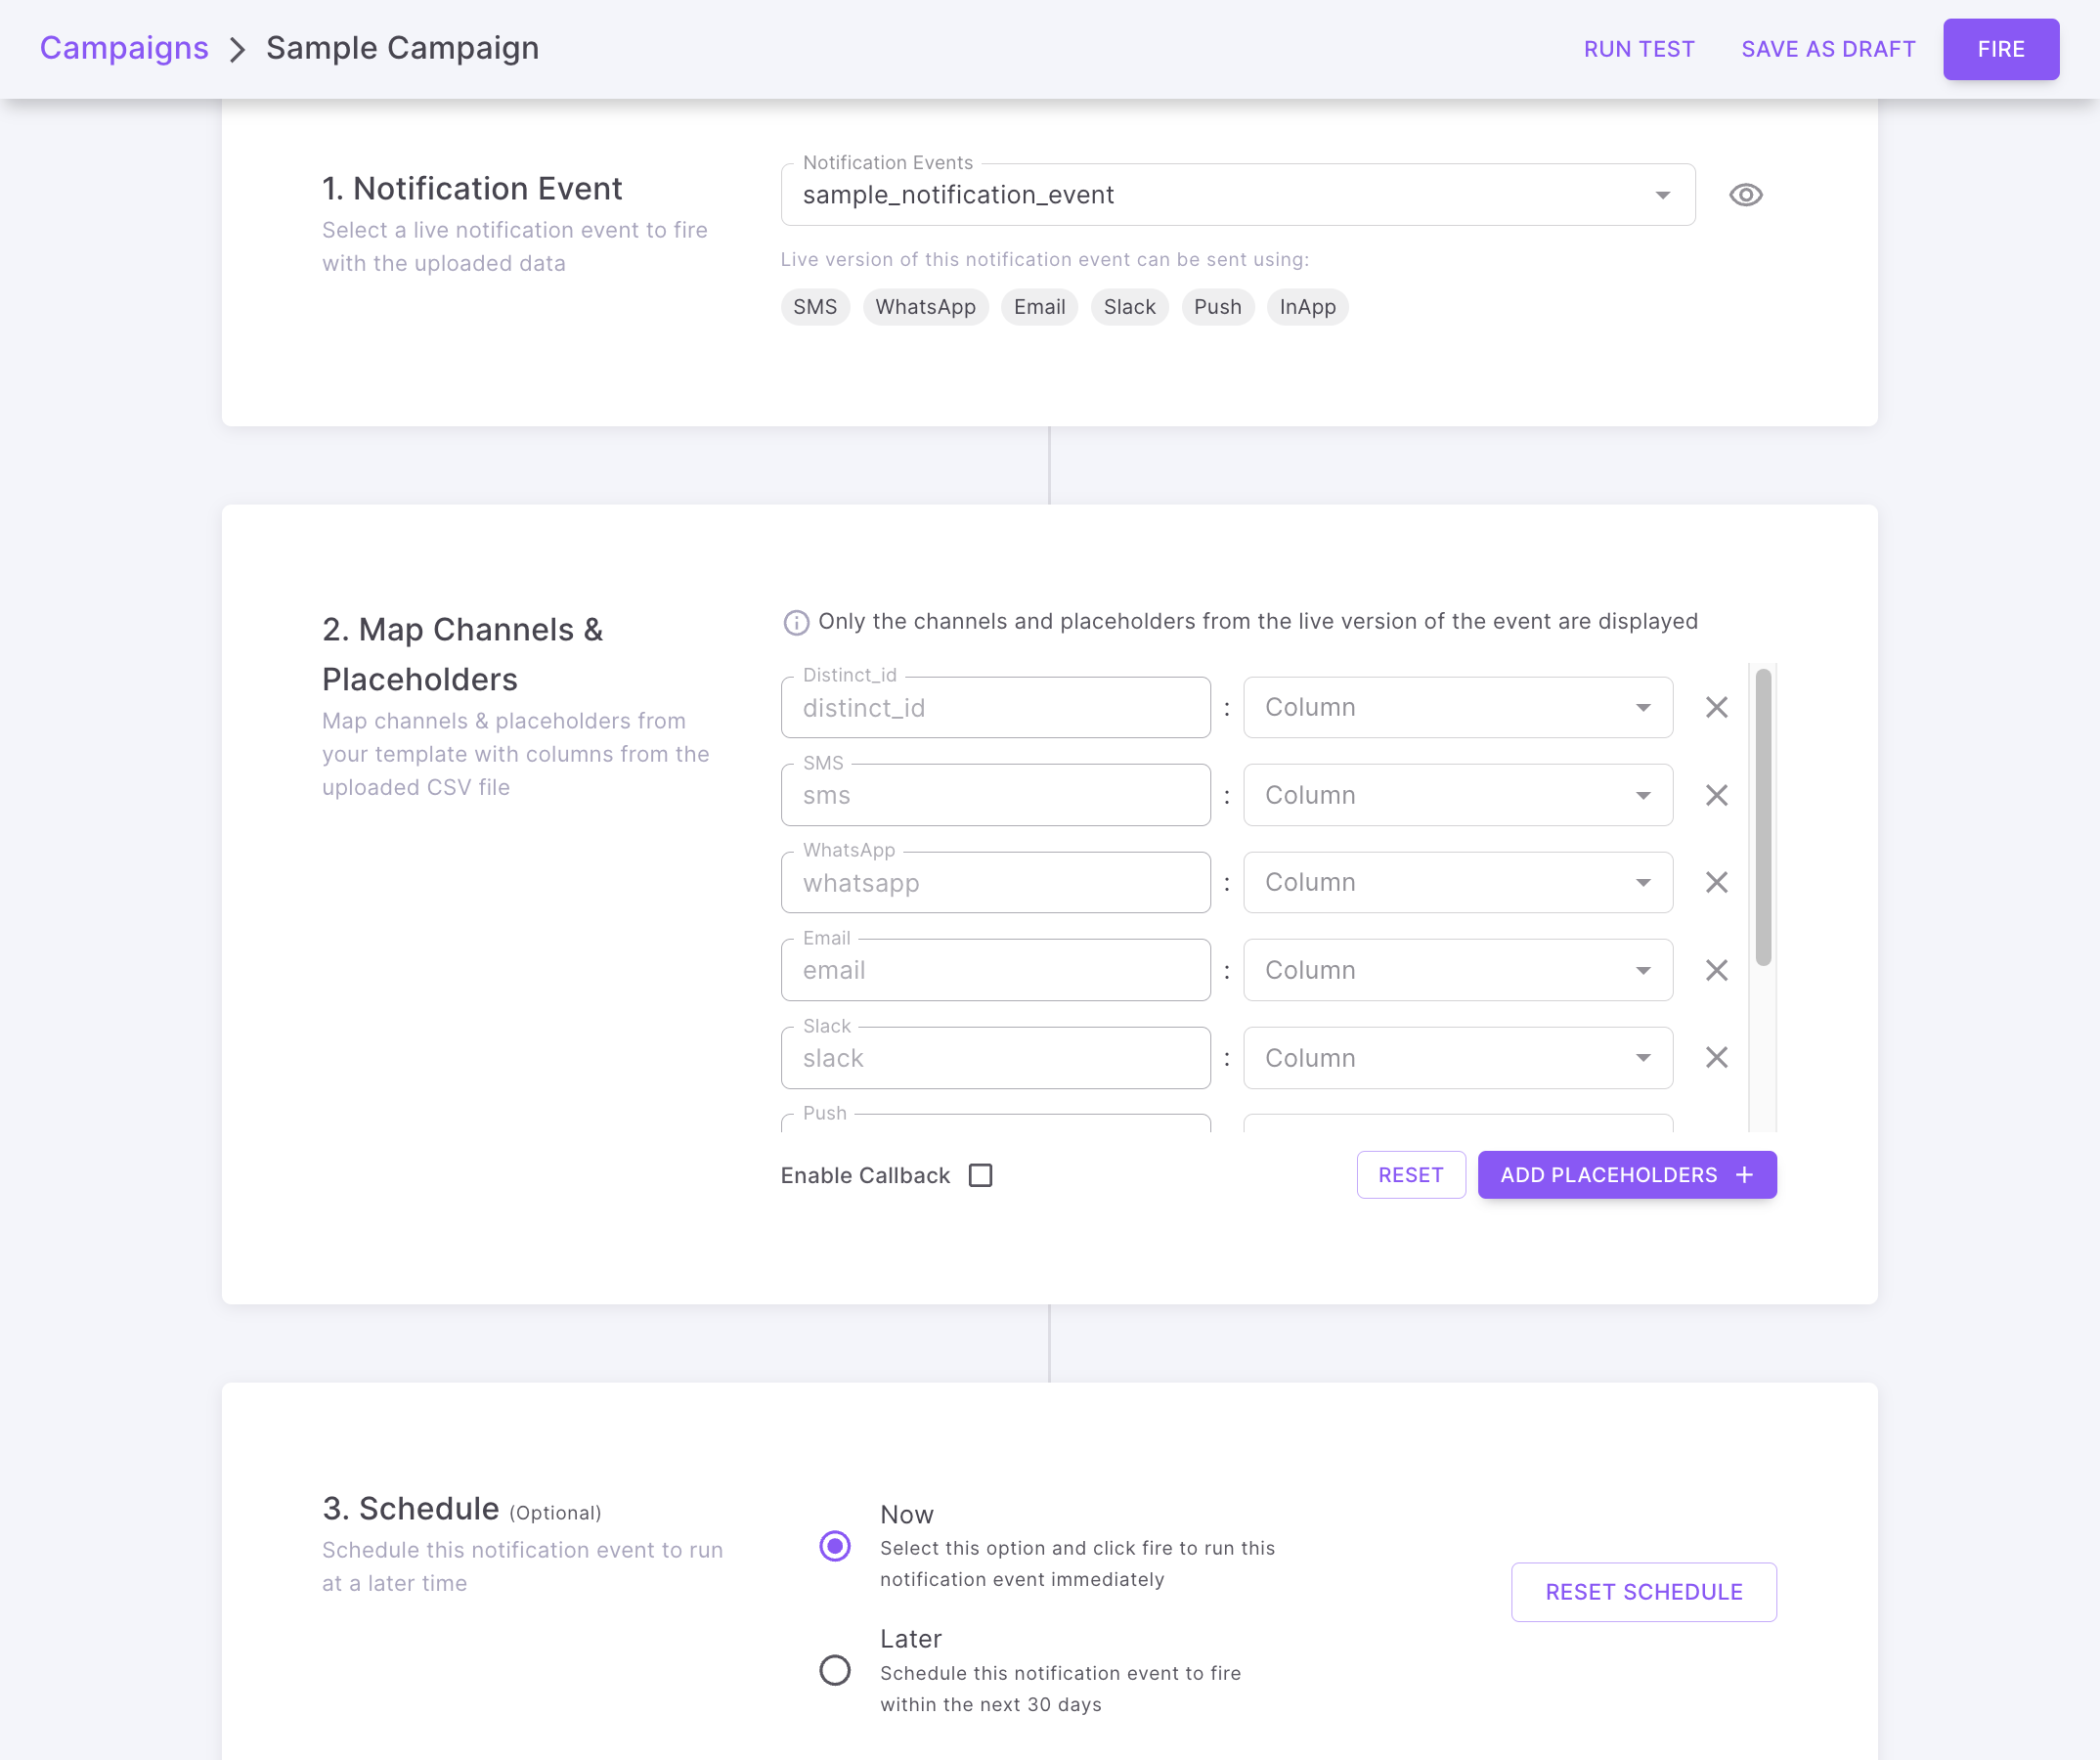
On clicking this, you will be redirected to a new page to configure your campaign:
-
Notification Event: From the drop down, select the Notification Event you want to use for this campaign
-
Once selected you will get an option to preview this Notification Event by clicking on the eye icon on the right side of the event name. You will also be prompted about the channels that are configured on that event so you have an idea of what Channels need to be mapped when doing so in the next step.
-
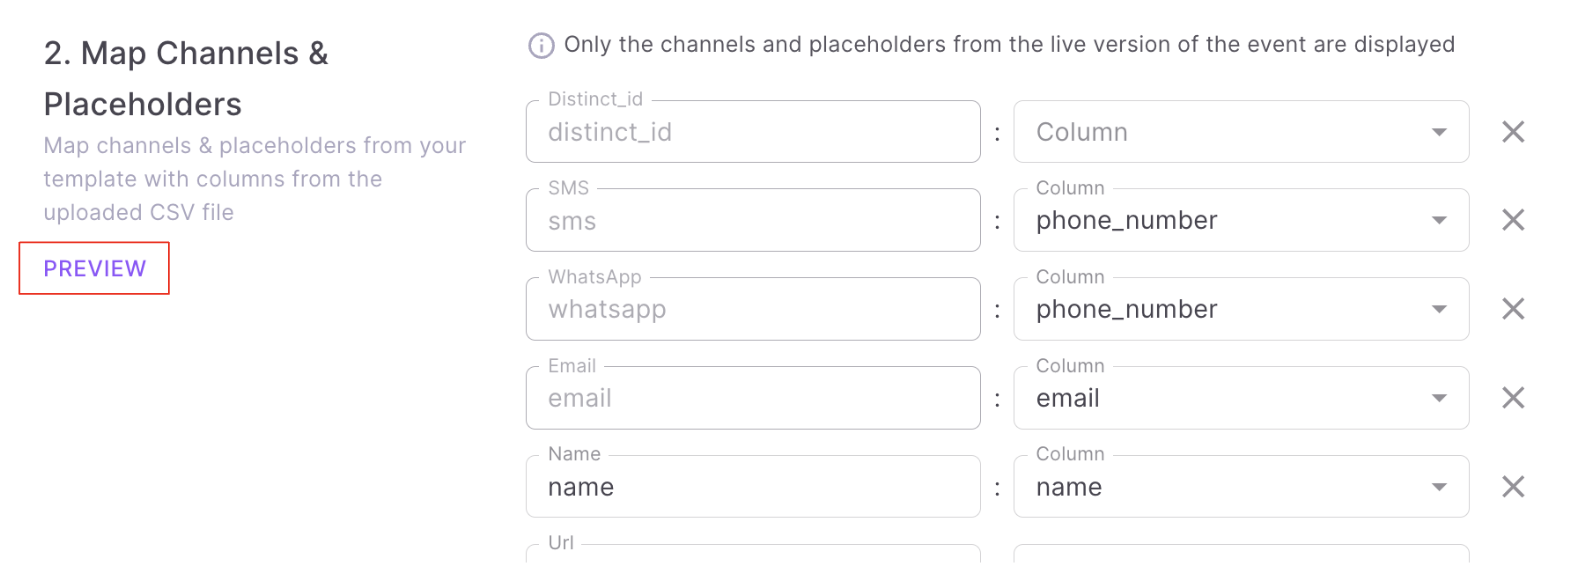
Map Channels & Placeholders: In this step, you will need to configure the details needed for the event to be successfully triggered. This includes the mapping of the Channels and Placeholders. You can select each item's corresponding data field from the uploaded CSV file by clicking on the drop-down and selecting one. In case you do not want to trigger a notification to a specific channel, you can remove it by deleting that row from this section.
-
Preview : Preview allows you to visualize how the data from a CSV upload appears within the template, ensuring the uploaded data aligns with your expectations.
-
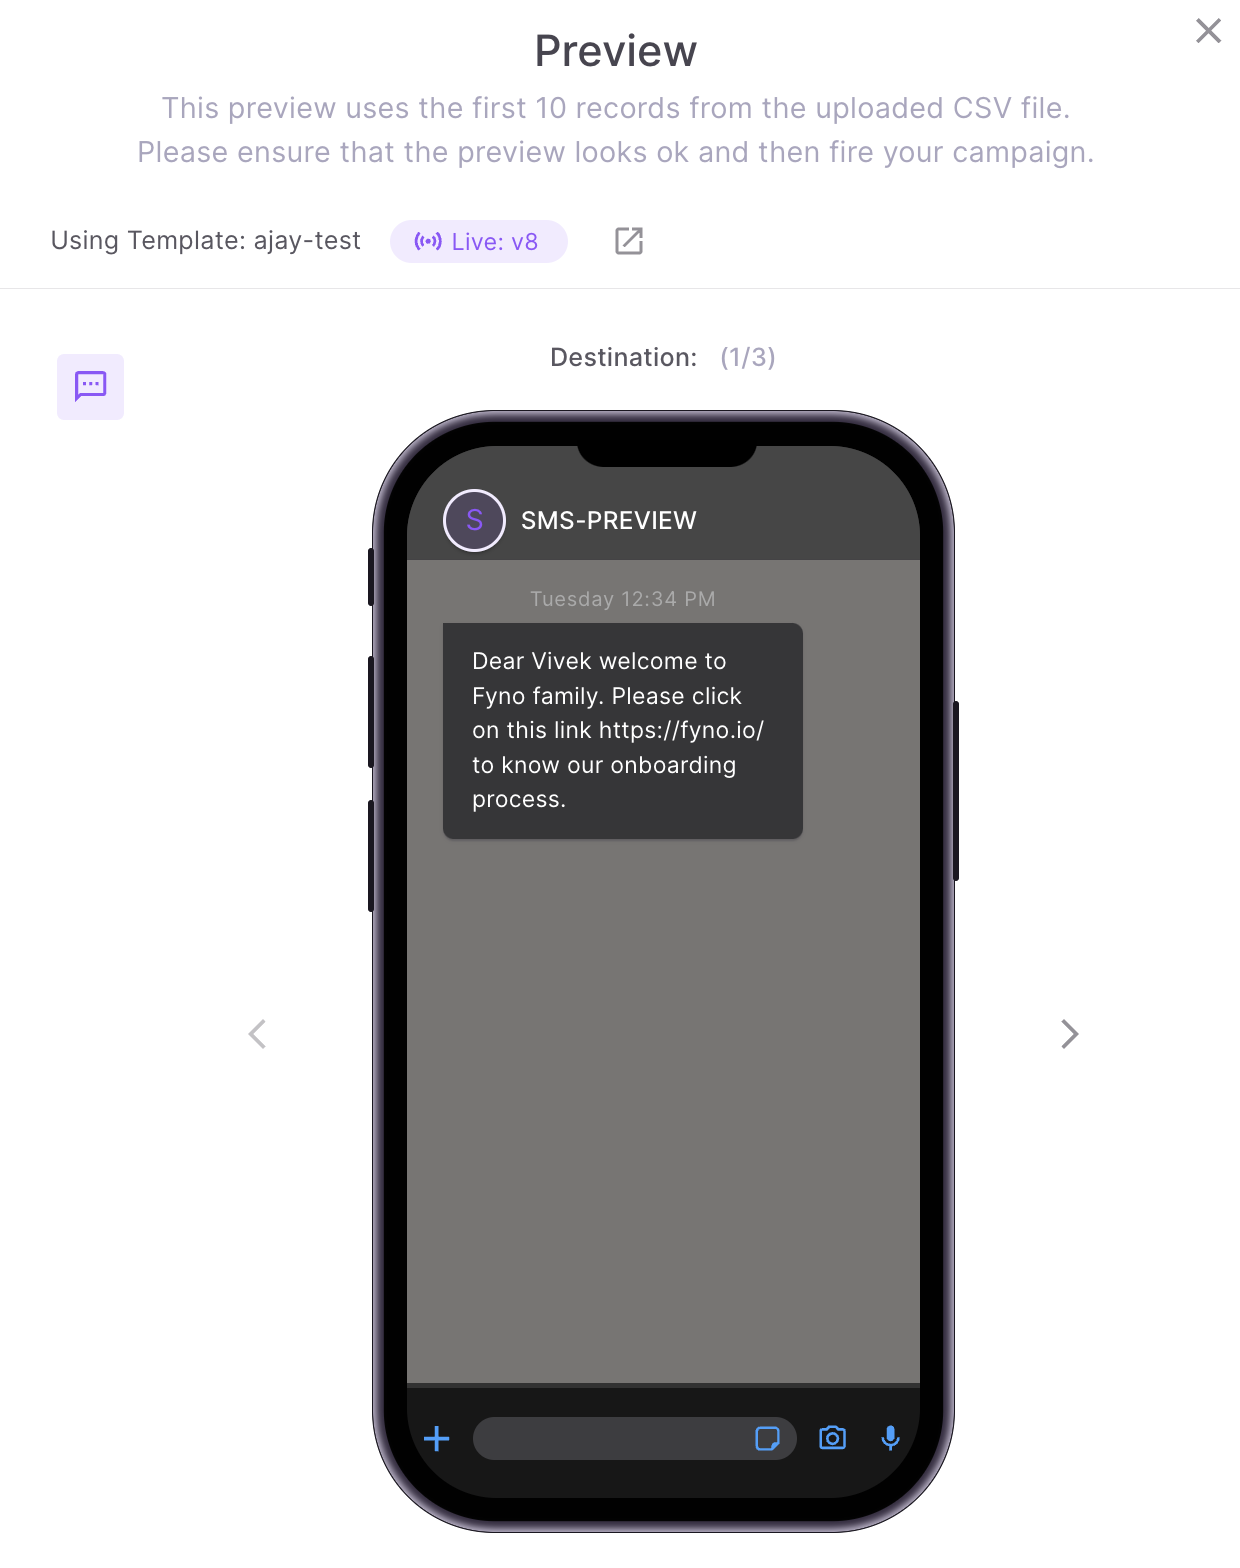
Once the channels & placeholders are mapped, you can preview the templates by clicking 'Preview'.
-
You will see the preview as shown below. You can click '>' to see the first 10 records from the uploaded CSV file.
-
-
Enable Callback: This enables the callbacks for the channels and essentially sends back the delivery updates about each notification triggered. On checking this box, 3 additional placeholder details will need to be configured.
- Custom ID
- Custom1
- Custom2
By default you will receive these 3 values in callback: custom_id , msg_id , status
custom_id - Is the ID you provided in the callback.custom_id field while triggering the notification.
msg_id- is the message ID within Fyno.
status - Is the status of the message:
More values can be added in the callback. For a list of additional available values, please see:
https://docs.fyno.io/docs/allowlist-url#callback-response
-
Reset: Resets all the configurations for the Map Channels and Placeholders section.
-
Add Placeholder: Allows you to add a new row for a placeholder you would like to use, in case the same is not added in the template and you have the data to map it, within the CSV uploaded.
-
Schedule: This is optional. Gives you the option to:
- Now: This is the default one. Sends the campaign immediately.
- Schedule: Send the campaign at a futuristic date and time of your choosing. You can select a date, 30 days from the day of creating the campaign. For example, if you are creating a campaign on 01-Mar-2024, you can schedule a date till 31-Mar-2024.
-
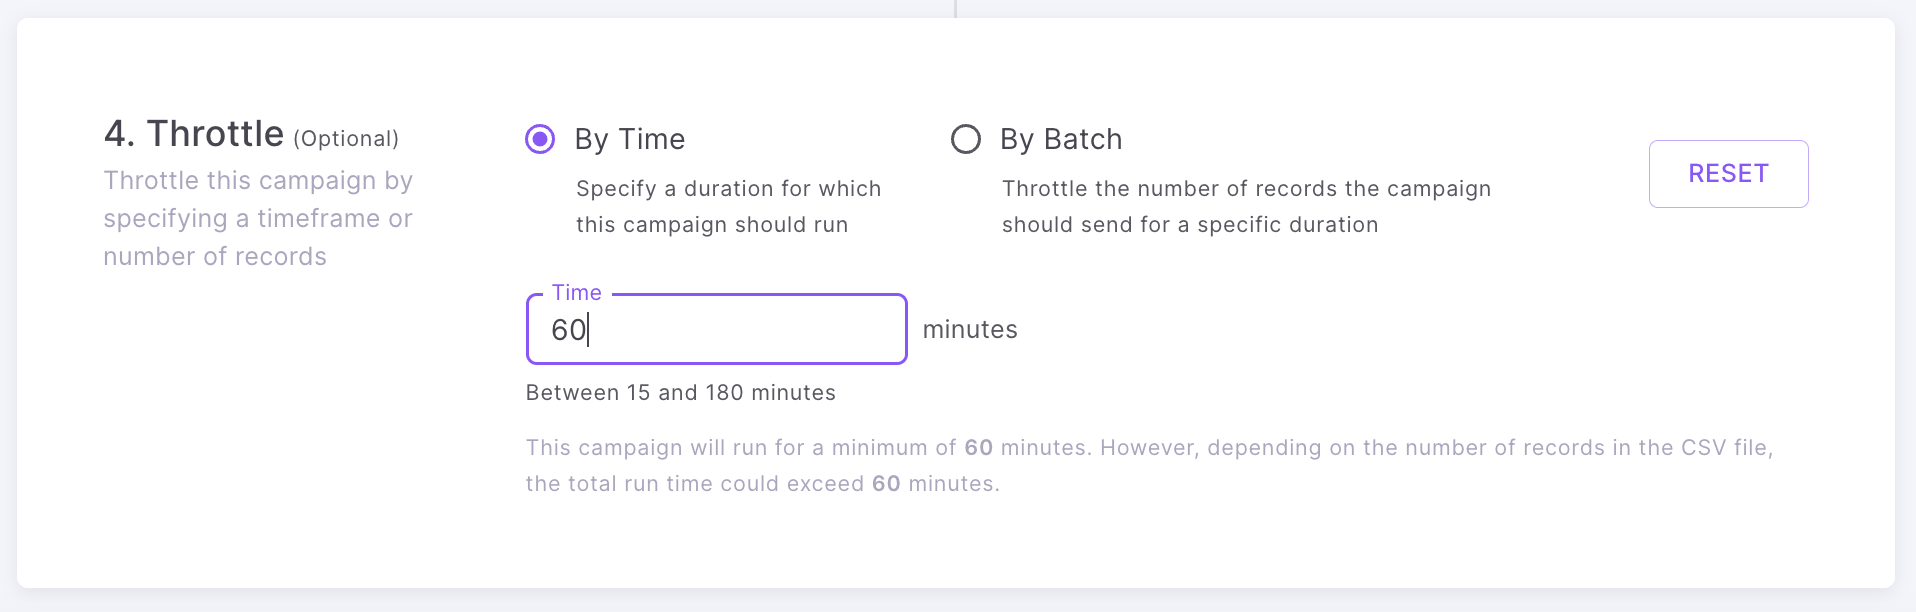
Throttling: This is Optional. Throttling allows you to control the rate at which notifications (Emails/SMS/WhatsApp/Push/WebPush) are sent to users.
-
By Time - You can specify a duration for which the campaign should run. For example, if you want to execute the campaign for an hour, you can do that by configuring as shown below.
-
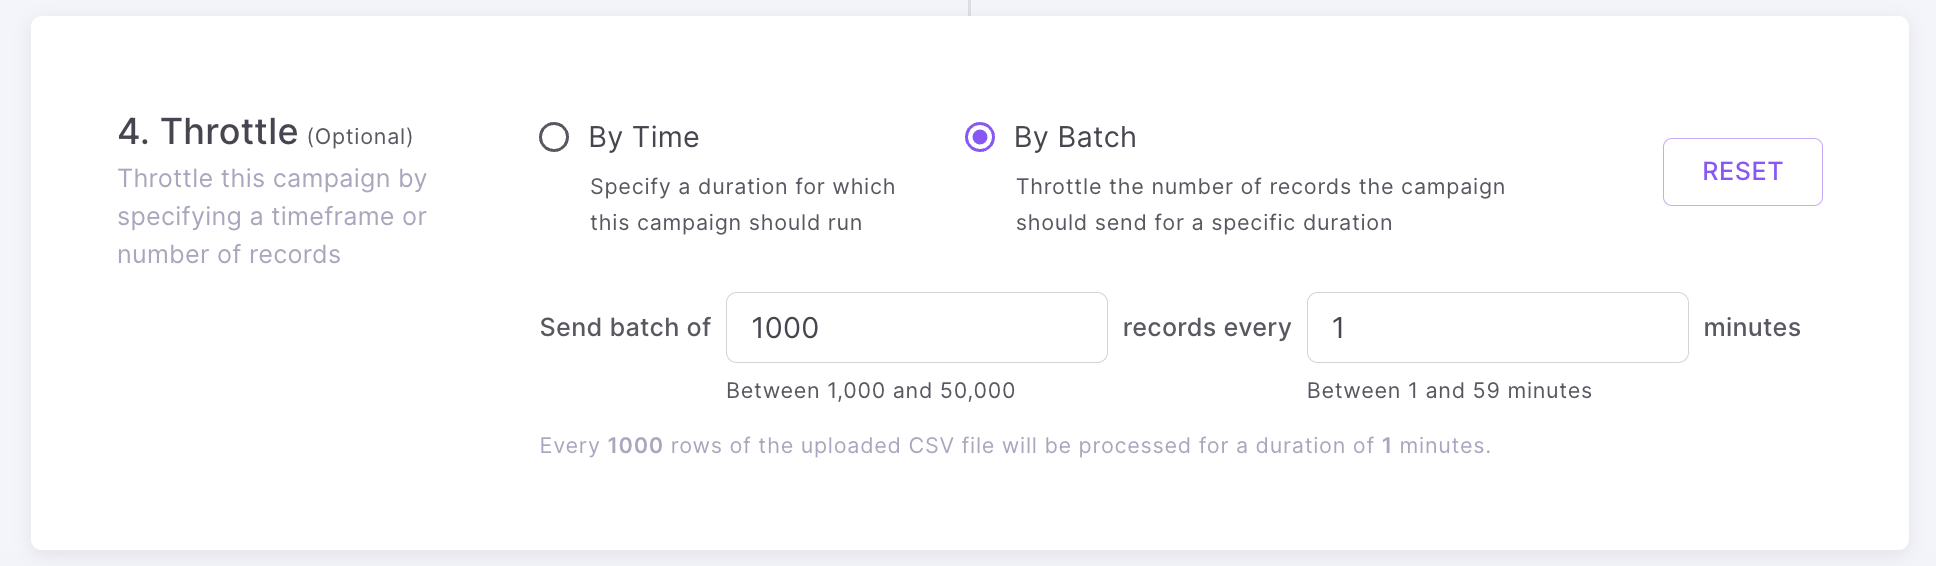
By Batch - In this option, you can throttle the number of records the campaign should send for a specific duration. For example you want to send a execute a batch of 1000 records in the csv file every minute, then you can configure it as shown below.
-
Once all this is filled in, you are set to trigger your campaign!
Simply scroll to the top and click on "Fire" on the top right corner of the page and we are all set!
If your Campaign is scheduled for a later time, this will be triggered at the time it was scheduled for.
Logs of the event can be seen later, once the event has been triggered, not otherwise.
Run Test
Just before you send out a campaign to all your marketing audience, running a test is always a good idea, since you will be able to preview the look and feel of your notifications before they go out.
To do this, once you have set up your campaign, simply:
- Scroll to the top of the campaign configuration page to find the Run Test button and click on it.
- A new pop-up requesting the below information to run the test will come up:
- Send Using (Channel Details): Map the channels that are there in the notification event to run the test on.
- Map Placeholders: Map the placeholders that are there in the template of the corresponding Notification event to successfully simulate the notification.
- Once ready, click on run test to get the notification delivered to the corresponding test recipients.
Save as Draft
Once an event is configured with the details of the Notification Event, mapped Channels and Placeholders and scheduled time, this can now be saved to use or edit at a later time.
Simply click on the Save as Draft at any point in time of configuring the campaign and this will be saved for later use!
Updated 8 days ago